This workshop will teach us how to work with particles, those tiny bitmaps that bring so much color and excitement to our games. Any particle effect has a clear, precise structure:
action particle_start // this can be a function as well
{
............................
effect(particle_function, number_of_desired_particles, starting_position, initial_velocity);
}
function particle_function() // this function is run by each and every particle
{
// set the properties and the speed of the particles here
............................
my.function = some_function;
}
function some_function() // this (short) function tells the particles how to behave after they are emitted
{
............................
}
As you work with particles, you will notice that 99% of your particle effects use this structure. Let's see a practical example right now:
action damaged_lightbulb
{
while (1)
{
effect(effect_explo, 1000, my.x, normal);
sleep (random(6) + 0.3);
}
}
function effect_explo()
{
var particle_direction;
particle_direction.x = random(2) - 1;
particle_direction.y = random(2) - 1;
particle_direction.z = -random(2);
vec_normalize(particle_direction, random(5));
vec_add(my.vel_x, particle_direction);
my.alpha = 30 + random(65);
my.flare = on;
my.bright = on;
my.move = on;
my.function = fade_particle;
}
function fade_particle()
{
my.alpha -= 1.2 * time_step;
if (my.alpha < 0) {my.lifespan = 0;}
}
This is, in fact, the first particle example from this month's workshop; open work39.wmp, run it using script39.wdl and you will see it in action.
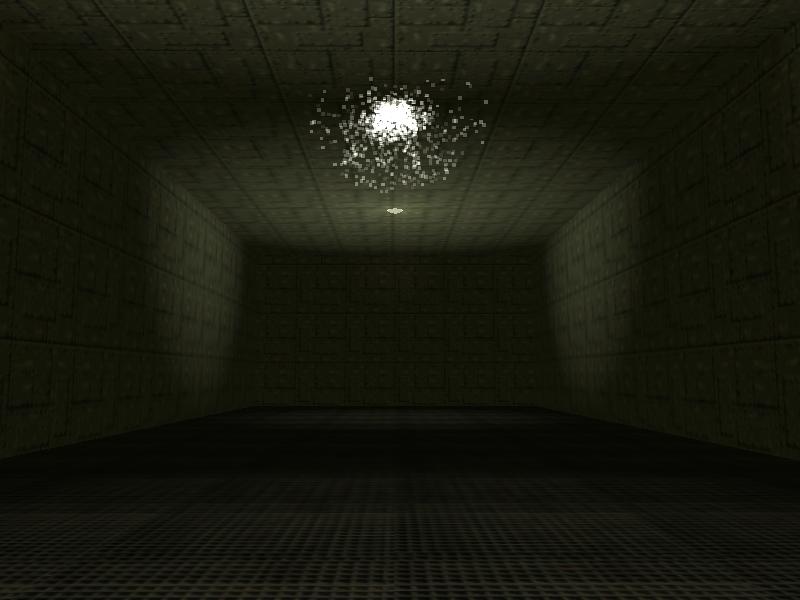
Now let's go through each line of code and explain what's happening:
action damaged_lightbulb
{
while (1)
{
effect(effect_explo, 1000, my.x, normal);
sleep (random(6) + 0.3);
}
}
This is the action that's attached to our damaged light bulb model; the while loop calls the "effect" line of code, the one that generates the particles, every 0.3... 6.3 seconds. Let's take a good look at the "effect" syntax:
effect (particle_function_name, number_of_desired_particles, starting_position, initial_velocity);
- particle_function_name is the name of the function that will drive the particles, so you can use any function name here;
- number_of_desired_particles is... the number of desired particles, what else? If you want to generate a single particle, use "1" here. As you can see, our example generates 1000 particles every time when the effect line of code is run;
- starting_position sets the particles' starting point. If you would want to generate particles from a monster's nose, you would get those coordinates using vec_for_vertex and you'd put them here, get it? We are simply using my.x in our example, which places the starting point of the particles in the origin of the light bulb model;
- initial_velocity sets the initial speed vector for our particles. Since we are going to change the speed in the function that drives the particles anyway, normal or nullvector will work just fine here most of the times.
This is the part where you can get creative; the following function will tell the particles how to behave.
function effect_explo()
{
var particle_direction;
particle_direction.x = random(2) - 1;
particle_direction.y = random(2) - 1;
particle_direction.z = -random(2);
Our function sets random speeds on the x and y axis, with values ranging from -1 to 1 and a speed that can go down to -2 on the z axis. This means that our 1st particle could have a speed of (let's say) 0.5, -0.3, -1.2 on the xyz axis, the second particle could have a speed of (let's say) -0.2, 0.7, -0.1 and so on; we will have 1000 different particles, each one of them moving with a slightly different speed.
vec_normalize(particle_direction, random(5));
vec_add(my.vel_x, particle_direction);
The first line of code normalizes the speed vector, which is just a pretentious way of saying that it scales it according to the value that's given by random(5). That is, if you want to put it this way, an easy way to set the speed for all the particles without having to tweak all those random values in the particle_direction lines of code separately. This means that if you want to make the effect look bigger or smaller (while keeping its aspect) all you need to do is to change 5 to another value. The vec_add line of code adds the resulting speed vector to vel_x, which sets the velocity of the particle. We are adding two vectors here, so vel_y and vel_z are set to their proper values as well.
my.alpha = 30 + random(65);
my.flare = on;
my.bright = on;
my.move = on;
my.function = fade_particle;
}
These last few lines are easy to deal with! They set a random transparency factor the the particles, with values that can range from 30 to 95, make the particles transparent, bright looking and allow them to move in the direction that's given by their velocity vector. The last line tells each particle to act according to the instructions that are given inside the function named fade_particle.
function fade_particle()
{
my.alpha -= 1.2 * time_step;
if (my.alpha < 0) {my.lifespan = 0;}
}
That's supposed to be (and is) a very short, fast running function; it decreases the transparency factor of the particle every frame, with the speed given by -1.2 * time_step. If the transparency factor of the particle goes below zero we set its lifespan to zero; this makes the particle disappear, which is the sensible way of doing the things because a particle with an alpha factor of zero is invisible anyway.
The manual contains many particle-related parameters that can be tweaked; let's play with some of them right now! First of all, we can change the color of our particles; let's give them a more blueish color. To do that, we need to add a single line of code to function effect_explo:
function effect_explo()
{
var particle_direction;
particle_direction.x = random(2) - 1;
particle_direction.y = random(2) - 1;
particle_direction.z = -random(2);
vec_normalize (particle_direction, random(5));
vec_add(my.vel_x, particle_direction);
my.alpha = 30 + random(65);
my.flare = on;
vec_set(my.blue, vector(200, 100, 130)); // add this new line of code
my.bright = on;
my.move = on;
my.function = fade_particle;
}
That line sets the blue component of the particle color to 200, green to 100 and red to 130, just like .x which can set the x, y and z position for an entity. As an alternative we could use something like this:
my.blue = 200;
my.green = 100;
my.red = 130;
and we would have got the same result. Oh, and speaking about the result, here's how our particles look like this time:
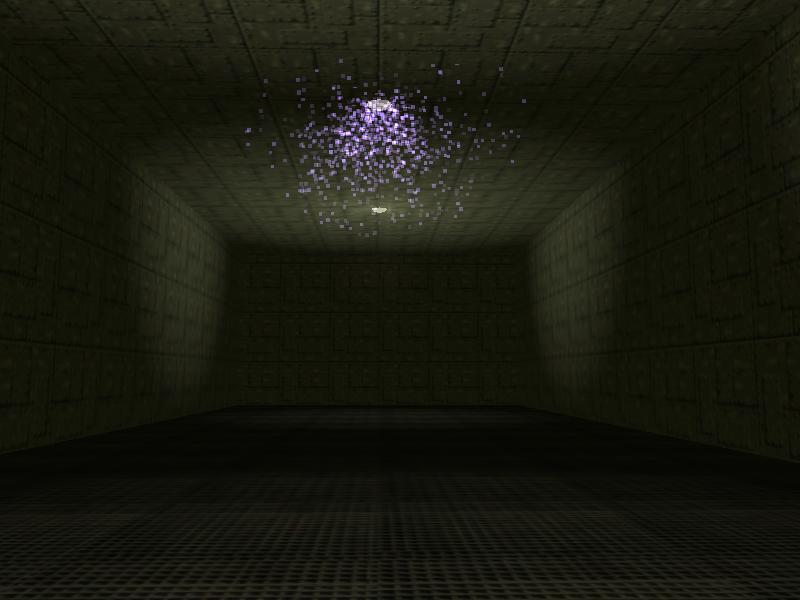
The particles look better now, but they're kind of blocky; they remind me of the particle effects from the second version a famous shooter game which was launched many years ago. Let's use a nice bitmap for our particles and we will (hopefully) change that.
First of all, we need to define the bitmap. I have created a decent looking light.tga bitmap for you, so let's use it; add this line of code at the top of the script39.wdl file:
BMAP light_tga = "light.tga";
Then, edit function effect_explo once more, making it look like this:
function effect_explo()
{
var particle_direction;
particle_direction.x = random(2) - 1;
particle_direction.y = random(2) - 1;
particle_direction.z = -random(2);
vec_normalize (particle_direction, random(5));
vec_add(my.vel_x, particle_direction);
my.alpha = 30 + random(65);
my.flare = on;
vec_set(my.blue, vector(200, 100, 130));
my.bmap = light_tga; // add this new line of code
my.bright = on;
my.move = on;
my.function = fade_particle;
}
That has changed our particles from squares to bitmaps, making them look better; however, they are kind of big now. Fortunately, there's a simple way of setting the size of our particle bitmaps through coding; add another line of code to function effect_explo, making it look like this:
function effect_explo()
{
var particle_direction;
particle_direction.x = random(2) - 1;
particle_direction.y = random(2) - 1;
particle_direction.z = -random(2);
vec_normalize (particle_direction, random(5));
vec_add(my.vel_x, particle_direction);
my.alpha = 30 + random(65);
my.flare = on;
vec_set(my.blue, vector(200, 100, 130));
my.bmap = light_tga;
my.size = 2; // this new line controls the size of the particle
my.bright = on;
my.move = on;
my.function = fade_particle;
}
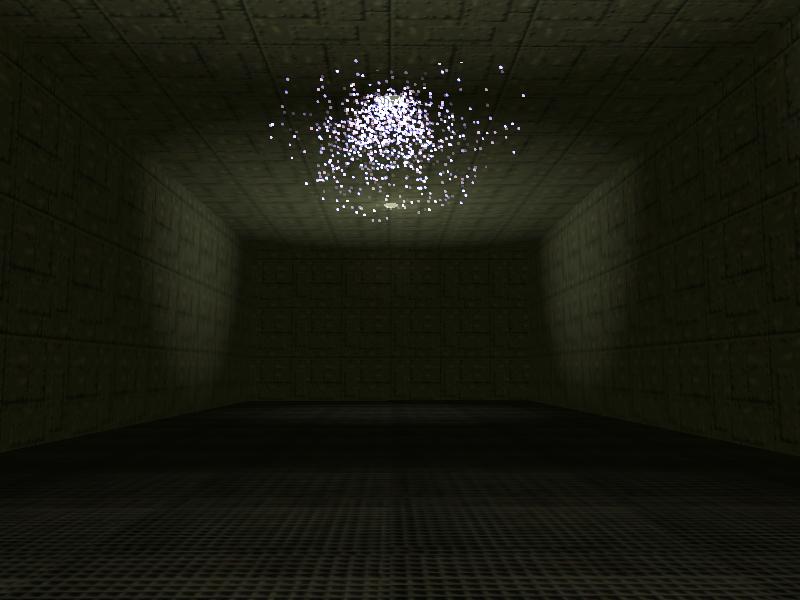
The particles have a default size of 4, so if we omit the my.size line of code we set their size to 4 automatically. Anyway, I think that the particles look much better now, but I'd like us to add a simple dynamic light effect in their area as well. Let's edit action damaged_lightbulb until it looks like this:
action damaged_lightbulb
{
my.blue = 160;
my.green = 100;
my.red = 130;
while (1)
{
my.lightrange = 500; // make the light bulb entity generate light on a radius of 500 quants
effect(effect_explo, 1000, my.x, normal);
sleep (0.1); // the dynamic light effect lasts for 0.1 seconds
my.lightrange = 0; // extinguish the light bulb
sleep (random(6) + 0.3);
}
}
And here's how our dynamic light effect looks like in action:

We could also play a sound whenever the particle sparks are produced, but I'll leave that as a homework for you. Let's test another particle effect; copy and paste the following lines of code at the bottom of the script39.wdl file:
var max_particles = 50000; // allow the generation of up to 50,000 particles
BMAP barrier_tga = "barrier.tga"; // new bitmap, used for the particle barrier
function fade_barrier()
{
if (my.y < -400) {my.lifespan = 0;}
}
function effect_barrier()
{
var particle_direction;
particle_direction.x = 0;
particle_direction.y = -50 - random(100);
particle_direction.z = 0;
vec_normalize (particle_direction, random(250));
vec_add(my.vel_x, particle_direction);
my.alpha = 30 + random(65);
my.flare = on;
my.bmap = barrier_tga;
my.size = 2;
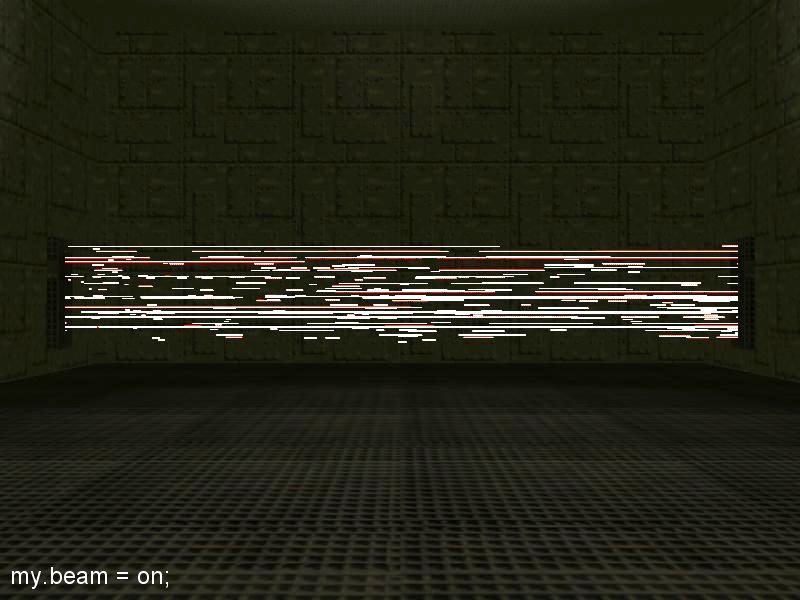
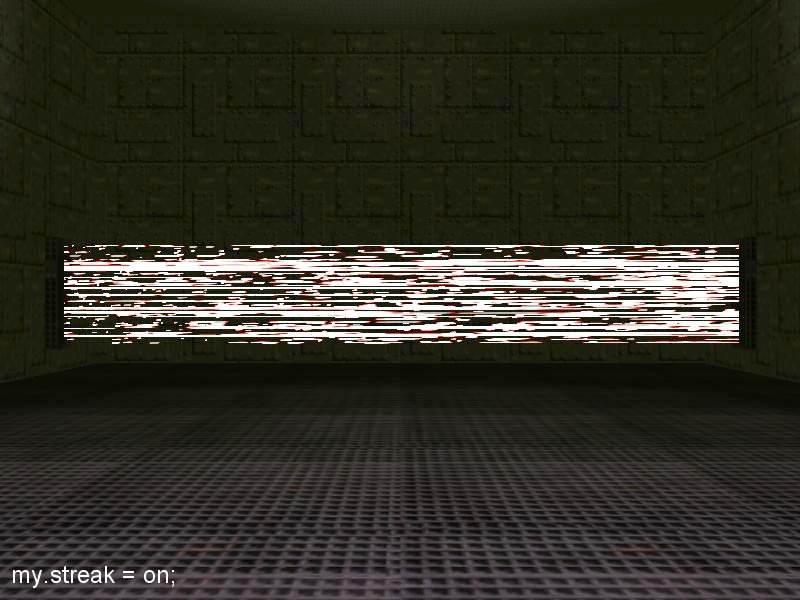
//my.beam = on;
//my.streak = on;
my.bright = on;
my.move = on;
my.function = fade_barrier;
}
function particle_barrier_startup()
{
while (!key_b) {wait (1);} // wait until the player presses the "B" key
while (1)
{
effect(effect_barrier, 10 / (0.1 + time_step), vector(900, 450, 50 + random(100)), nullvector);
wait (1);
}
}
Run the script, try to ignore the previous particle effect and then press the "B" key to start the particle barrier.
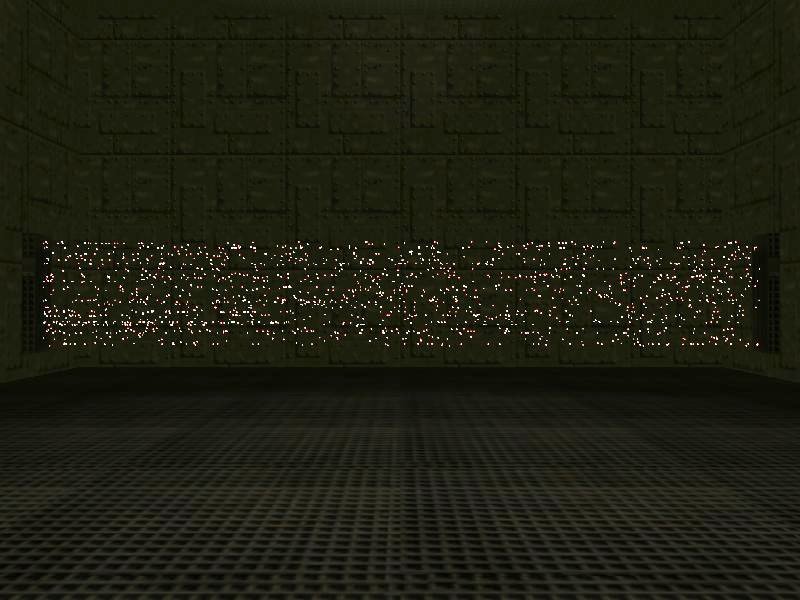
You can see lots of particles moving from the left towards the right side of the screen; the effect looks much better in motion, of course. This time we are using a function (and not an action) to start the particles.
function particle_barrier_startup()
{
while (!key_b) {wait (1);} // wait until the player presses the "B" key
while (1)
{
effect(effect_barrier, 10 / (0.1 + time_step), vector(900, 450, 50 + random(100)), nullvector);
wait (1);
}
}
The function waits until the player presses the "B" key, and then starts generating particles every frame. The effect line of code uses a few tricks:
- number_of_particles is set to 10 / (0.1 + time_step) this time. This means that on weak PCs, where time_step has big values, the function will generate less particles, while on fast PCs, where time_step has small values, the function will generate many more particles. As an example, a PC which runs at 16 fps will generate about 9 particles per frame, while a PC which runs at 100 fps will generate about 55 particles per frame.
- starting_position was set to x = 900, y = 450 and z = 50... 150. I have got these values from Wed - that's where I have placed those barrier generators (two regular level blocks).
- initial_velocity was set to nullvector (zero on all the axis) this time because the particles will only move on the y axis and that is handled by the following function.
function effect_barrier()
{
var particle_direction;
particle_direction.x = 0;
particle_direction.y = -50 - random(100);
particle_direction.z = 0;
vec_normalize (particle_direction, random(250));
vec_add(my.vel_x, particle_direction);
my.alpha = 30 + random(65);
my.flare = on;
my.bmap = barrier_tga;
my.size = 2;
//my.beam = on;
//my.streak = on;
my.bright = on;
my.move = on;
my.function = fade_barrier;
}
The function above does all the smart things, as usual. We are setting a negative speed on the y axis because our particles will move towards the negative part of the y axis (as indicated by Wed's top view). Our particles look good, but they'd look even better if they'd have some sort of a trail, isn't it? Fortunately, this can be achieved easily if your Acknex edition supports beam and streak; simply uncomment one of those lines and you'll see the result instantly.
Once again, you have to see the effect in motion if you want to understand how it works. Oh, and the function that takes care of the particles after their creation simply removes them if their y coordinate goes below -400, because the particles don't know anything about collision detection (that's the reason why they run so fast!).
function fade_barrier()
{
if (my.y < -400) {my.lifespan = 0;}
}
As you can imagine, the particles barrier doesn't hurt the player; however, you can turn it into a deadly barrier by placing an invisible wmb entity which sets player's health to zero if he dares to impact with it. You will find several samples that do that in the older magazines.
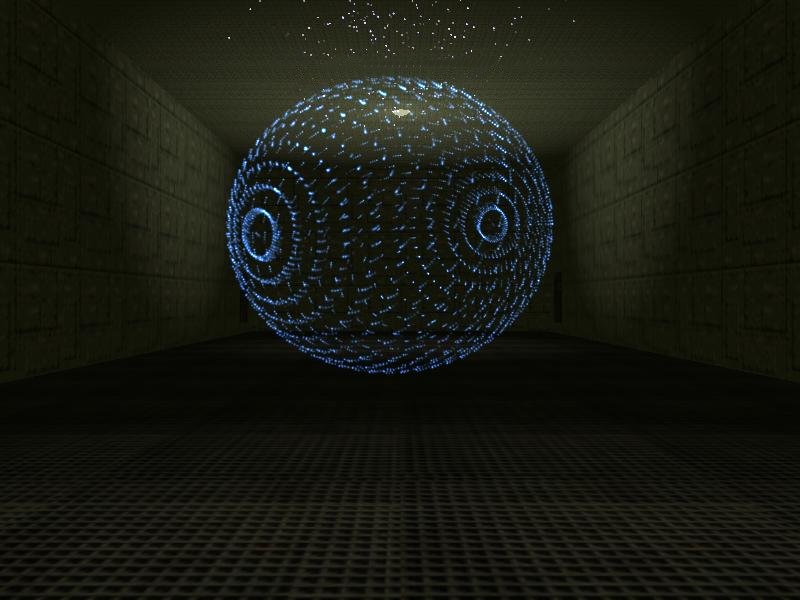
The last example shows us a few more tricks; the particle effect looks just like this:
To get started, copy and paste the following lines of code at the end of the script file.
var particle_gravity = 0;
var particle_lifespan = 0;
BMAP earth_tga = "earth.tga";
function earth_fade()
{
my.lifespan = particle_lifespan;
my.alpha -= 10 * time_step;
if (my.alpha < 0) {my.lifespan = 0;}
}
function particle_earth()
{
my.alpha = 10 + random(20);
my.flare = on;
my.bmap = earth_tga;
my.size = 2;
my.bright = on;
my.gravity = particle_gravity;
my.move = on;
my.function = earth_fade;
}
action particle_sphere
{
my.invisible = on;
my.passable = on;
var particle_pos;
while (!key_e) {wait (1);} // wait until the player presses the "E" key
my.skill99 = 0;
while (1)
{
my.skill99 += time_step / 16;
my.skill1 = 0;
while (my.skill1 < ent_vertices (my)) // go through all the vertices
{
my.skill1 += 1;
vec_for_vertex(particle_pos, my, my.skill1);
effect(particle_earth, 1, particle_pos, nullvector);
}
if (my.skill99 > 3) // the sphere didn't move for 3 seconds?
{
my.roll += 3 * time_step;
}
if (my.skill99 > 7) // 7 seconds have passed?
{
my.pan += 2 * time_step;
}
if (my.skill99 > 10) // 10 seconds have passed?
{
my.tilt += 2 * time_step;
}
if (my.skill99 > 15) // 15 seconds have passed?
{
particle_lifespan = 10;
particle_gravity = -0.5;
}
if (my.skill99 > 20)
{
my.scale_z = 1 + 0.5 * sin(total_ticks);
}
wait (1);
}
}
Run the level, and then press the "E" key to start the particle effect; an invisible earth (sphere) model will appear, rotating around its pan, tilt and roll axis, changing its z scale and so on. The action attached to the sphere model goes through all the vertices, generating a particle from each vertex.
This time I have set the lifespan for the particles directly, as well as their gravity. Yes, any particle will move upwards or downwards, even if its speed vector is zero on the z axis, provided that its gravity is set to a non-zero value. If you want to go through this workshop step by step, use script39_init.wdl as a starting point; script39.wdl contains all the needed code already so that you can test all the effects right away.
Our workshop is over, but I encourage you to start creating your own particle effects; you'll also find tens of examples (ranging from very simple to advanced) in the Aum.