Why do we like to play games? Isn't it all about competition, about being better than another human opponent that lives 2 or 10,000 miles away? Or being better than a bunch of pixels that are controlled by a 4KB AI routine? Some may object and talk about sand castle builders and stuff like that, but that's a small niche in the game development industry. This month we will learn to create our own weapons; we've scratched the surface in Aum55 but this time we will get to see how it's actually done.
We have come a long way together, so now it is time for us to split... no, please don't cry; I'm not talking about the two of us, but about the scripts. It's time to split the script throughout several files. We are going to use a main.wdl script, a player.wdl script and a weapons.wdl script.
Let's examine the content of the main script file.
That's my kind of script! It's short, simple and gets the job done. You can see that we include the player.wdl as well as the weapons.wdl files in our main script; this means that all their variables, actions, functions, whatever will be available in our main script, so they can be used in our game or accessed (if this is the case) through Wed as if their content was included inside main.wdl.
It might sound a bit complicated, but this method allows us to reuse our code over and over. Need a quick player code? Then simply include the player.wdl file from a previous project in your new game! Want to use the weapons we're creating right here, right now in your project? Then all you need to do is to include the weapons.wdl file in your project, IF (and you know that I hate capitals) IF you have included all the needed definitions in a single file. Don't place something like this in main.wdl:
var number_of_bullets = 7;
and then wonder why your weapons.wdl script isn't working when you are trying to use it in another project - it is missing that definition from main.wdl. I am using a typical player.wdl script so we won't discuss its content here; make sure to check the file and you will see a simple action that is used for the dummy targets.
There are 3 types of weapons that can be created with the Acknex engine:
1) Weapons with "real" bullets that impact with the target (used for rocket launchers, machine guns, and so on). These weapons usually generate an mdl bullet which travels through the air until it hits (or misses) the target.
2) Weapons that use "c_trace" to trace an invisible line from the gun to the target (used for rail guns, etc). These weapons simply check if there's a straight line that connects the weapon with the target. If you want to press the fire button and see the enemy instantly dyeing 2 miles away (think sniper guns) then this is your weapon type. Don't forget that these weapons don't use bullets so they are the fastest of all.
3) Weapons that use "c_scan" to affect some (or all) of the targets that are placed near them (think grenades and stuff like that). The bullet (the grenade) will scan around it, decreasing the health for all the enemies that are near it. Player's bullet doesn't need to hit the target; it can do the job without getting into contact with the target.
Some of you will probably say that you can create even more types of weapons, like the ones that destroy the target when you click it using the left mouse button (and so on) but the 3 types of weapons I've mentioned are the ones that really count.

The first few lines inside weapons.wdl define the strings that will be used for the bullet, the muzzle sprite and the explosion sprite. We are also defining a bullet sound and an entity pointer, which will give our weapon a simple and yet effective name: weapon1.
I am using a separate action for player's weapon. This means that we can place the weapon anywhere in the level; it will be moved to the proper position (in player's virtual hands) as soon as the level is loaded. The gun is passable and waits until the player appears in the level (isn't "null" anymore).
Please allow me to show you a simplified version of the while(1) loop:
while (1)
{
vec_set (weapon_offset.x, vector (50, -18, -20));
vec_rotate (weapon_offset.x, vector (camera.pan, camera.tilt, 0));
vec_add (weapon_offset.x, camera.x); // add the camera position to weapon_offset
vec_set (my.x, weapon_offset.x); // set weapon's coords to weapon_offset
my.pan = camera.pan; // use the same camera angles for the weapon
my.tilt = camera.tilt;
wait (1);
}
I have removed the code that moves the weapon up and down while the player is moving; we'll discuss that part separately. We have used vec_rotate in conjunction with vec_add and vec_set before, so you know what they do; right here, they place the weapon 50 quants in front of the camera, 18 quants to the right and 20 quants below camera's origin. A realistic looking weapon should have the same pan and tilt angles with the camera, so we take care of that as well.
The good news is that you can use a very similar script for a (visible) 3rd person player or enemy and the weapon will be attached to it nicely. Simply replace "camera" with "player" or the enemy pointer and you'll be up and running in no time.
What? You call me a liar? Ok, mister, now you've got me upset! Hold on...
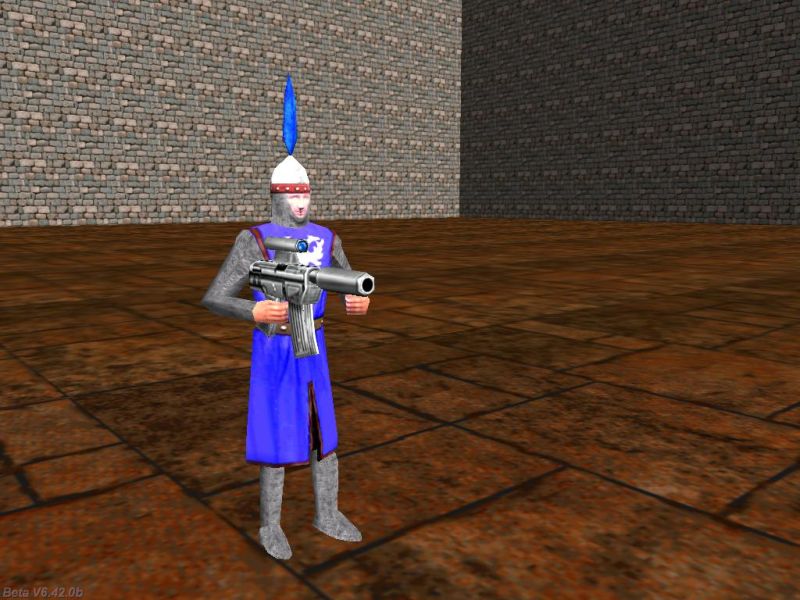
See what I mean? It is always better to animate your weapons together with the player and save them as separate models, but even a simple action like this will do its magic most of the time.
action players_weapon2 // attaches a weapon to the player in 3rd person mode
{
weapon1 = my; // I'm weapon1
var weapon_offset;
my.passable = on; // the weapon model is passable
while (player == null) {wait (1);} // wait until the player is created
while (1)
{
vec_set (weapon_offset.x, vector (18, -8, 18)); // play with these values
vec_rotate (weapon_offset.x, vector (player.pan, player.tilt, 0));
vec_add (weapon_offset.x, player.x); // add the camera position to weapon_offset
vec_set (my.x, weapon_offset.x); // set weapon's coords to weapon_offset
my.pan = player.pan; // use the same camera angles for the weapon
my.tilt = player.tilt;
wait (1);
}
}
Let's get back to our script; if you have tested my demo you have noticed that the weapon is swinging a bit, moving up and down while the player itself is moving. The key passage here is "while the player is moving"; how can we tell if the player is moving?
We can use one of these methods:
a) We track the distance that is covered by player's c_move instruction. This is the instruction that moves our player inside player.wdl:
c_move (my, temp.x, nullvector, ignore_passable | glide);
We can rewrite that code, making it look like this:
var distance_covered;
distance_covered = c_move (my, temp.x, nullvector, ignore_passable | glide);
if (distance_covered > 0) // if the player has moved
{
// do something here
}
If the player moves, distance_covered will be greater than zero; if the player moves with 5 quants / frame, distance_covered will be 5, get it? That's how you'd normally do the things, but we're using the other method here.
b) We compare two variables that store player's positions using two consecutive frames. Take a look at the picture below to see what I mean.
We are using two local variables (named player1_pos and player2_pos) to store the xyz coordinates of the player before and after the "wait (1);" instruction that's place inside our while (1) loop. This means that if our player has moved during the last frame, player1_pos and player2_pos will be different; otherwise, they will be identical.
Now let's see the entire while(1) loop, this time showing the part that does the weapon bobbing as well:
var player1_pos;
var player2_pos;
var weapon_height;
var weapon_offset;
my.passable = on;
while (player == null) {wait (1);}
while (1)
{
vec_set (player1_pos.x, player.x);
vec_set (weapon_offset.x, vector (50, -18, -20));
if (vec_dist (player1_pos.x, player2_pos.x) != 0)
{
weapon_height += 30 * time;
weapon_offset.z += 0.3 * sin(weapon_height);
}
vec_rotate (weapon_offset.x, vector (camera.pan, camera.tilt, 0));
vec_add (weapon_offset.x, camera.x);
vec_set (my.x, weapon_offset.x);
my.pan = camera.pan;
my.tilt = camera.tilt;
vec_set (player2_pos.x, player.x);
wait (1);
}
If the distance between player1_pos and player2_pos isn't zero, the player has moved, so we allow weapon_height to be increased with 30 * time quants every frame. The following line of code increases or decreases weapon_offset.z with up to 0.3 quants, according to the value returned by one of our old friends - the sine function. We are using this function because its values change gently, allowing us to obtain a nice weapon bobbing effect.
You can tell for sure that the method we're using here is more complicated than the first one, which was only tracking player's c_move instruction. Now why would we want to go through all this trouble?
The reason is simple: we want to create self-contained, 100% standalone scripts. If I need to access player's c_move instruction (placed inside player.wdl) from my weapons.wdl file I can for sure say good bye to my script independence. I won't be able to simply include my weapons.wdl script in another project and expect it to work; the script would need to access player's "distance_covered" variable.
Let's explore the following lines of code.
That's simple stuff! If the player presses the left mouse button, function fire_bullets() is run. That function makes sure that only a copy of it is running at a certain moment, and then runs the while loop for as long as the left mouse button is kept pressed.
I have chosen to create a weapon that fires bullets for as long as its trigger is kept pressed. We get the coordinates of the bullet's origin (vertex 29 on the "weapon1" model), we create the bullet, attaching it the move_bullets() function, and then the gun muzzle, attaching it the display_muzzle() function.
Finally, we play a bullet sound at a volume of 100 (more about sounds and music in a future workshop) and then we wait for 0.14 seconds. This means that our loop can run every 0.14 seconds or 7 times per second, get it? If you want to fire more or less bullets per second simply change 0.14 to a different value; as an example, sleep (0.2) will allow us to fire 5 bullets per second because 0.2 * 5 = 1 second.
Time to discuss the function that drives our bullets - move_bullets(). The bullets are sensitive to impact with other entities and level blocks; if a bullets collides with something, its "remove_bullets()" function will run. The bullets have the same pan and tilt angles with the camera and travel with a speed of 200 quants * time per frame.
The bullets will move for as long as they exist in the the level (my != null), ignoring (passing through) passable entities: water, and so on. Let's examine bullets' event function: it waits a frame, and then it creates a small explosion / ricochet sprite, makes the bullet passable and invisible, waits for 2 more seconds and then removes the bullet.
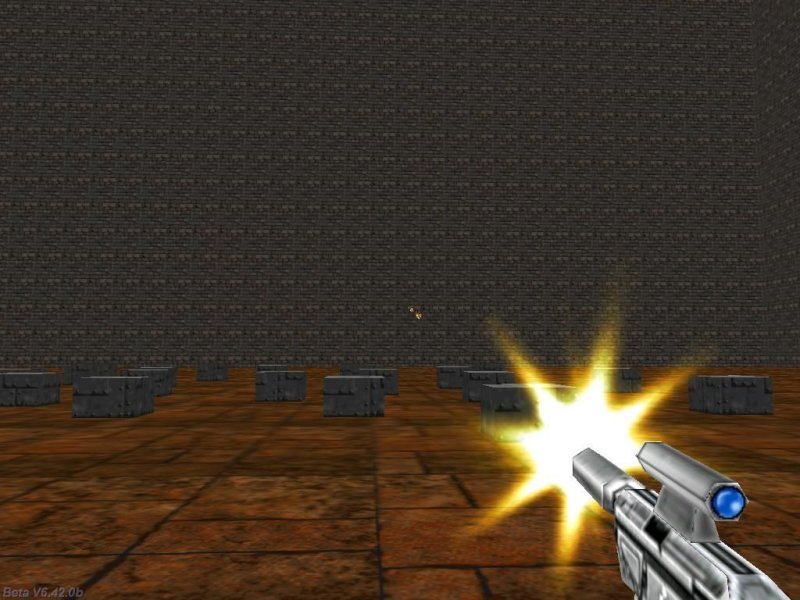
Function display_muzzle displays the gun muzzle, which can be admired in its full splendor in the picture above. The muzzle sprite is passable and has its "flare" and "bright" flags set; its ambient is set to 100 in order to make it look even brighter. The sprite is oriented and has the same pan and tilt angles with the weapon, but a random roll angle, which makes every muzzle sprite look a bit different.
My muzzle sprite was a bit too big, so I have decided to scale it down to 0.5; feel free to use a different value here. The following lines add a simple and yet effective effect, increasing the ambient of the weapon to 100 for 2 frames. This means that the weapon will "light up" with every bullet that is shot, appearing to be illuminated by the gun muzzle. Why do we have to go through all this trouble? We are creating virtual reality, so everything has to be faked carefully. The last line of code removes the muzzle sprite.
Function explosion_sprite displays the animated explosion sprite; that's a passable sprite scaled to 0.15 which has its flare and bright flags set, uses an ambient of 100 and a random roll angle. The sprite is transparent, but its initial alpha factor of 100 makes it look completely opaque (for now).
The explosion sprite will go through all its animation frames with the speed given by 2 * time, and then it will fade away quickly, with the speed given by 50 * time. The last line of code removes the explosion sprite from the level.
I hope that you like our machine gun; its code is simple but has got all the needed accessories. Next month we will create a different type of gun using c_trace. I'll see you then!