"The making of" Perfect AI
This month I have decided to talk less about the code and more about how Perfect AI works; this way you should be able to edit my code easily. Let's test the demo first; open level5.wmp, build it and run it using the script named ai5:
I'd start running if I were in your place! Use "W", "S", "A", "D" and the mouse to move and fire. There are two enemies that start to chase you right away and another one (to the right) that waits until you come closer than 1000 quants to him before attacking you. If you shoot the guy, it'll forget about those 1000 quants and it will start to chase you too.
The enemies will shoot you as soon as they see you unless you ask them to be more gentle, so let's see the options right away:
We can set "Alert_dist" and we can check (or not) the "Gentle" flag. If we set Alert_dist to zero, the enemies will start to chase the player as soon as the level is loaded, otherwise they will wait until the player has come closer than the values specified for Alert_dist in quants (1000 quants in my example). Check the Gentle flag and the enemies will try to come close to the player, and then they will start to shoot at it. Uncheck the flag and they will shoot the player as soon as they are able to see it; this makes the things much more real and fun.
You can see that the level is a combination of indoor and outdoor areas, which doesn't really matter, as long as you place the nodes indoors and outdoors. I told you that perfect AI starts with perfect path planning; however, the enemies should be able to get to the player even if the nodes aren't placed perfectly in the level. The level I'm using this month is a mess - here's an example:
The enemy wants to find the player, so it should use the path highlighted by the red arrows; however, you can see that some other nodes can see each other (take a look at the green arrow) but the enemy would run into the wall if it would follow them, because the enemy is thicker than a bullet! The algorithm tries to find the shortest distance from the enemy to the player every time, so it will instruct the enemy to follow the route that includes the green arrow! The code used this month allows the enemies to glide along walls; if they get stuck, they stop and ask for a new path towards the player. Now you can finally place your nodes in the level without being extremely careful, but don't forget that every node uses additional resources.
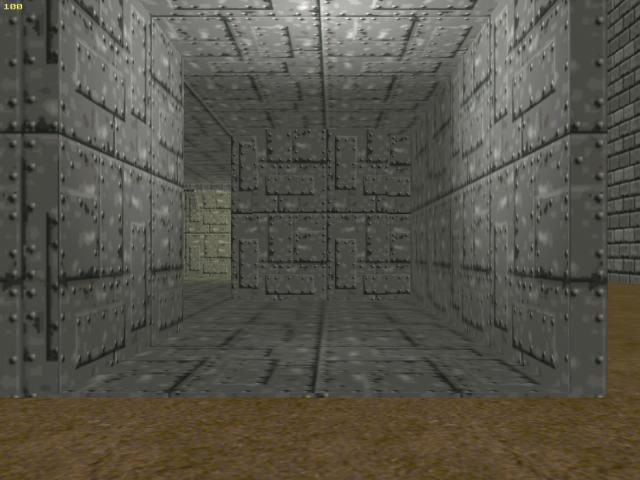
This demo can work with up to 100 nodes and up to 40-50 enemies in a level. Before you start thinking that I am somehow related to Pinocchio, let me show you a screenshot that was taken while I was testing the code with about 40 enemies; I'm the one hiding behind those boxes but I'm pretty sure I'll be dead soon.
I have assumed that any path between those 100 nodes (in case you use them all) has a maximum number of 50 points, which I think is ok for any regular level. If you need more nodes, enemies, etc you can have them by increasing the size of the arrays. Well, I think that 100 nodes should be enough for everybody, but what do I know? I'm not everybody...
The algorithm used for Perfect AI works ok, but it can slow down the game a little bit. How little? My tests show that the find_path function that was used in my previous articles sets the limit to about 400 enemies running at the same time in the level. I can hear you laughing... 400 enemies are more than enough for a single level, but these 400 enemies would use ALL the resources, so if you would need to add more entities, code, panels, etc to your level, you would end up with maybe 50 enemies in a level, which isn't too much if you are creating a strategy game.
The solution is simple: I have decided to create a separate script file that is run only once, and only by the developer (not by your customers). This script named compute.wdl will detect and write all the paths between any two nodes in your level; the actual paths between any two nodes are stored in the file named paths.txt (should be paths1.txt for the first level, paths2.txt for the second level and so on). What do we gain from here? The enemies don't need to ask for the correct path, because it is already computed for them, and the speed increases with about 800%. I'll let you do the math...
This is a small portion of the paths.txt file:
1 999 2 1 999 3 1 999 4 1 999 5 1 999 6 3 1 999 7 8 1 999 8 1 999 9 8 1 999 10 5 1 999 11 10 5 1 999 12 13 16 1 999 13 16 1 999 14 1 999 15 16 1 999 16 1 999 17 1 999 .....
I have used "999" as a separator, in order to gain some extra speed with file_var_read, but the example above would look like this
1
2 1
3 1
4 1
5 1
6 3 1
7 8 1
8 1
9 8 1
10 5 1
11 10 5 1
12 13 16 1
13 16 1
14 1
15 16 1
16 1
17 1
...............
The path from 1 to 1 is obviously through 1; nodes 2, 3, 4 and 5 can see 1 directly. The path from node 6 to node 1 includes node 3 and so on. All the possible paths between any pair of nodes are written inside this file. Our playable script (ai5.wdl) loads all these values into a huge array named paths; the enemies will simply pick the shortest path from this array whenever they need it, so they will not need to compute the path at all. If you want to see how these paths are computed in compute.wdl, you will find a commented "wait (1);" instruction in there; remove the comment and you will see the find_path function going through every possible combination.
Ok, let's go back to "the making of". How does all this stuff work?
We place our nodes in the level and they get an unique id number automatically. I could have set skill1 to 1 for the first node, skill1 to 2 for the second node, etc but I thought that this method will help me gain more friends among the level designers out there :) These nodes start scanning each other: node 1 scans node 2, 3, 4, ... , 40 (if our level has 40 nodes), then node 2 scans node 1, 3, 4, ... , 40, node 3 scans node 1, 2, 4, ... , 40 and so on. When all the nodes have scanned each other, a variable named distances_computed is set to 1 and the path finding algorithm can run.
But why do these nodes scan each other? Take a look at the picture below.
Let's assume that node 1 scans the nodes around it (using those golden circles) which are 2, 5 and 7. You know that ent_scan goes through walls too, so we need to find a method that allows us to detect which nodes can "see" each other directly. The answer is simple: we trace back from every node that was scanned to the scanner, so node 2 traces from its position to node 1, node 5 traces to node 1 and node 7 traces to node 1. Node 2 and node 5 can see node 1, but node 7 can't see it; function trace_back will set the array node_to_node[2, 1] = 300 and node_to_node[5,1] = 340, which are the distances from the scanned nodes to the scanner. The value for node_to_node[7, 1] will remain zero, because node 7 can't see node 1.
I started to understand a few things... so when all the nodes have finished scanning each other, we have an array (named node_to_node) that know which nodes can see each other and the distance between them, right? What comes next?
Well, I have told you that distances_computed is set to 1 and the path finding algorithm can run; the algorithm replaces the zeros in node_to_node with a huge value: 999,999. Why did I do that? The algorithm wants to detect the shortest path from one node to another, so it would hapily use a distance that is equal to zero; however, we know that node_to_node[x, y] = 0 means that x and y are two nodes that can't see each other, so the distance between them can be huge!
The algorithm goes through all the nodes, finding the shortest distance between any two nodes; when it is over, node_to_node[x, y] will contain the shortest distance between any two nodes, even if those nodes can't see each other. Take another look at the picture above; node_to_node[1, 7] would be set to 500 if node_to_node[1, 2] would be 200 and node_to_node[2, 7] would be 300.
We have got the shortest distance between any two nodes on the map, be we haven't got the actual path yet - that's what function find_path does. It is a recursive function that chooses the shortest distance between any pair of nodes.
The picture above shows the shortest path from A to I: ABCI, with a cost (or a distance) of 350. It is clear that ADEC has a bigger cost than ABC, and function find_path does just that: it replaces ADEC with ABC if it needs to, because 100 + 150 < 90 + 110 + 80. Function find_path returns the actual points on the shortest path from the enemy to the player, and these values are written inside paths.txt.
There's only one thing that wasn't discussed: how do we know where are the start and target nodes; in other words, how do we detect the closest node to the player and the closest node to a certain enemy? Every node waits until the player has come closer than 500 quants to it, and then it traces from its position to the player. If node 3 can see the player, it sets see_player[3] = 1; if it can't see the player, it sets see_player[3] = 0. All the nodes that can see the player at a certain moment are compared, and the closest node to the player wins the competition: that will be the target node, the node that will be set as a destination for all the enemies. On the other hand, the enemies scan the nodes and every node traces back from its position to the enemy. The closest node to the enemy that can see the enemy will be the starting node for that enemy.
I have ent_created the player in this demo because I didn't want it to be scanned by the nodes at game start; set player_pos[3] inside ai5.wdl to the values that fit your needs.
That's how Perfect AI works! I think that you have a decent AI system in your hands now; it isn't a fully finished product yet, but the AI part is really over. You will need to add some code that makes the enemies take smoother turns, maybe some pain sounds, some death animations, etc, but that code isn't AI related. Don't worry, I don't plan to abandon Perfect AI; I've spent about a month working at it, after all. Post your suggestions at the forum and if you want me to continue to add features to Perfect AI I will do it, now or in the near future.
Fake mirrors
The ability to create mirrors is a feature available only to the "professional" engine users; however, you can create decent looking mirror effects even if you are using A5 or A6 standard.
How do we create a mirror effect that can be used on the floor of a room? Here's a step by step explanation:
1) Add a large cube in Wed, set its size and texture it;
2) Hollow the cube and then delete its "floor":
3) Save the level and then create a separate wmb entity that will be used as the floor for your room; texture it using "checker1" from standard.wad:

4) Load the level again and then add the entity used for the floor:
5) Select all the level geometry excepting the floor entity and group it; use the "Back" or "Side" view for that:
6) Duplicate the room, rotate it and move it until it is flipped upside down:
7) Add more furniture, props, etc (normal and flipped). This is the image of the room used in my demo:
8) Add a player model and attach it the "player1" action. Attach action "transparent_floor" to the floor entity. That's it!
You've got it: the player can see through the transparent floor entity, and it sees the same things on both sides of the floor. But what happens with the player model? It changes its position, animations, etc all the time, so it must have some code attached to it!
action player1
{
player = me;
while (1)
{
camera.x = player.x - 100 * cos(player.pan);
camera.y = player.y - 100 * sin(player.pan);
camera.z = player.z + 80;
camera.pan = player.pan;
camera.tilt += 10 * mouse_force.y * time;
player.pan += 4 * (key_a - key_d) * time;
player_distance.x = 10 * (key_w - key_s) * time;
player_distance.y = 0;
player_distance.z = 0;
The camera is placed 100 quants behind the player and 80 quants above its origin; it has the same pan angle with the player and changes its tilt angle depending on the movement of the mouse on the y axis. The player can change its pan angle using "A" and "D" and moves forward and backward with "W" and "S".
if ((key_w == 1) || (key_s == 1)) // the player is walking
{
ent_cycle("walk", my.skill20); // play "walk" frames animation
my.skill20 += 4 * time; // "walk" animation speed
my.skill20 %= 100; // loop the animation
}
else // the player is standing
{
ent_cycle("stand", my.skill20); // play "stand" frames animation
my.skill20 += 2 * time; // "stand" animation speed
my.skill20 %= 100; // loop the animation
}
move_mode = ignore_passable;
ent_move (player_distance, nullvector);
wait (1);
}
}
If the player is walking ("W" or "S" are pressed) the player will display its "walk" animation in a loop; else, if the player is standing, it will play its "stand" animation in a loop. The player will be moved with the speed given by player_distance, passing through all the passable objects.
I can't see any mirror code here; let's check a new function:
starter init_mirrors()
{
while (player == null) {wait (1);}
ent_create (fakeplayer_mdl, nullvector, mirror_player);
}
This starter function waits until the player entity is loaded in the level and then it creates player's reflection model (fakeplayer_mdl) in the origin, and associates it the function named mirror_player():
function mirror_player
{
my.passable = on;
while (1)
{
vec_set(temp, player.x);
temp.z -= 500; // trace 500 quants below the player
trace_mode = ignore_me + ignore_passable + ignore_models + ignore_sprites + scan_texture;
trace (player.x, temp); // get tex_name
my.frame = player.frame;
my.next_frame = player.next_frame;
if (str_cmpi ("checker1", tex_name))
{
my.invisible = off; // show the fake player image
my.pan = player.pan;
my.roll = player.roll + 180; // flip it upside down
my.x = player.x;
my.y = player.y;
my.z = player.z - 60;
}
else
{
my.invisible = on;
}
wait (1);
}
}
The model used as player's reflection in the mirror is passable; we trace 500 quants below the "real" player in order to get the name of the texture used for the floor and then we set the same frame and next_frame for the player and its reflection. If "trace" sees the texture named "checker1" below player's feet, it displays the reflection model, using the same pan angle and a different roll angle (180 degrees will flip the reflection model upside down, which is good for us). The reflection will have the same x and y with the player and it will be placed 60 quants below player's origin (play with this value).
If "trace" can't find the texture named "checker1" below player's feet, the reflection model is hidden. This way you can create normal rooms, with floors that don't reflect anything, and rooms that have mirrored floors. I have created a room of each type in my demo.
The action used for the transparent floor is really simple; change "85" to alter the transparency factor for the mirror.
action transparent_floor
{
my.transparent = on;
my.alpha = 85;
}
If you plan to have enemies in a room that includes a mirrored floor, you will need to create pointers and functions that look like mirror_player() for them.
You can use a similar method to create vertical mirrors; if you want me to write an article about that, post a message at Conitec's forum, under "User Contributions" inside the Aum31 thread. Happy mirroring!