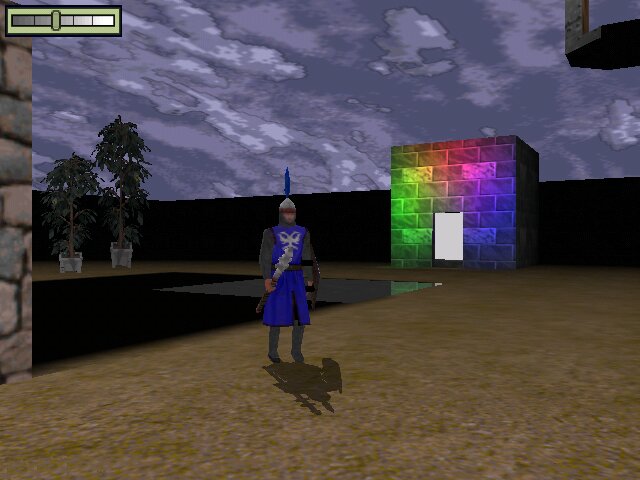
Splinter Cell panel
Splinter Cell is a great game! It's not the usual shooter; it is more like a combination of Project IGI and Thief! Anyway, you control a guy that needs to sneak in the dark sometimes (most of the time, actually). You have an indicator that shows the level of light in any part of the level, and this article tells you how to add this feature to your game.
First of all we define two panels:
panel back_pan
{
bmap = back_pcx;
pos_x = 5;
pos_y = 5;
layer = 20;
flags = overlay, refresh, visible;
}
panel cursor_pan
{
bmap = cursor_pcx;
pos_x = 0;
pos_y = 10;
layer = 25;
flags = overlay, refresh, visible;
}
That's nothing weird here; cursor_pan will appear over back_pan because it has a bigger layer value. The function that does the works is really simple:
function player_light()
{
while(1)
{
vec_set (temp, my.x);
temp.z -= 1000;
trace_mode = ignore_me + ignore_passable + scan_texture;
trace (my.x, temp);
cursor_pan.pos_x = 10 + 0.38 * tex_light;
wait (1);
}
}
This function must be called from within the action associated to the player, outside any loop, so the easiest method would be this:
action players_action
{
player_light();
// the rest of the code for the player
.........................
}
I have attached the office.wdl file which contains the modified player_prog action as an example. Our player_light() function traces below player's feet, scanning the ambient of the texture, and returns the result (0...255) in the variable named tex_light. The only line that needs some explanation is this one:
cursor_pan.pos_x = 10 + 0.38 * tex_light;
What's with that 10 + 0.38 * tex_light? Where did these values come from?
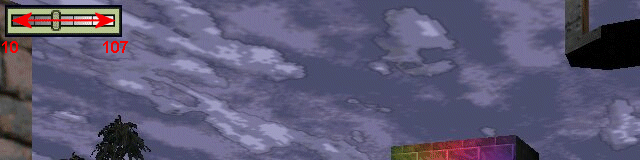
Our cursor_pan must change its x position from 10 to 107 pixels on x (as shown by the red arrow) if it wants to look good while it is moving over back_pan. Our duty is to make sure that when tex_light = 0, cursor_pan.pos_x = 10, and when tex_light = 255, cursor_pan.pos_x = 107. Our panel must be able to move 107 - 10 = 97 pixels when tex_light changes its value from 0 to 255, so the multiplication factor will be 97 / 255 = 0.38. We add 10 pixels (minimum cursor_pan.pos_x value) to 0.38 * tex_light and we're ready to roll!
Strings above entities
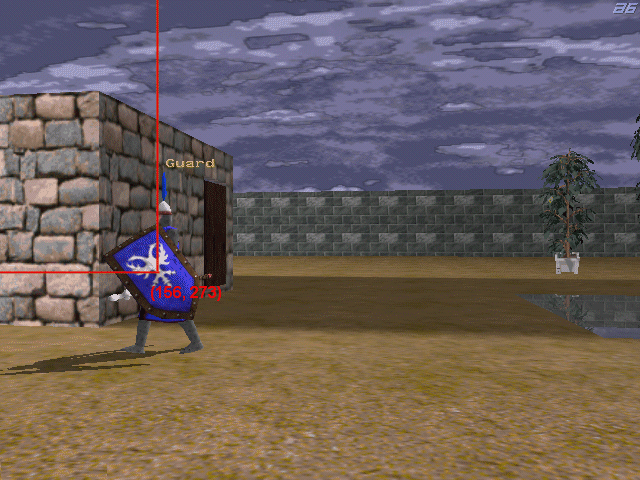
Many of you have asked this question: how can I add names to the characters in my games? How can I place texts above the heads of my characters? This article will show you how simple it is to do that, not to mention that the code can be used for any type of games, including the ones that use an isometric camera.
You can see that the names are crisp and clear - they'd better be, because I'm using standard text definitions for them:
text name1_txt
{
font = system_font;
string = "Player";
}
text name2_txt
{
font = system_font;
string = "Guard";
}
You can use as many texts and as many entities as you want. The function that does the entire job looks like this:
function name_ent1()
{
while (1)
{
vec_set (temp, my.x);
temp.z += 40;
trace_mode = ignore_me + ignore_models + ignore_passents;
if (trace (my.x, camera.x) == 0)
{
vec_to_screen (temp, camera);
name1_txt.pos_x = temp.x;
name1_txt.pos_y = temp.y;
name1_txt.visible = on;
}
else
{
name1_txt.visible = off;
}
wait (1);
}
}
My demo uses only two functions that look like the one above; if your game has 4 different characters, you should use 4 texts and 4 functions for them. The function must be called from within the action attached to your entity, outside any while loop. You can see the example used in my demo in the office.wdl file that is located inside the \entstrings folder:
action player_prog
{
name_ent1();
..............
}
action patrol_prog
{
name_ent2();
.............
}
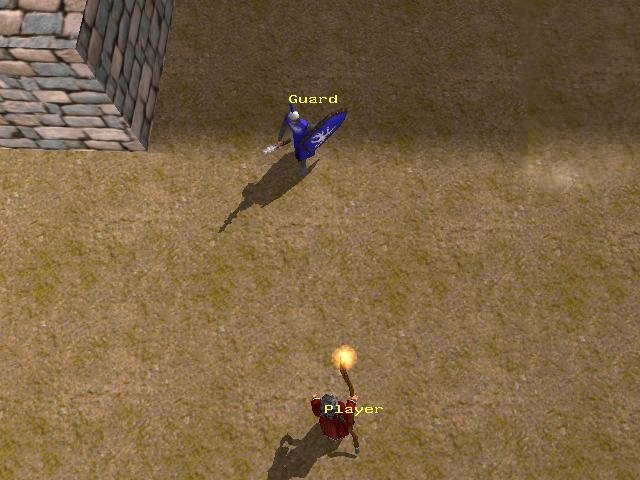
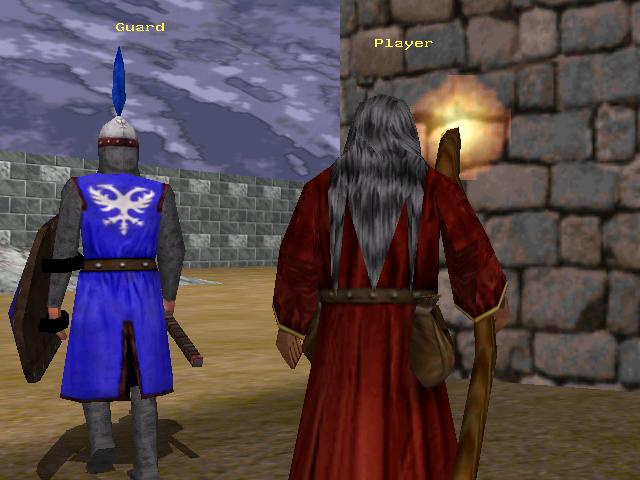
How does this stuff work? We use vec_to_screen to convert the position of the entity in the 3D world to screen coordinates. Take a look at the pictures below:
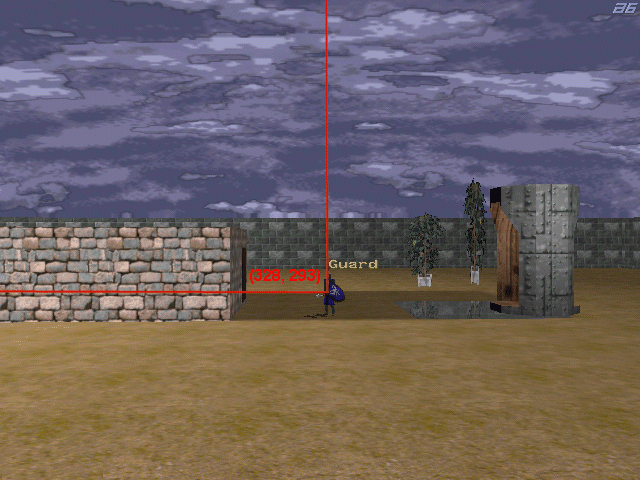
Vec_for_screen would return the origin of the entity as a 2D screen coordinate in pixels; however, we want to display the names above the heads (not in the origin) so we add 40 quants on the z axis before using vec_for_screen. Play with this value, because you might need different values for every entity.
Here's the final trick: we use a trace instruction from the entity to the camera; if the entity is visible on the screen, we set the correct pos_x and pos_y values and then we display its associated text. If the entity isn't visible on the screen (trace != 0) we hide the text.
Make sure that you use a 3rd person camera for the player. Press F7 to switch from 1st person to a 3rd person camera if you are using the templates, otherwise you won't be able to see the player.