This month we are going to test the elevators that come with the templates. Doug has done a great job adding quite a few features to them, so let's not waste your precious time! Fire up Wed, open the exp1.wmp file, and then bring on the Project Manager's window. Click the "Add" tab, select "Lifts (01)" from the "Script" list, and then click the "Add Script" button; you will notice that Lifts (01) was added to the list of scripts that are associated to our project.
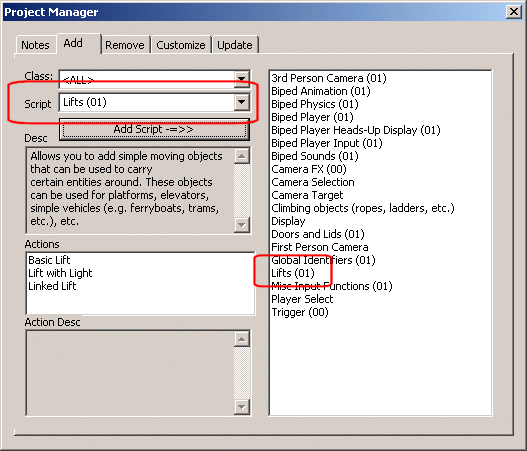
That's it! We can now use the elevators, keeping the player much more rested and happy (and fatter, but this doesn't matter that much - happiness prevails). Add the map entity named elevator1.wmb to the level, in a position that's very close to the floor or (even better) touches it.
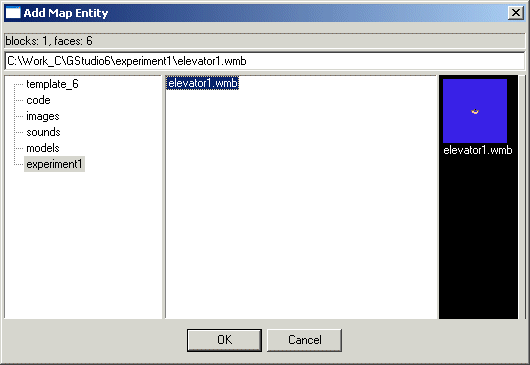
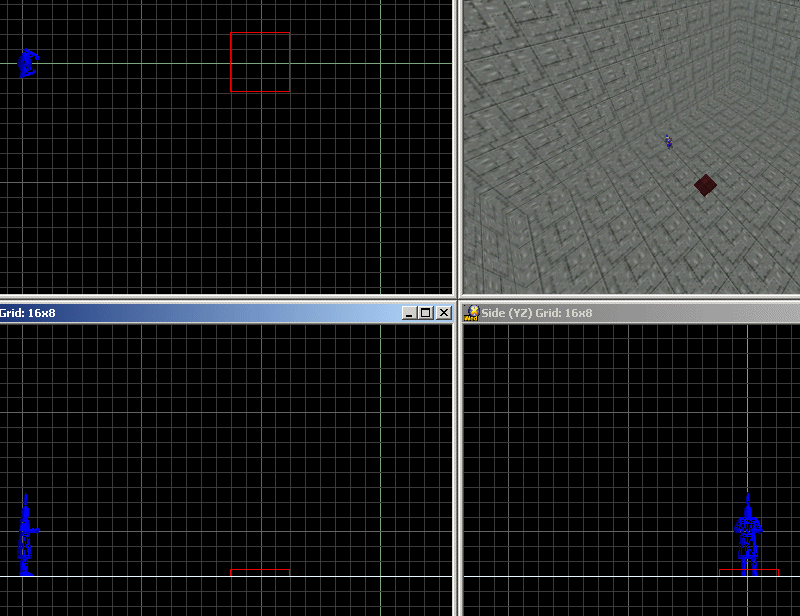
Attach the action named Lift01_Basic to the wmb entity. Don't let the name of the action trick you; this elevator has all the power that you might need and more. Right click the wmb entity and let's study its "Behavior" panel:
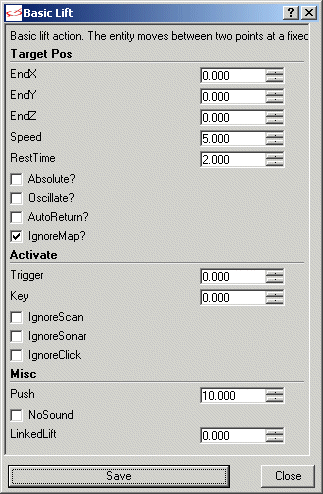
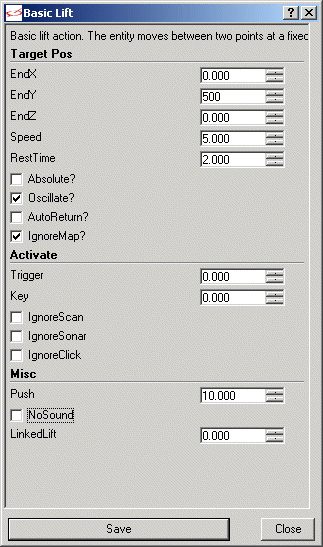
The first 3 fields: EndX, EndY and EndZ set the coordinates where the lift will stop. As you can guess, the elevator will start in the position where it was placed in Wed, but if these 3 fields are set up properly, they can change our elevator in a platform that can even carry the player around!
Let's set EndY to 500; this will displace the platform up to 500 quants. Also, don't forget to check the "Oscillate?" checkbox, which makes the lift move back and forth at all times.
Press the "Save" button to dismiss the window, and then build the level and run it; you will see that the platform moves as expected and can carry the player with it. I have just got this great idea for a game where the player jumps from one moving, horizontal or vertical platform to the other, collecting stuff along the way. Anyway, let's move on.
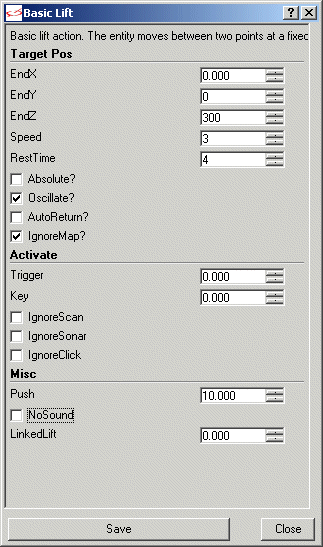
Duplicate the wmb platform, and let's turn this new entity into a "real" elevator. Set EndY to 0, EndZ to 300, Speed to 3 and RestTime to 4. The names are self-explanatory: we have changed the speed of the elevator, as well as the amount of seconds it waits at its starting point and destination before moving again.
Press "Save", and then build and run the level. You can now use the "real" elevator and have a much better perspective of the level.
Let's go through the rest of the "Behavior" fields:
- "Absolute?" tells the elevator to use absolute world coordinates. If this box is checked and (let's say) EndY is set to 300, the elevator will move until its y coordinate reaches 300. On the other hand, if the box isn't checked, the elevator will move 300 quants on the y axis.
- "Oscillate?" makes the elevator move back and forth at all times (if it is checked);
- AutoReturn?" instructs the elevator to return at its starting point as soon as "RestTime" has passed;
- "IgnoreMap?" tells the elevator to ignore all the map entities. This might come in handy if (let's say) your elevator is supposed to move underwater as well.
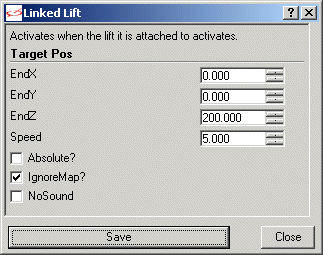
These elevators can be activated by triggers or keys; just set the proper field value like we've learned in Aum62. The last fields tell us that the elevator can ignore scanning, sonar event or mouse clicks (if that's what we want). We'll leave these fields unchanged most of the time. The "push" value allows our elevator to pass through entities with a lower push value, while "LinkedLift can link the actions of the elevator to other objects (elevators) - a feature that might prove to be very interesting for some of us.
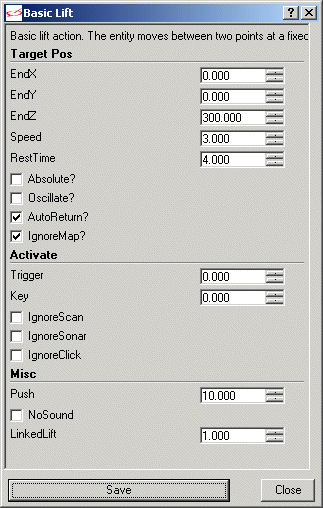
Let's link two elevators right now! Add a Lift01_Basic elevator to the level, and then customize its "Behavior" panel until it looks like this:
Then, add another platform and attach it the action named Lift01_Linked. Customize its "Behavior" panel as well:
Now all that's left to do is to link the 2 elevators; right click the "Lift01_Basic" elevator, choose "Properties" and then click the "properties" tab:
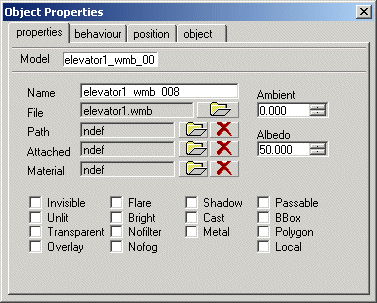
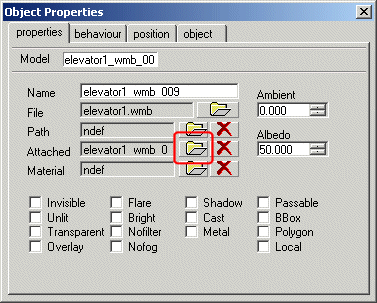
As you can see, the name of our "master" elevator is elevator1_wmb_008. Select it, right click again and the choose "Copy" from the menu that appears. Select the "Lift01_Linked" elevator, our "slave" elevator, bring on its "Object Properties" window, click the "properties" tab and then click the "Attached" button.
Right click the field at the top of the window, and then choose "Paste" - the name of the "master" elevator should appear.
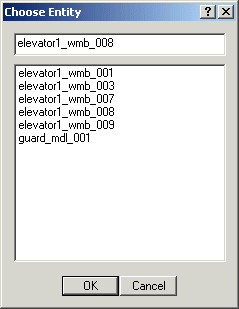
Press OK, close the "Object Properties" window, and then save, build and run the level. Our elevators are linked; the "slave" will only start when its "master" starts, waiting for its signales at all times. To test that, approach the "master" elevator and you will see that the "slave" starts ascending as well.
Let's add one more platform to the level; this time we will attach it the Lift01_Lite action, creating an elevator that radiates light.
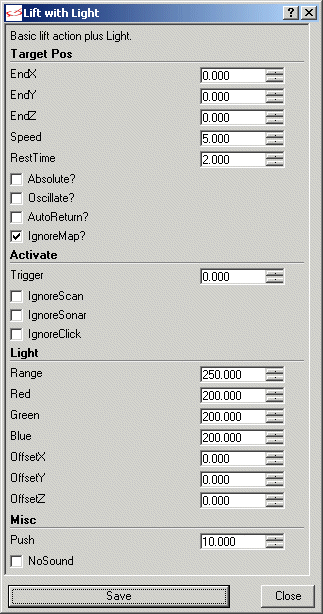
Set the fields until they look like this:
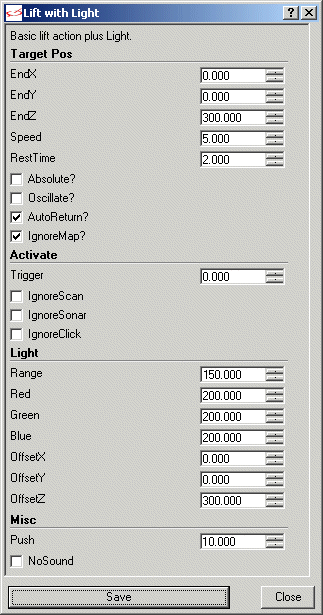
Now you've got an elevator that generates light in the level! OffsetX, OffsetY and OffsetZ give the offset of the light source in relation to the elevator; set proper values here and you'll have an elevator that moves together with a "real" light bulb.