This time we are going to test the "car project" template, which allows us to create racing games using the built-in physics engine. You'll need A6 professional to test this month's project, but the things might change in the near future.
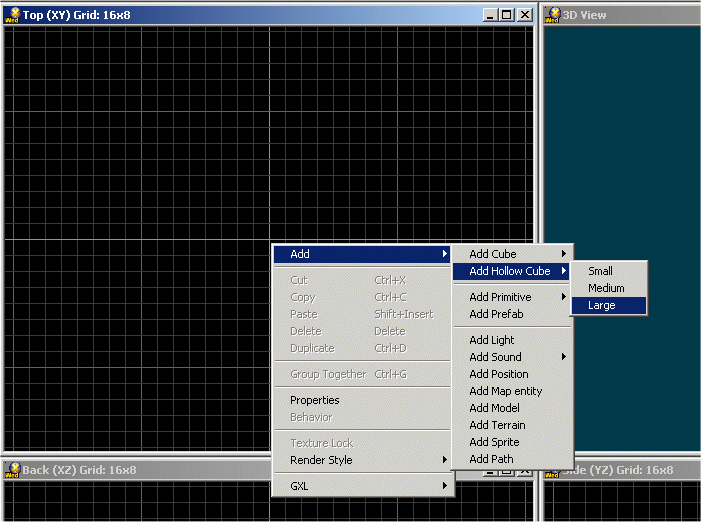
Start Wed, choose File -> New and let's create a large room for our car: right click Wed's top view window, and then add a large, hollowed cube in the level.
The cube is too small for a racing track, so let's change its size; right click it, choose "Properties" and then click the "position" tab.
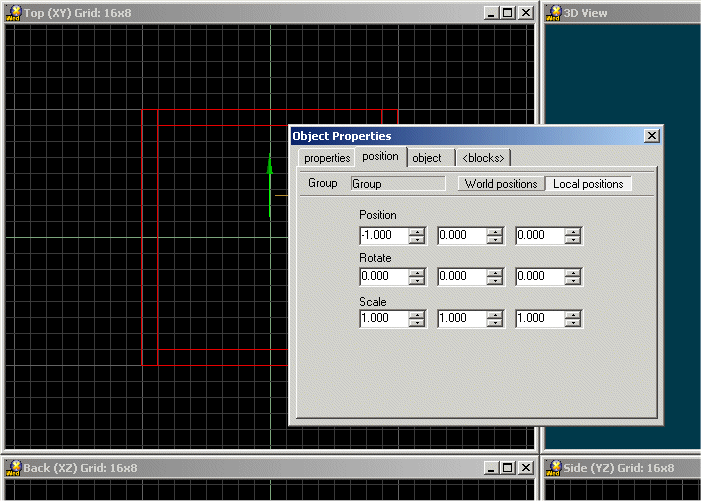
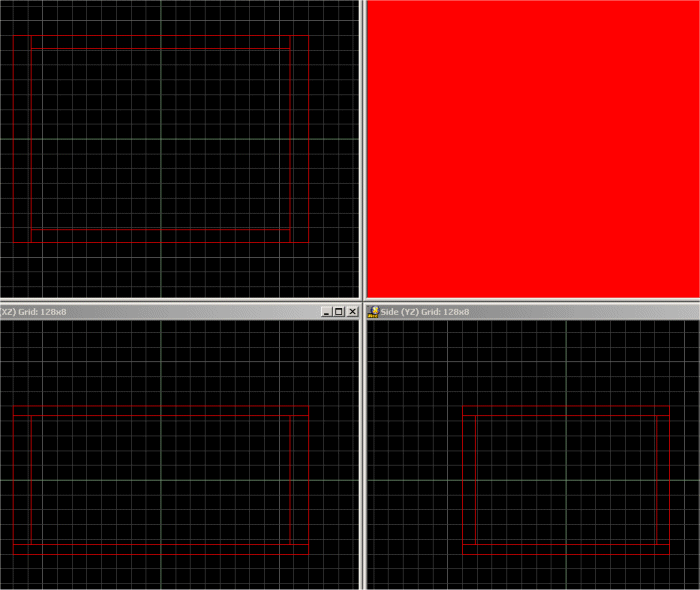
We need to change the "Scale" values; type 10 in the first box to increase the size on x by 10, 7 in the second box to increase the size on y by 7 and 5 in the third box to increase the size on z by 5. The values will only change for a very short period of time, being set to 1.000 again but don't worry - our block has changed its size indeed. Here's a view of our former cube (I had to zoom out a lot in order to capture the following screenshot).
Now you can texture the cube using your favorite textures; I have used a few textures from the well-known standard.wad file. Do that, and then choose File -> Save As, create a folder inside your 3DGS folder and save your level file inside that folder. I have named my folder "carproject" and the level file... "carproject", what else? You can use different names for the folder and the level file, of course.
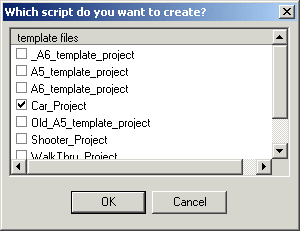
Choose File -> Project Manager to bring on the "Project Manager" window. Click the "Car_Project" checkbox, and then press OK.
You can close the "Project Manager" window now. We need a car body model and four wheels; actually, we only need a wheel model because we will duplicate it several times. Fortunately, I have copied the needed models in my "carproject" folder which comes with this month's resources, so you can copy those models inside your own project folder.
Add the carbody.mdl file to the level, and then assign it the action named PlCar01. Add four instances of the carwheel.mdl model to the level, and then assign them the actions named PlCar01_WheelFL (the front left wheel), PlCar01_WheelFR (the front right wheel), PlCar01_WheelRL (the rear left wheel) and PlCar01_WheelRR (the rear right wheel).
Make sure to place the wheels properly, close to the car body - it matters! Now save the level, build it and run it.
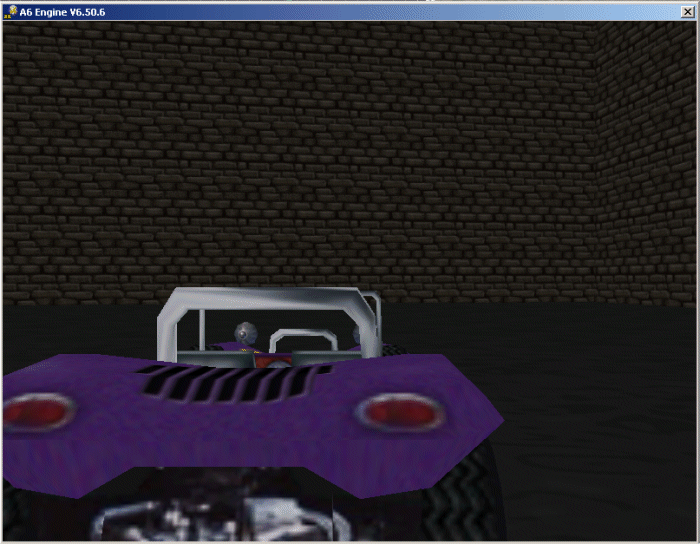
Press the "W", "S", "A", "D" keys to control the car; it works fine, but the camera position isn't too good... And I know that I have told you that we wont' write a single line of code here, but we really have to edit a line of code.
Open the plCar01.wdl script, which is located inside the template_6 folder, and then find this line of code:
var plCar01_viewOffset[3]= -50,-15,30; // where camera will be located relative to chassis center (cockpit)
These are the camera offsets on the x, y, z axis. It is clear now why the camera isn't placed on the center of the screen. Fortunately, there's a simple way of changing that; edit the numerical values until they look like this:
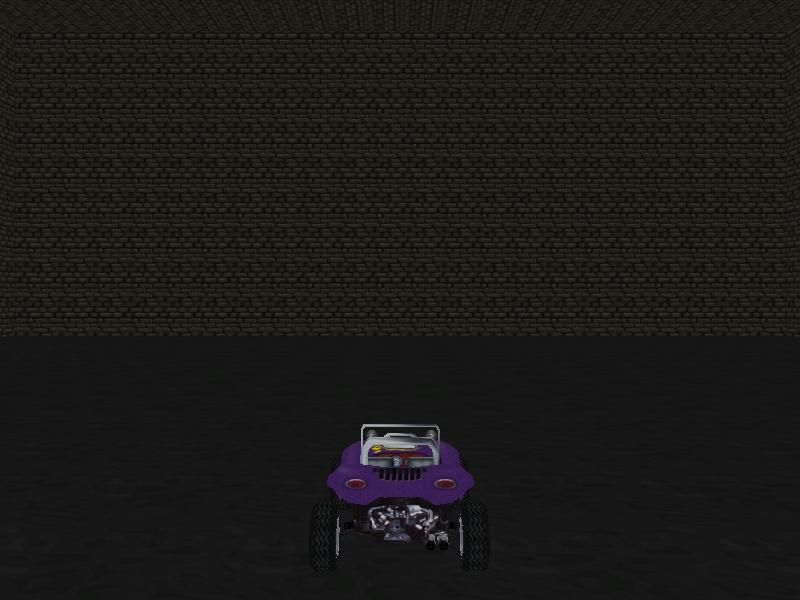
var plCar01_viewOffset[3]= -300,0,100; // where camera will be located relative to chassis center (cockpit)
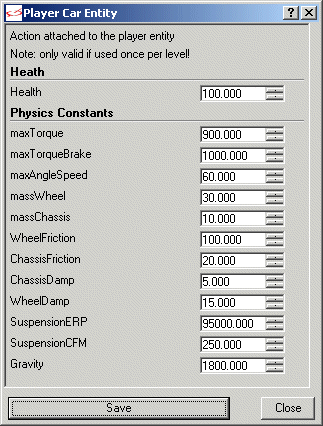
If you are a more adventurous guy (or girl) you can play with the various settings that can be tweaked under the car's body "behavior". All the settings are commented nicely, so you shouldn't get lost; just press the question mark and then click one of the numerical fields to see what it does.
Finally, you should add several obstacles when you are building your racing tracks if you want to make the race more fun.