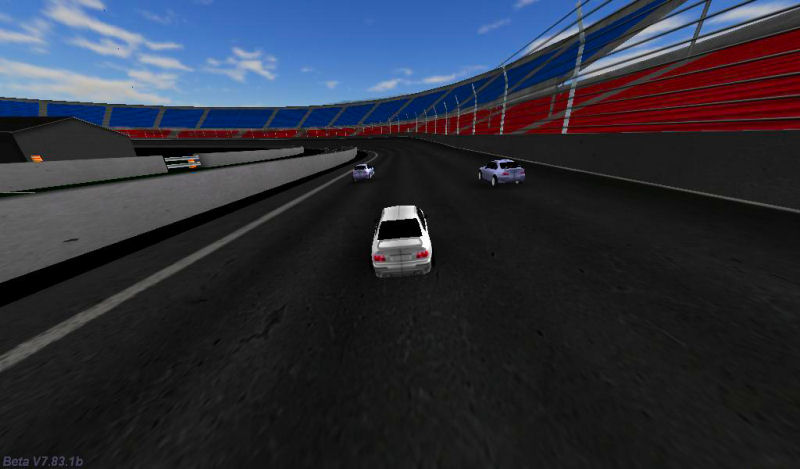
The car template is finally finished; it went through many under-the-hood changes, but now it is easier to use than ever. Since many things have changed from the 1st car template episode, let's go through the entire process of setting up and using a quick racing game that's based on this template.
First of all, you will need a main script file. I have included a main.c script with the template (you can use any other name for it, of course) but you can start from scratch and use something as simple as this:
#include <acknex.h>
#include "t_car.h" // include player's car code
#include "t_car_cameras.h" // include the car camera code
#include "t_car_ai.h" // include the enemy cars AI code
#include "t_car_props.h" // include the template car speedometer, racing timer, semaphore
#include "t_car_tracks.h" // include racetracks detection code for ice, grass, water and oil
#include "t_car_keys.h" // include user-defined keys for racing, jumping, etc
function main()
{
video_mode = 8; // run at a 1024x768 pixels resolution
level_load("racetrack01.wmb"); // use your own level name here
}
The script above includes all the template goodies, but you don't have to include all the files. Let's see what each one of them does:
1. t_car.h
This script includes player's car action; as soon as you include it, the action named "t_players_car" will appear in Wed's action list and can be attached to a car body model. Make sure to use a separate car body and wheel models; since player's car is using the physics engine and the wheels propel it, you can't use a single model. Use the included "bmw.mdl" and "wheel.mdl" or design your own car body and wheel models.
Click the "Resources" tab in Wed, open "script files", and then select "t_car.h".
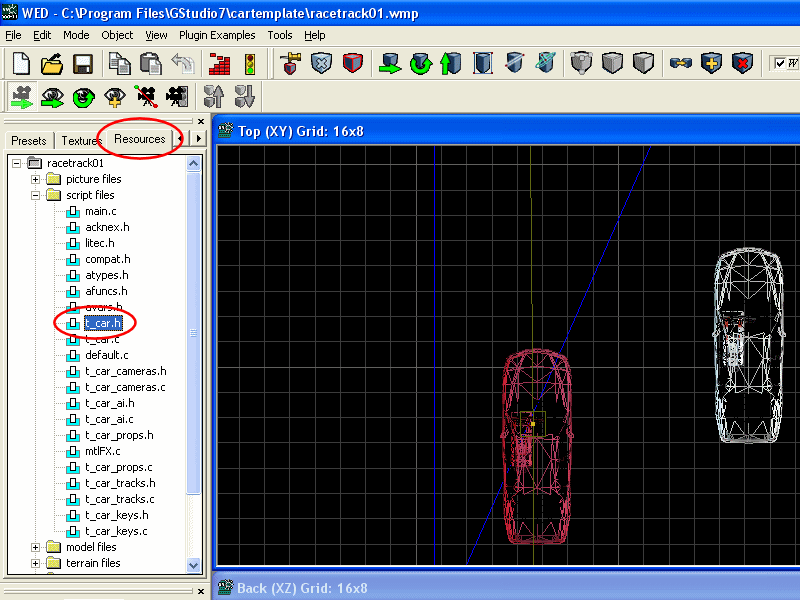
Right click the file, and then choose "Customize" to display the following panel:
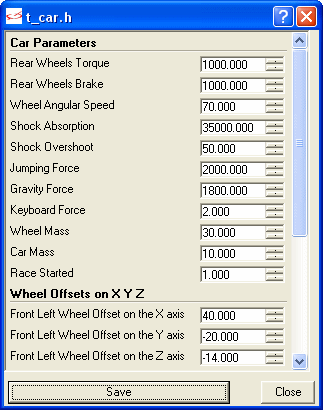
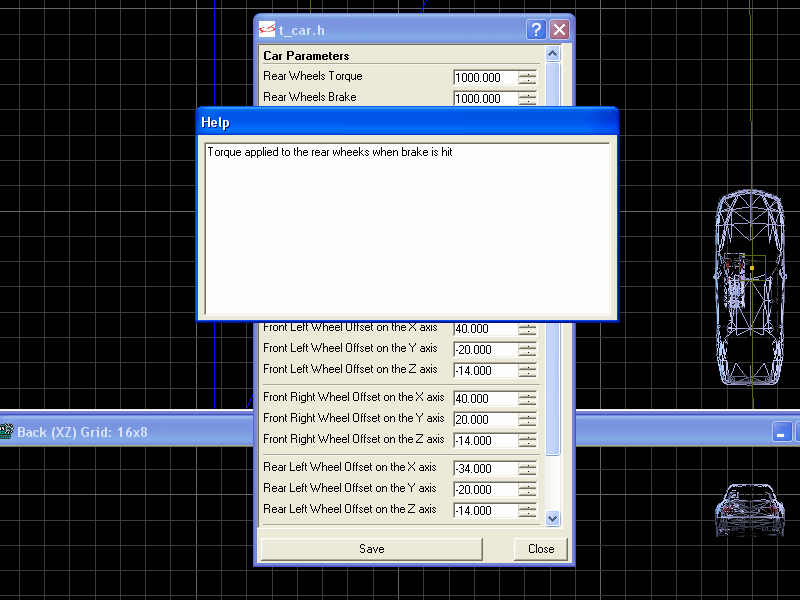
Feel free to modify the values; they work fine with the existing car and wheel models. Don't forget to click the "?" button in the upper right corner of the panel, and then click one of the fields to display additional information about it.
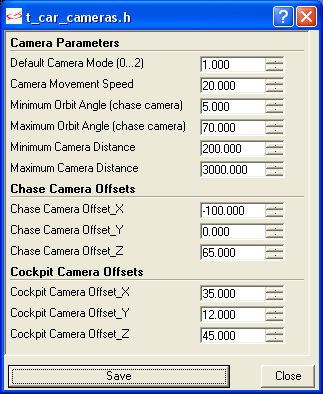
2. t_car_cameras.h
This script allows the player to use one of the 3 built-in cameras (orbit, cockpit, chase) for the game.
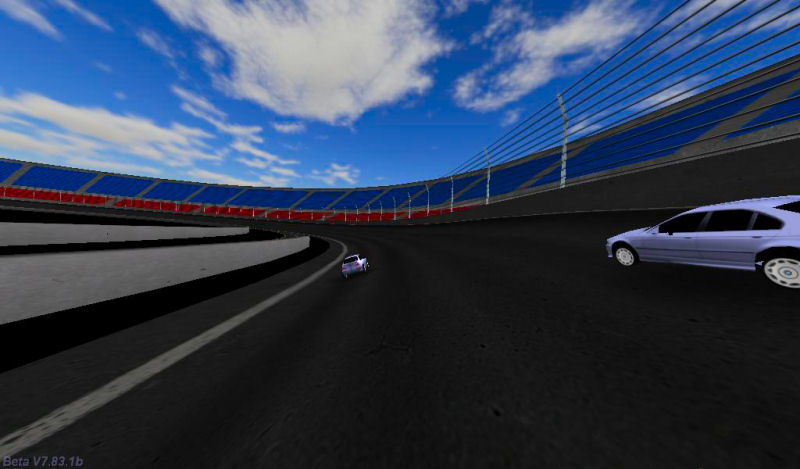
Press the "C" key to go through all the available cameras. You can set the default camera mode at game start, the chasing speed, the angles and offsets by customizing the t_car_cameras.h file in Wed.
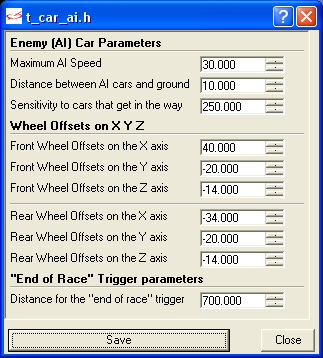
3. t_car_ai.h
Include this script in your main file and you will be able to use the following props in Wed's action list:
t_race_finisher. This action can be attached to any entity that is placed at the end of the level; it's the white flag at the end of the track in my racetrack level. As soon as one of the cars (player's car or the enemy cars) comes close to it, the race will be over for that particular car. Add as many t_race_finisher entities as you want to your level if the racetrack is very wide. You can also make some of the race finisher entities invisible in Wed if you want to.
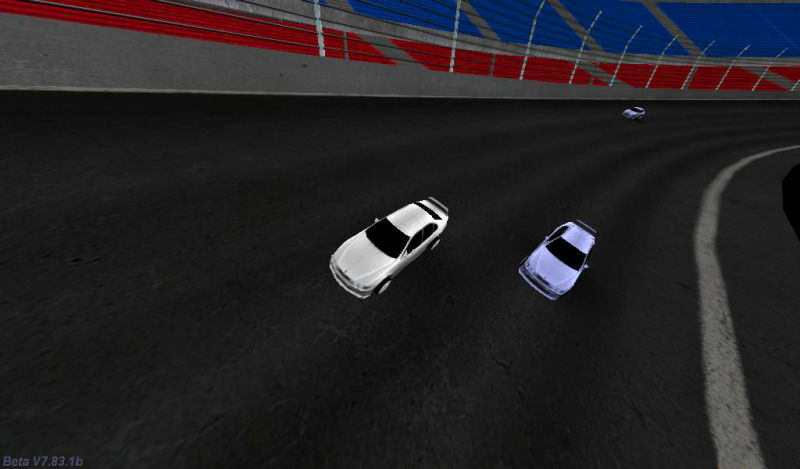
t_ai_car. Attach this action to an enemy car body model (up to 1,000 enemy cars can be used in a level) and it's going to set itself up automatically. Make sure to create a separate path for each car in Wed and place its origin close to the car; the cars will detect and use the closest paths at startup. The AI-controlled cars can detect other cars and will slow down in order to prevent the collisions; nevertheless, if the player gets in the way and tries to block them, they'll smash into its car and they'll get in front.
Feel free to customize the t_car_ai.h script using Wed's "resources -> script files" tab. The "end of race" trigger value sets the distance (in quants) that will end the race if the cars come close to the "t_race_finisher" entity.
4. t_car_props.h
This script contains various props:
- Speedometer;
- High precision racing timer;
- Semaphore;
- Water shader (useful if your racing levels contain water).
The speedometer, the timer and the semaphore are activated automatically by simply including the t_car_props.h file in your project; nevertheless, you can customize their behavior or disable them completely from Wed.
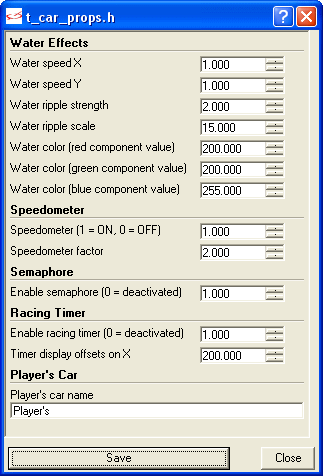
The water shader uses Gamestudio's built in water effect that comes with the mtlFX.c file; attach the fx_water_enviro action to your water model or terrain and it will activate if your engine version and your video card supports it (a V.S. / P.S. 2.0 video card or better is required). If you have a weak video card or a low engine version, the water will use a simple texture shifting effect.
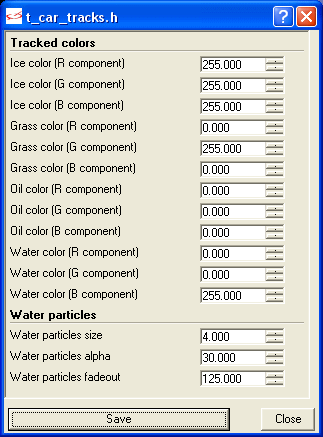
5. t_car_tracks.h
This script modifies player's car behavior (speed, friction, rotation, etc) if it moves over the icy, grassy or oily areas of the level: the car will slow down if at least one of its wheels touches the grass and will run out of control if its wheels touch the icy areas. The player will have a hard time controlling the car if its wheels touch an oily area in the level. In addition to that, the script will generate water splash particle effects and water sound effects if player's wheels touch a water surface in the level.
Start by assigning the action named "tcar_terrain" to the terrain or model entity that is used for the level. The grass, ice, etc behavior isn't triggered by the color of the level texture; a special bitmap needs to be prepared if you want to use this feature. Export the skin of the terrain or model that is used for the level and name it "colormap.tga". Paint the areas that are supposed to be icy with RGB = 255 255 255 in your favorite painting application, use RGB = 0 255 0 for the grass, RGB = 0 0 0 for the oil and RGB = 0 0 255 for the water - here's a colormap.tga example:
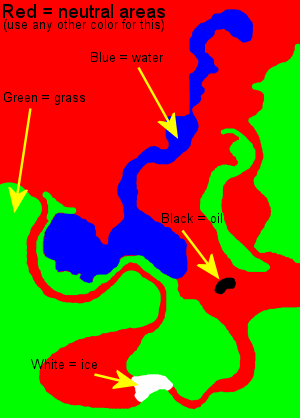
In this example, player's car would drive normally in the red area and would be affected by grass, water, ice and oil in the green, blue, white and black areas. The active colormap.tga colors, as well as the water particles properties can be customized from within Wed, as shown below.
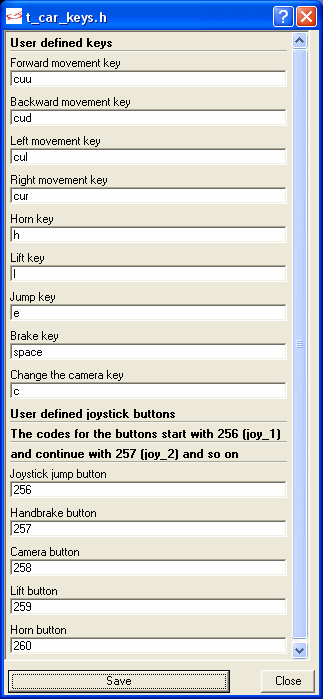
6. t_car_keys.h
This script allows the player to customize the keys and the joystick buttons that are used by the car template; right click t_car_keys.h in Wed's "resources -> script files" and you will be able to assign the new keys and joystick buttons according to your desire.
That's it for now, folks! I'll see you next month when I'll start working at the shooter template.