This workshop will teach us how to create snow, rain, fog and day/night transitions.
We will use some of the knowledge we've got from the previous workshop, the one that was dealing with particles.
To test this month's workshop, copy the workshop40 folder inside your 3DGS folder, start Wed, open the work40.wmp file and then run it using the script40.wdl file.
Now press the "S" key to start the snow; you should see something like this.
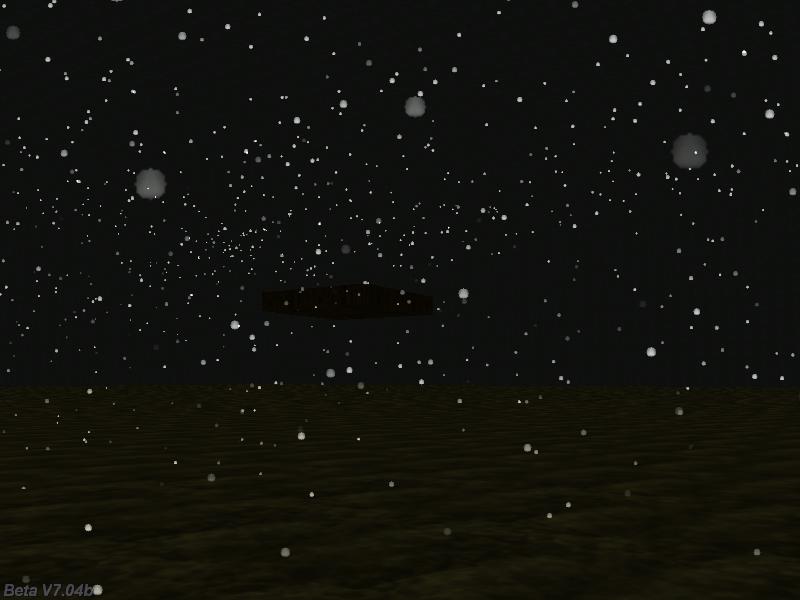
We've got several thousands of snow particles moving here and if you are going to spend some time observing the snow, you'll see that there's some wind blowing from north which pushes the player backwards a bit. We will take a look at the code that makes all these things possible, but before doing that let me show you the code that allows the player to move using the arrow keys and to look around using the mouse.
action players_code // simple player and 1st person camera code
{
player = my; // I'm the player
my.INVISIBLE = ON; // no need to see player's model in 1st person mode
while (1)
{
// move the player using the "W", "S", "A" and "D" keys; "10" = movement speed, "6" = strafing speed
c_move(my, vector(6*(key_cuu-key_cud)*time_step, 4*(key_cul-key_cur)*time_step,0), nullvector, IGNORE_PASSABLE | GLIDE);
vec_set (camera.x, player.x); // use player's x and y for the camera as well
camera.z += 30; // place the camera 30 quants above the player on the z axis (approximate eye level)
camera.pan -= 5 * mouse_force.x * time_step; // rotate the camera around by moving the mouse
camera.tilt += 3 * mouse_force.y * time_step; // on its x and y axis
player.pan = camera.pan; // the camera and the player have the same pan angle
wait (1);
}
}
There' isn't anything strange here; you've seen similar code in the previous workshops. Now let's take a look at the code for the snow effect.
function toggle_snow()
{
snow_on += 1;
snow_on %= 2;
var snow_origin;
var i;
while (!player) {wait (1);}
snow_sound();
while (snow_on)
{
i = 0;
while (i < 50) // that's a "while without wait" loop
{
snow_origin.x = player.x + 1000 - random(2000);
snow_origin.y = player.y + 1000 - random(2000);
snow_origin.z = player.z + 300;
effect(snow_particles, 1, snow_origin.x, normal);
i += 1;
}
if(random(1) > 0.7)
{
c_move (player, nullvector, vector((-1 + random(1)) * time_step, 0, 0), IGNORE_PASSABLE | GLIDE);
}
wait (1);
}
}
on_s = toggle_snow;
As you can see, pressing "S" will toggle the snow on and off. The variable named snow_on has an initial value of zero, so pressing the "S" key once will set it to 1; "snow_on %= 2;" will limit the possible values for snow_on to 0 or 1. We wait until the player is loaded (so the "player" pointer is valid) and then we call the snow_sound() function (more about it a bit later) which toggles the snow sound.
The outer "while" loop runs for as long as snow_on is set to 1; we've got a counter (a variable) named i which helps us generate 50 snow particles each frame inside another while loop which doesn't contain a "wait (1);" instruction. How is this possible? The loop runs exactly 50 times, and then it waits for a frame because the variable named i has reached 50. This means that the loop doesn't run forever without pausing, so it won't trigger the engine error message. You can (of course) use another limit for i if you want to generate a different number of snow particles.
The function that generates the snow is named "snow_particles"; the particles are generated inside a square area that surrounds the player model and moves with it, just like in the picture below.
The snow particles don't fall down vertically, but move towards the negative part of the x axis; you'll see why that happens in a second but first let's take a look at the lines that move the player backwards once again.
if(random(1) > 0.7)
{
c_move (player, nullvector, vector((-1 + random(1)) * time_step, 0, 0), IGNORE_PASSABLE | GLIDE);
}
This is one of those rare situations when we will want to use the absolute distance vector, the one that takes into account the world coordinates (and not the entity's coordinates). If random(1) is greater than 0.7, the player is moved towards the negative part of the x axis (just like the snow flakes) with a speed that can range from -1 * time_step to 0. This way we will get a realistic effect; the player won't be moved at all times. You can read the 18th workshop for more information about c_move.
Pushing the "S" key one more time sets snow_on to zero, thus stopping the outer loop, the sound and the snow particles. Which, by the way, are controlled by these functions:
function snow_particles()
{
var particle_direction;
particle_direction.x = random(5) - 15;
particle_direction.y = (1 - random(2)) / 10;
particle_direction.z = -5 - random(7);
vec_add(my.VEL_X, particle_direction);
my.ALPHA = 30 + random(65);
my.FLARE = ON;
my.BMAP = snow_tga;
my.SIZE = 3;
my.BRIGHT = ON;
my.MOVE = ON;
my.FUNCTION = fade_snow;
}
function fade_snow()
{
my.ALPHA -= 1.2 * time_step;
if (my.ALPHA < 0) {my.LIFESPAN = 0;}
}
Particle_direction.x has a random value that ranges from -15 to -10; this will give the particles a negative speed on the x axis; particle_direction.y has a small, random value (-0.1... 0.1) which moves the particles sideways a little bit. You can play with these values if you want to make the flakes appear to be more random. Finally, particle_direction.z can range from -12 to -5 so the snow will always fall downwards.
Each flake has a random transparency factor which can range from 30 to 95. Function fade_snow decreases it and removes the snow flakes if alpha goes below zero. Play with 1.2 - a proper value here will remove most of the flakes as soon as they have penetrated the ground; otherwise, you will lose precious system resources for particles that aren't visible anymore.
The following function plays or stops the snow.wav sound when the player triggers or stops the particle snow effect. Note that I have used a snd_loop instruction here, which is guaranteed to loop the sounds perfectly because it doesn't need to load them from the hard drive after each repetition.
function snow_sound()
{
if (snow_on)
{
snow_handle = snd_loop(snow_wav, 50, 0);
}
else
{
snd_stop(snow_handle);
}
}
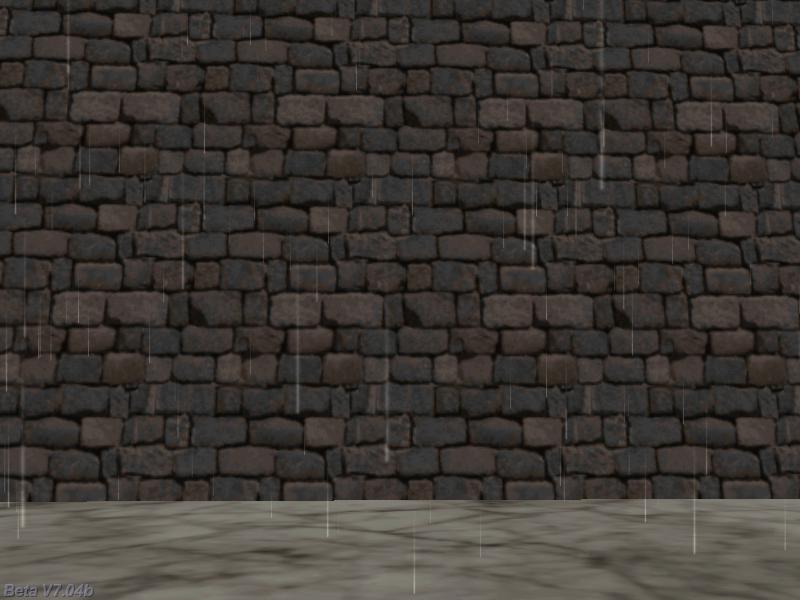
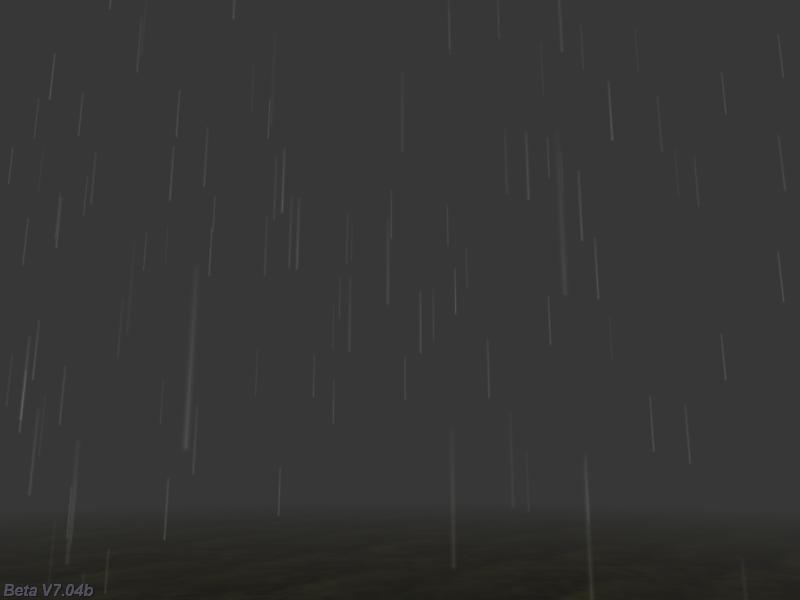
As you can imagine, you can create a good looking rain effect by replacing the snow.tga bitmap with another one that looks with a rain drop and maybe by playing with some of the numerical values inside function snow_particles. However, I have decided to create a different snippet for the rain - one that uses sprites instead of particles.
Why would I want to do something like that? Aren't particles much faster than sprites? That is correct indeed, but one of the reasons why the particles are so fast is this: they are bi-dimensional, so they can't be oriented. This means that we can't use a decent looking, longer bitmap for the rain particle:
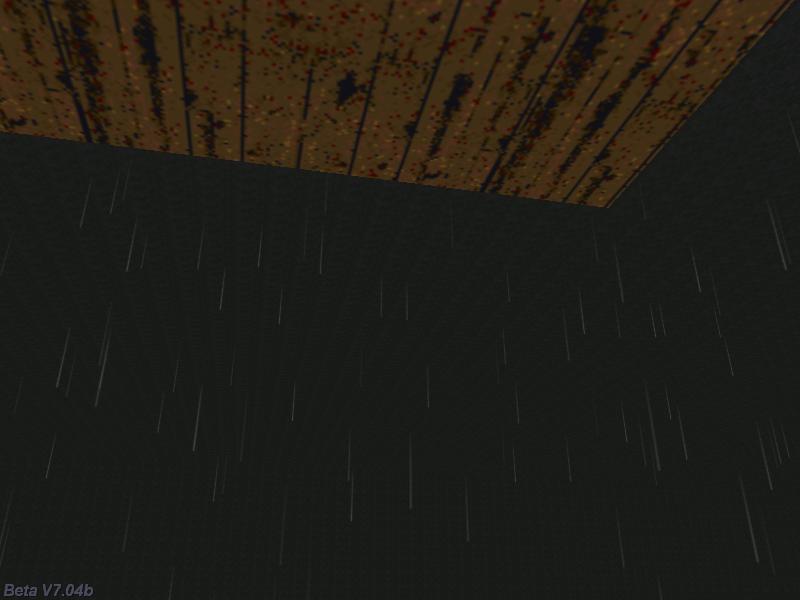
Why can't we use them? Because if the player would look at the ceiling, he or she will see something like this:
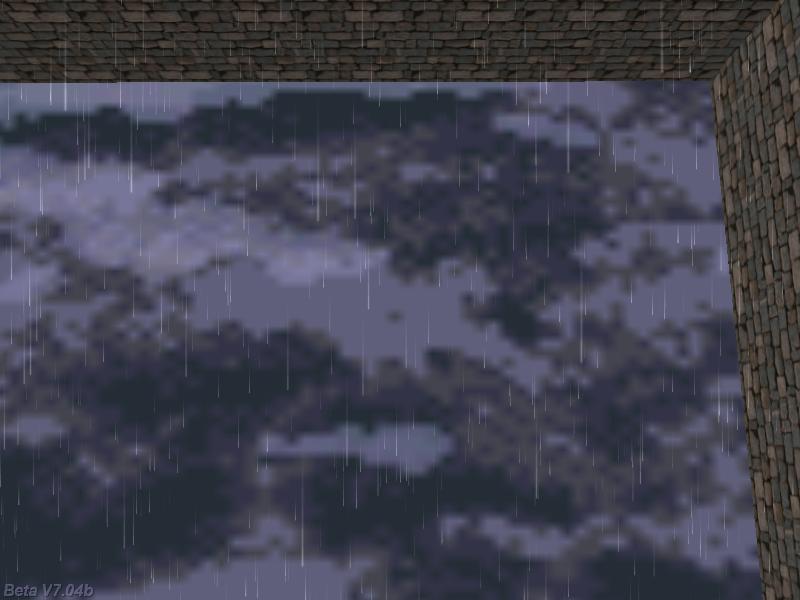
The particles are bi-dimensional so we can only see them using their 2D perspective. The only alternative is the usage of sprites, so let's see the function that creates them.
function toggle_rain()
{
rain_on += 1;
rain_on %= 2;
var rain_origin;
var i;
while (!player) {wait (1);}
rain_sound();
while (rain_on)
{
i = 0;
while (i < 30) // that's a "while without wait" loop
{
rain_origin.x = player.x + 500 - random(1000);
rain_origin.y = player.y + 500 - random(1000);
rain_origin.z = player.z + 300;
ent_create(rain_tga, rain_origin.x, rain_sprites);
i += 1;
}
rain_origin.x = player.x + 100 - random(200);
rain_origin.y = player.y + 100 - random(200);
rain_origin.z = player.z + 500;
ent_create(rain_tga, rain_origin.x, rain_sprites);
wait (1);
}
}
on_r = toggle_rain;
Press the "R" key to toggle the rain on and off; if rain_on is set to 1, we create 30 rain_tga sprites per frame, and then we create another rain_tga sprite right above player's head. Why do we want to do that? Let's see a picture that shows what's happening clearly.
As we all know, life isn't fair. Don't tell anyone I said this, but I am pretty sure that most of your potential customers have ancient computers. I'd like to create 1,000 rain sprites per frame instead of 30 in my game, but I'm pretty sure that almost any computer would crawl if I'd do that. What is the solution? Trick your customers into thinking that you are using lots of rain sprites, just like I did. Make the rain abundant close to the player and they will buy it!
Time to examine the function that controls the rain sprites.
function rain_sprites()
{
my.PASSABLE = ON;
my.ORIENTED = ON;
my.TRANSPARENT = ON;
my.ALPHA = 20 + random(75);
// my.UNLIT = ON; // remove the comment to increase the brightness of the rain sprites
my.AMBIENT = 40 + random(60);
my.BRIGHT = ON;
while (my.ALPHA > 0)
{
if (c_content(my.X, 0) == CONTENT_SOLID)
{
my.ALPHA = 0;
}
my.Z -= (25 + random(30)) * time_step;
wait (1);
}
ent_remove(my);
}
The sprites are made passable and oriented right after their creation; they are transparent, with an alpha factor of 20... 95 and an ambient value of 40... 100. The sprites will move for as long as their alpha is greater than zero.
I am using c_content to detect if a certain sprite has penetrated a solid (a level block or a map entity) or not. If the sprite penetrates a solid, its alpha factor is set to zero, the "while" loop stops and the sprite is removed. Press "R" to start the rain effect and them move under the wooden platform; you will notice that the rain won't bother the player there.
You can use a similar piece of code in order to prevent the particles from entering the unwanted areas; however, this will slow them down. The last significant line of code inside the while loop tells the rain sprite to move downwards by decreasing its z coordinate with a speed that can range from -55 to -25 * time_step.
function rain_sound()
{
if (rain_on)
{
rain_handle = snd_loop(rain_wav, 50, 0);
}
else
{
snd_stop(rain_handle);
}
}
The function that plays the rain sound is identical with the one that was used for the snow / storm sound, so there's no need to discuss it. Let's examine the code for the function that toggles the fog:
function toggle_fog()
{
fog1_on += 1;
fog1_on %= 2;
if (fog1_on)
{
camera.fog_start = 10;
d3d_fogcolor1.red = 55;
d3d_fogcolor1.green = 55;
d3d_fogcolor1.blue = 55;
fog_color = 1;
while (fog1_on)
{
camera.fog_end = 1000 + 400 * sin(0.5 * total_frames);
wait (1);
}
}
else
{
fog_color = 0;
}
}
on_f = toggle_fog;
As we all know, we can set a certain fog color in Wed's File -> Map Properties -> Fog. It's an easy, convenient way to set up to 4 different colors for the fog; however, there is another way of setting the fog at runtime, using the predefined d3d_fogcolor1... d3d_fogcolor4 vectors. Function toggle_fog enables the fog for as long as fog_1 is set to 1; press the "F" key to toggle the fog on and off. When fog_1 is 1, we start the fog 10 quants away from the camera, we define a dark grey fog (RGB = 55 55 55) and then we enable it by setting fog_color = 1.
The while loop changes camera.fog_end depending on total_frames, the total number of frames that have passed since the game was started. Since the sine function can have values that range from -1 to +1, camera.fog_end will range from 1000 + 400 * (-1) and 1000 + 400 * (+1) which means that the player will see the fog moving back and forth 600... 1400 quants away from the camera.
Press the "F" key without activating the snow or the rain to see the effect in motion; I think that it looks interesting in conjunction with the rain or snow, but you can set a fixed camera.fog_end value if you want to.
ENTITY fading_ent
{
type = "fader.mdl";
layer = 10;
alpha = 0;
pan = 90;
flags = TRANSPARENT | VISIBLE;
view = camera;
x = 250; // 250 quants ahead of the view
y = 0;
z = 0;
}
function toggle_daynight()
{
day += 1;
day %= 2;
if (day)
{
while (day)
{
camera.ambient = min(100, camera.ambient + 1 * time_step);
fading_ent.alpha = max(0, fading_ent.alpha - 1 * time_step);
wait (1);
}
}
else // night
{
while (!day)
{
camera.ambient = max(-100, camera.ambient - 1 * time_step);
fading_ent.alpha = min(70, fading_ent.alpha + 1 * time_step);
wait (1);
}
}
}
on_d = toggle_daynight;
The last weather effect toggles the ambient between day and night. I have used an "ENTITY" definition here, as well as different camera.ambient values. If the "D" key is pressed for the very first time, day is set to 1 and the camera increases its ambient until it reaches 100, with the speed given by 1 * time_step. At the same time, the fading_ent entity, which is placed 250 quants in front of the camera, decreases its transparency until its alpha reaches zero (completely transparent).
If the player presses the "D" key one more time, it's night time: the camera decreases its ambient until it reaches -100, while fading_ent.alpha increases its value until it reaches 70 (almost opaque). It's a simple method that allows us to create day / night transitions easily; if your level contains a sky texture as a background, you can achieve the same effect by playing with the sky_color vector.
We have managed to cover a few weather effects in this workshop; I'm sure that you can create other interesting effects, like tornados and so on. How would we create a tornado effect, I hear you asking? We could use an invisible, passable, rotating cone model which generates particles from all its vertices, just like I did with the sphere from the previous workshop.