This month we are going to start exploring the wonderful world of Win32 API (application programming interface).
Just imagine that the API is an interface between you and Windows and allows you to use many functions that are built in the operation system.
How many functions are available for us? I don't know the exact answer, but you can explore them by opening the api.def file inside your GameStudio / lite-C installation folder.
I'd say that we have about 3,000 different functions at our disposal and Conitec is doing a great job at adding brand new functions to this list from time to time.
Aren't you excited to see how we can combine the power of lite-C with the built-in Windows functions? Let's start right away by opening and running winapi1.c
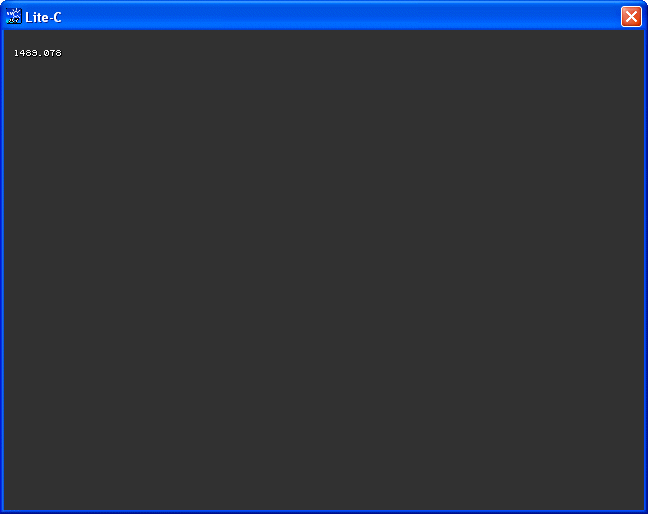
The first example displays the number of seconds that have passed since my computer was started (or restarted); I am using an API function named GetTickCount( ) for that.
#include <acknex.h>
#include <default.c>
#include <windows.h>
float time_passed;
STRING* time_str = "#30";
TEXT* time_txt =
{
layer = 15;
pos_x = 10;
pos_y = 20;
string (time_str);
flags = VISIBLE;
}
function main()
{
video_mode = 6; // create a program window of 640x480 pixels
vec_set(screen_color, vector(55, 55, 55)); // make the background color dark
while (1)
{
time_passed = GetTickCount() * 0.001;
str_for_num(time_str, time_passed);
wait (1);
}
}
Please note that I am including a new file - windows.h. That's the file where all these API functions reside, so make sure to include it whenever you want to use the API.
MSDN - Microsoft's Developer Network - is THE place where you can find the information regarding all these API functions; just google it and you'll find it.
We are declaring a "float" - that's a floating point variable which can store big numbers and their decimals; time_str is a string that can hold up to 30 characters.
Function main calls GetTickCount in a loop, multiplying the result with 0.001 in order to show us a value that looks like this: seconds.milliseconds.
The result is then converted to a string and displayed on the screen; don't forget that the digits aren't that useful when you want to display high-precision values.
Can we do something useful with GetTickCount? How about high precision timers, lap counters for racing games and so on?
All we need to do is to compute the GetTickCount difference between the two moments that interest us ("start" and "end" of the lap, etc).
Let's examine another, funnier example:
#include <acknex.h>
#include <default.c>
#include <windows.h>
function swap_them()
{
SwapMouseButton(TRUE);
}
function restore_them()
{
SwapMouseButton(FALSE);
}
function main()
{
video_mode = 6; // create a program window of 640x480 pixels
vec_set(screen_color, vector(55, 55, 55)); // make the background color dark
on_s = swap_them;
on_r = restore_them;
}
SwapMouseButton(TRUE) swaps the left and right mouse buttons, while SwapMouseButton(FALSE) restores them to their original state (look it up in MSDN).
Our example swaps the buttons when we press the "S" key and restores them as soon as we press the "R" key.
Run winapi2.c, and then press the "S" key; you will notice that you can't close the program window using the left mouse button anymore. Close it by clicking the "X" with the right mouse button, and then run the application again (using the right mouse button) and press "R"; everything should return to normal.
Before you start thinking that this function was created by Microsoft for prank lovers, you should know that button swapping was provided as a convenience to people who use the mouse with their left hands. As a conclusion, don't scare your dad using SwapMouseButton!
The following example allows us to create message boxes and respond to their buttons' press.
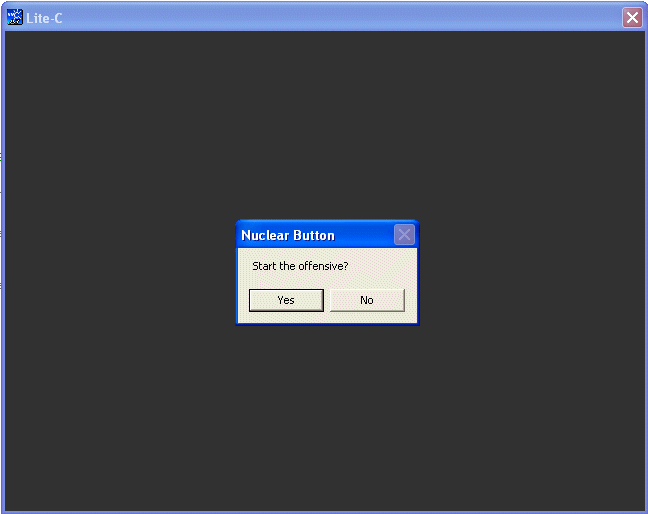
Let's examine the content of the winapi3.c file:
#include <acknex.h>
#include <default.c>
#include <windows.h>;
var answer;
STRING* decision_str = "#30";
TEXT* decision_txt =
{
layer = 15;
pos_x = 10;
pos_y = 20;
string (decision_str);
flags = VISIBLE;
}
function main()
{
video_mode = 6; // create a program window of 640x480 pixels
vec_set(screen_color, vector(55, 55, 55)); // make the background color dark
wait (-3);
answer = MessageBox(NULL, "Start the offensive?", "Nuclear Button", MB_YESNO);
if (answer == IDYES)
{
str_cpy(decision_str, "The war has started!");
}
else
{
str_cpy(decision_str, "The war has ended.");
}
}
As you see, MessageBox has a simple syntax: MessageBox(owner_window_handle, text_to_be_displayed, title, message_box_style). The handle to the owner window identifies the window that owns the message box; NULL tells the message box that it doesn't have a parent and is good enough most of the time.
The style of the message box can set the number of buttons (1...3), its icon, the default button and so on. Once again, MSDN is your best friend when it comes to API so don't forget to check it out.
In addition to that, a MessageBox can return a value such as IDYES, IDNO, IDABORT and so on, depending on what button was pressed. These are, in fact, numerical values, so you can store them inside a variable, and this is exactly what we are doing in the winapi3.c example.
If the player presses the "Yes" button, we display "The war has started!" on the screen; otherwise, if the player presses the "No" button, we display "The war has ended."
It's time for a very useful, and yet tiny example:
#include <acknex.h>
#include <default.c>
#include <windows.h>
FONT* morpheus_font = "Morpheus#36"; // new truetype font with a size of 36
TEXT* newfont_txt =
{
layer = 15;
pos_x = 10;
pos_y = 20;
font = morpheus_font;
string ("This demonstrates a new true type font");
}
function main()
{
video_mode = 6; // create a program window of 640x480 pixels
vec_set(screen_color, vector(55, 55, 55)); // make the background color dark
// AddFontResource("morpheus.ttf");
wait (3);
set(newfont_txt, VISIBLE);
}
Run winapi4.c and you should see something like this:
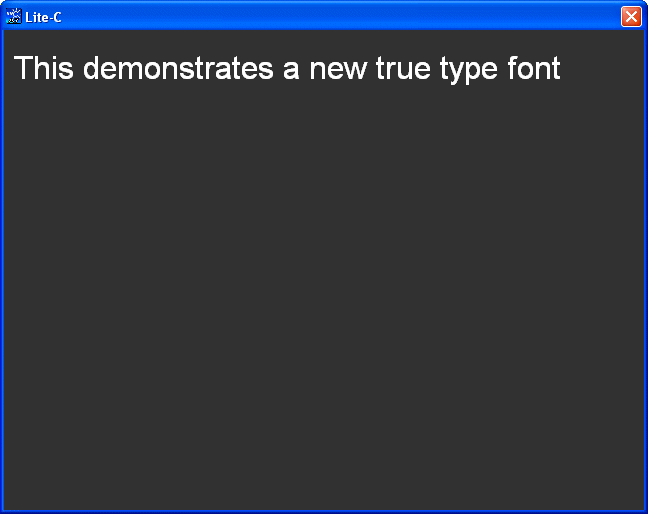
If this looks like an arial font to you... well, it is! We have defined a morpheus_font for our text, but Windows doesn't know it yet. Let's remove the comment in front of the AddFontResource line and then let's run the code again:
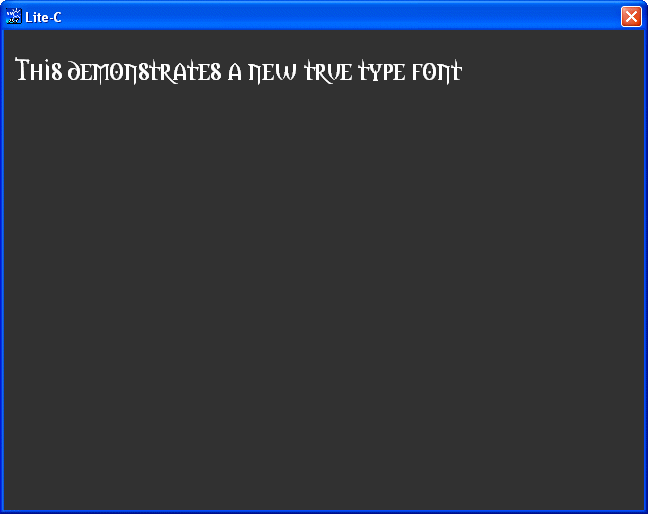
This time, AddFontResource has run, adding our font to the system font table. We can now use this font in our game, provided that we have placed the needed font file inside our game folder.
Now that you can use any true type font you can think of in your games, one word of advice: make sure that you have the right to use the fonts you like in your application. Take the morpheus font as an example: the readme that comes with it states that if you like the font, you have to send the author 5 USD. It's not much, but make sure that you aren't using some Star Wars font in your games without permission; otherwise, you might face a trial.
The last example can be found inside winapi5.c and lists all the logical drives from our computer:
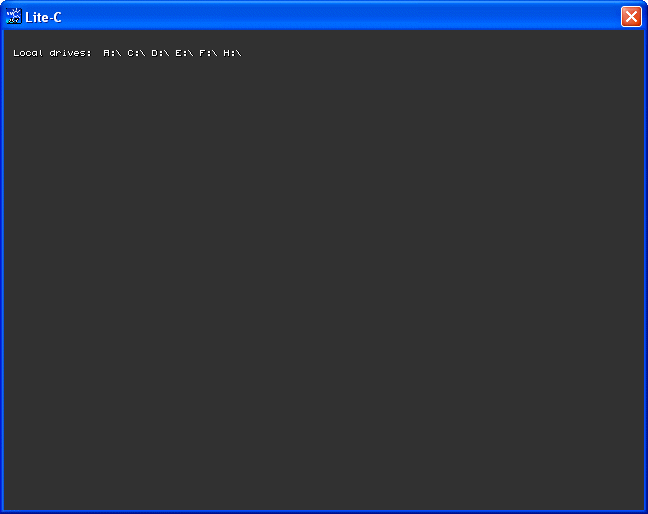
As you can see, I've got quite a few drives on my PC! Let's see how I have got their names.
#include <acknex.h>
#include <default.c>
#include <windows.h>
DWORD operation_result;
char* drives_str[1024];
char* p;
STRING* temp_str = "#30";
TEXT* drives_txt =
{
layer = 15;
pos_x = 10;
pos_y = 20;
string (temp_str);
flags = VISIBLE;
}
function main()
{
video_mode = 6; // create a program window of 640x480 pixels
vec_set(screen_color, vector(55, 55, 55)); // make the background color dark
// the function below would return zero if the operation wouldn't succeed
if(operation_result = GetLogicalDriveStrings(1024, drives_str)) // the operation has succeeded?
{
p = drives_str;
str_cpy(temp_str, "Local drives: ");
while (*p)
{
str_cat(temp_str, p);
str_cat(temp_str, " ");
p += 4;
}
}
else
{
str_cpy(temp_str, "The operation has failed");
}
}
First of all, we are defining a DWORD, a 32-bit integer that can only store positive values; we will get the result of the GetLogicalDriveStrings operation inside it. Then, we are defining two pointers to char. The first one will point to an area that can hold 1024 characters, while the second... but let's not spoil the surprise.
The function that gives us the names of all the logical drives that are installed on our computer is named GetLogicalDriveStrings and has two arguments: the maximum size of the buffer that will store the drive letters and the actual string buffer that will store them (once again, this is MSDN stuff, don't ask me why they did it this way). If the operation succeeds, operation_result is set to a non-zero value, the "if" branch gets to be executed and drives_str will contain something like this:
a:\<null>c:\<null>d:\<null><null>
In this example, the computer has the a:\ c:\ and d:\ drives and the double <null> character marks the end of the string. The bad news is this: the resulting string buffer contains quite a few <null> characters, which makes it difficult for us to display all the drives on the screen using lite-C.
Why is that, I hear you asking? Well, if we would try something like "str_cpy(temp_str, drives_str);" in order to display the logical drives on the screen, we would end up with something like this:
a:\
because the first <null> character would trick str_cpy into thinking that it has reached the end of the string, ignoring the c:\ and d:\ drives. We have to find a way and jump over those <null> characters and the solution, if you have read my recent workshop on pointers, is quite simple - we can use a pointer to char (our p) to do just that.
I have a great, innovative digital camera, so I have taken a snapshot of your computer's memory with it and here's how drives_str looks like:

How can we extract all the drives letter (a, c, d, e) from the memory, ignoring the null characters that would confuse our str-based instructions? Let's take a look at the relevant code once again:
p = drives_str;
str_cpy(temp_str, "Local drives: ");
while (*p)
{
str_cat(temp_str, p);
str_cat(temp_str, " ");
p += 4;
}
The first line of code assigns the starting address of drives_str (the first cell in our picture) to the pointer named p. If you don't know how this works, read Aum70's workshop and then return here.
Our while loop runs for as long as the pointer is valid (until it reaches the "real", double <null>). We add the drive letters to temp_str one by one, starting with a:\ (str_cat will believe that drives_str ends whenever it encounters a <null>), we add a space character after that in order to make the output prettier, and then we jump four characters to the right, avoiding the confusing <null> character every time.
The result looks like this: "Local drives: A:\ C:\ D:\ E:\" and can be manipulated even further. We could use GetDriveType to detect the cd-rom letter and so on; this, in fact, could be your homework, if you wouldn't be soooo lazy... Oh, and don't forget to check out the "Plug and play" section of the magazine if you want to explore even more, powerful API stuff.