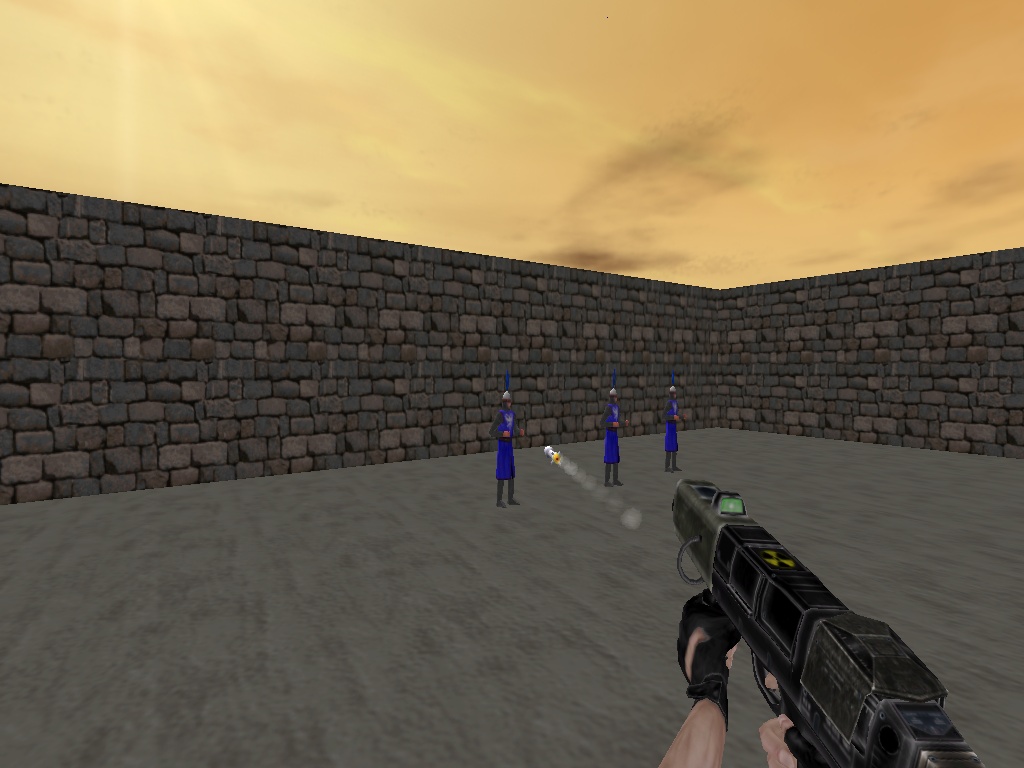
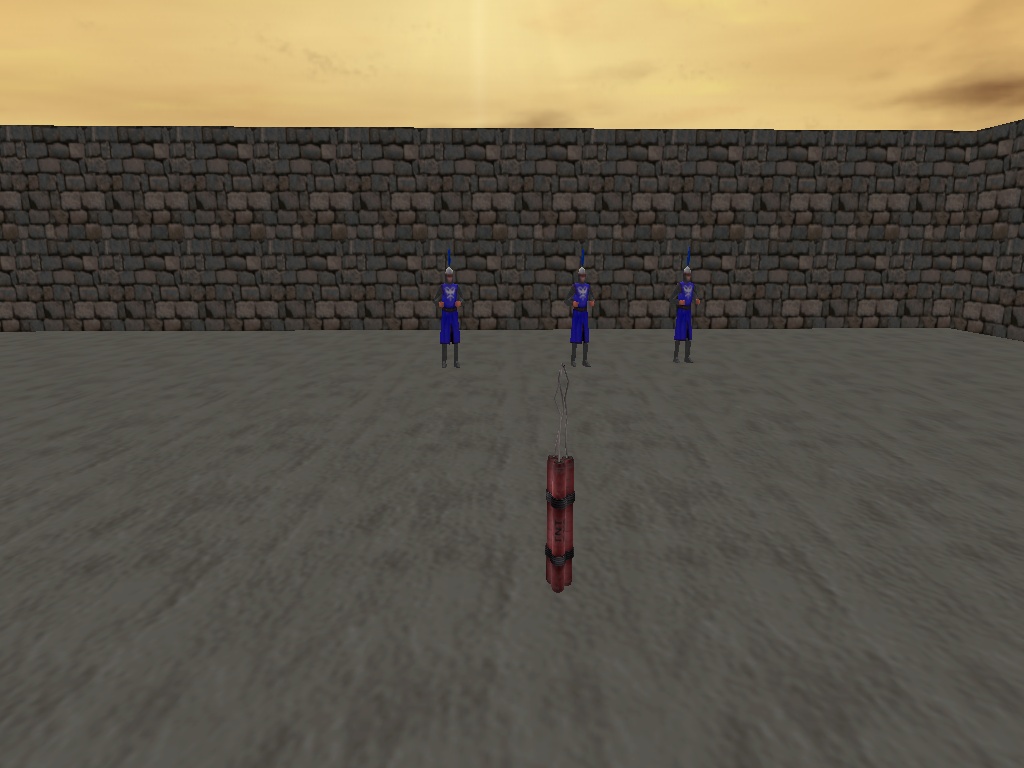
This month we will use two brand new weapons: a rocket launcher and dynamite, baby! Both types of weapons will use visible entities for their projectiles, but while the rocket will kill the enemies only if it collides with them, just like in real life, the dynamite can kill any enemy that is close enough to it.
Let's start with the rocket launcher; these weapons are a bit more complicated, but I'll walk you through all the code, so it's going to be an easy ride. Btw, the code for the rocket launcher can be found inside the \weapons4 folder that comes with this month's resources.
action rocket_launcher() // attach this action to your rocket launcher
{
set (my, PASSABLE);
while (!player) {wait (1);}
while (vec_dist(player.x, my.x) > 150) // wait until the player has come close to the rocket launcher
{
my.pan += 3 * time_step; // rotate until the player picks up the rocket launcher
wait (1);
}
snd_play(gotweapon_wav, 80, 0); // play the "got the weapon" sound
rocket_weapon = ent_createlayer("rocketgunhands.mdl", 0, 20); // create the rocket launcher entity on the 20th view layer
rocket_weapon.flags2 |= SHOW; // show the rocket launcher entity
rocket_weapon.x = 50; // 55 quants ahead of the view, play with this value
rocket_weapon.y = -25; // 25 quants towards the right side of the screen, play with this value
rocket_weapon.z = -90; // 90 quants below, play with this value
rocket_weapon.pan = 5;
wait (1);
ent_remove (my); // remove the rocket launcher from the ground
}
The rocket_launcher action is attached to the rocket launched model that is placed in the level; it makes it passable, and then rotates around its pan angle, waiting for the player to come closer than 150 quants in order to be picked up. As soon as this happens, we play the gotweapon_wav sound, and then we create a new "view" entity that contains the rocket launcher model and a pair of hands - you can thank Blattsalat for his great models. We assign the hands & rocket launcher the "rocket_weapon" pointer because we will use them in other functions, and then we make them visible and set their x y z positions in relation with the center of the screen. Since the weapon is placed on the right side of the screen, we rotate it towards left by 5 degrees by changing its pan angle. Then, we wait for a frame and we remove the rocket launcher model that was rotating above the ground because we don't need it anymore.
function gun_startup()
{
on_mouse_left = fire_rockets; // call this function when the left mouse button is pressed
}
function fire_rockets() // this function is triggered by any left mouse button push
{
VECTOR rocket_origin;
if (!rocket_weapon) return; // don't fire rockets if the player didn't pick up the rocket launcher yet
if (launcher_firing) return; // don't fire another rocket before reloading the launcher
launcher_firing = 1;
snd_play(rocketfired_wav, 100, 0); // rocket fired sound effect
vec_set(rocket_origin.x, vector(80, -22, -18)); // the origin of the rocket is offset by 80, -22 and 18 quants in relation to camera.x
vec_rotate(rocket_origin.x, camera.pan);
vec_add(rocket_origin.x, camera.x);
ent_create(rocket_mdl, rocket_origin, move_rocket);
anim_factor = 0;
while (anim_factor < 100)
{
ent_animate(rocket_weapon, "fire", anim_factor, ANM_CYCLE); // play the weapon "fire" animation
anim_factor += 10 * time_step; // 10 gives the firing animation speed
wait (1);
}
anim_factor = 0;
while (anim_factor < 95) // needs to be smaller than 100 here to fix a small weapon animation glitch
{
ent_animate(rocket_weapon, "reload", anim_factor, ANM_CYCLE); // play the weapon "reload" animation
anim_factor += 3 * time_step; // 3 gives the weapon reload animation speed
wait (1);
}
launcher_firing = 0; // we can fire the rocket launcher again
}
A tiny startup function will tell the engine that it is supposed to run function fire_rockets and time the player presses the left mouse button. That function includes two lines of code that make sure that we can't fire before picking up the weapon or before reloading it. Then, we play a rocketfired_wav sound and we set the position of a vector that is offset by 80, -22 and -18 quants on the x, y, z axis in relation to the center of the screen; we have to do this because our rocket launcher is placed sideways, so the rockets can't be generated from the center of the screen. Each rocket will start a move_rocket function, which tells it what to do; the rest of the code animates the rocket launcher, making it play its "fire", and then its
"reload" animation frames.
function move_rocket()
{
set (my, PASSABLE); // don't collide with the player
VECTOR rocket_speed;
var tempo_pos;
my.pan = camera.pan + 5;
my.tilt = camera.tilt;
wait (1);
my.emask |= (ENABLE_ENTITY|ENABLE_IMPACT|ENABLE_BLOCK);
my.event = remove_rocket;
my.skill40 = 1234; // I'm a rocket
my.skill20 = 0;
while (my.skill20 < 5000)
{
if (my.skill20 > 2) // the rocket has moved away from the player? Then let's reset its passable flag
reset (my, PASSABLE);
effect (rocket_trail, 1, my.x, normal); // generate particle trails for the rocket
my.roll += 20 * time_step;
rocket_speed.x = 40 * time_step;
rocket_speed.y = 0;
rocket_speed.z = 0;
my.skill20 += 1 * time_step;
c_move (my, rocket_speed, nullvector, IGNORE_PASSABLE);
wait (1);
}
remove_rocket();
}
The function that drives the rockets is quite simple and starts by making the rockets passable. Why did I choose to do that? Well, I wanted you to get to see the rocket, so I have set a small speed for it; this means that the player can collide with the rocket if it moves forward while firing. The solution to this problem is to increase the speed of the rocket (didn't want to do that) or to make it passable for a few frames, until it moves away from the player. As an alternative, you could reduce player's movement speed.
Anyway, as I said, we make the rocket passable, we set its pan to a value that matches the pan of the rocket launcher "view" entity, and then we make it sensitive to collision with level blocks and entity, setting its event to be function remove_rocket. We uniquely identify the rockets by setting their skill40 to 1234 (useful if you create a more complex weapon system) and then we move them using a while loop.
As soon as my.skill20 exceeds 2 (play with this value) we reset the "passable" flag for the rocket, and then we start to move it with the speed given by 40 * time_step, while rotating it around its roll angle with the speed given by 20 * time_step. Also, we are generating smoke trail particles each frame using a simple particle effect. The loop will stop if the rocket collides with something or if my.skill20 exceeds 5000 - we don't want our rocket to use valuable computer resources if it has missed its target and now moves towards the sky, etc.
function remove_rocket()
{
if (you)
you.skill99 = 0; // kill the enemies from the first shot
my.event = NULL;
set(my, PASSABLE | INVISIBLE);
my.skill20 = 5000; // stop the rocket for good
wait (1);
ent_playsound (my, destroyed_wav, 1000); // play the explosion sound
ent_create (explo13_tga, my.x, explode_rocket);
wait (-1);
ent_remove(my); // now remove it
}
The tiny function above makes sure that our enemies die instantly if they are hit by a rocket; their health is stored inside their skill99. We make the rocket passable and invisible, we stop its movement loop, and then we play an explosion sound and an explosion animation. Finally, we remove the invisible, passable rocket after one second; we need to keep it there for as long as we need the sound to play.
function explode_rocket()
{
set(my, BRIGHT | PASSABLE);
VECTOR temp;
my.frame = 0;
wait (1);
while (my.frame < 13) // go through all the animation frames
{
my.frame += 2 * time_step;
vec_set (temp.x, camera.x);
vec_sub (temp.x, my.x);
vec_to_angle (my.pan, temp); // turn towards the player to make sure that the explo looks great
wait (1);
}
ent_remove(me); // now remove the explosion sprite
}
The explore_rocket function drives an animated, passable sprite, going through its 13 animation frames and telling it to face the camera (you) at all times using a vec_to_angle instruction.
function rocket_trail(PARTICLE *p) // particle trail for the rocket
{
p->vel_x = 0;
p->vel_y = 0;
p->vel_z = 0.1 * random(3);
p.alpha = 10 + random(40);
p.bmap = rocket_trail_tga;
p.size = 5;
p.flags |= (BRIGHT | MOVE);
p.event = fade_rocket_particles;
}
function fade_rocket_particles(PARTICLE *p)
{
p.alpha -= 4 * time_step;
if (p.alpha < 0) {p.lifespan = 0;}
}
These last two functions are your standard particle effects functions, with a slightly positive z speed to simulate the way in which the smoke tends to move up while you are firing a rocket. See? I told you that it wasn't so complicated!

Time to move on to the following weapon (the dynamite) - the project can be found in the \weapons5 folder, so open the weapons5.wmp level and then run the main.c script to start it.

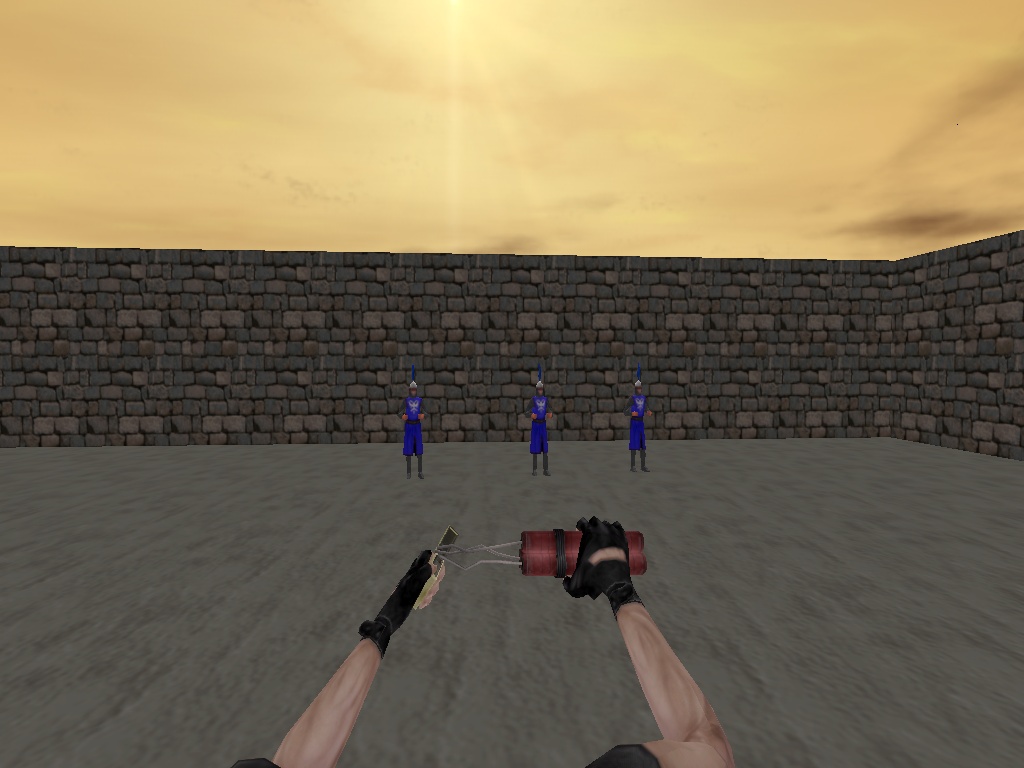
Move close to the dynamite to pick it up; apparently, nothing will happen, but if you press the left mouse button you'll be able to throw it.

First of all, the dynamite is lit, and then it is thrown away, killing all the enemies that happen to be close enough to it.

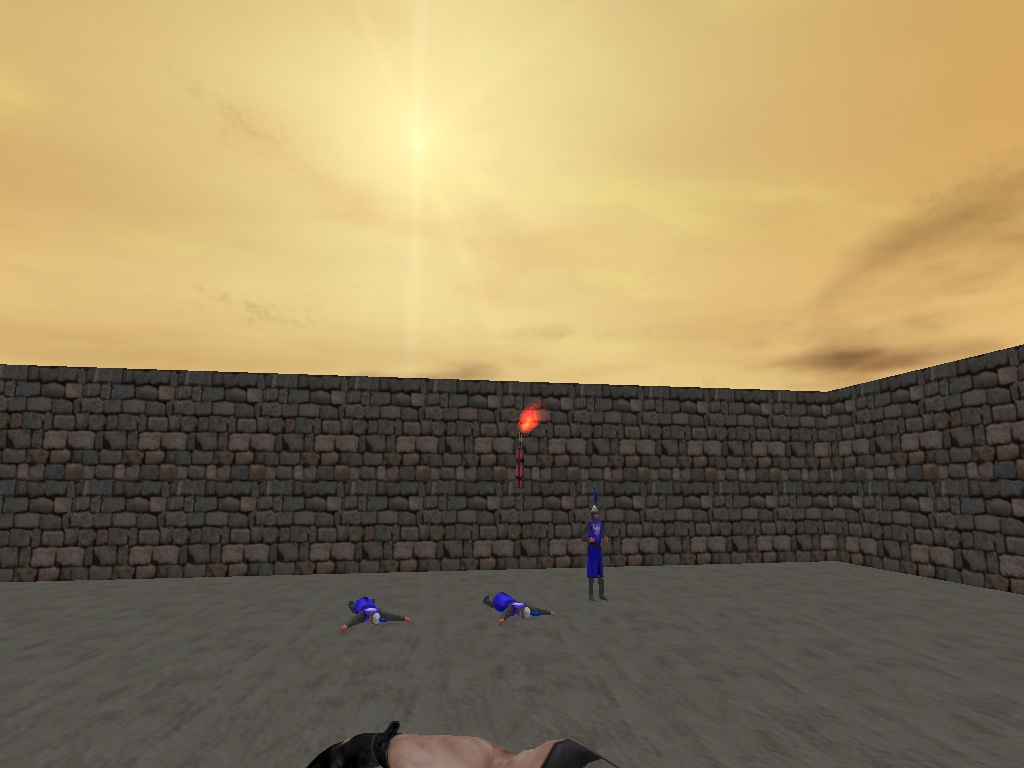
As you can see, my first dynamite has killed two enemies and the one that's flying right now will probably kill the 3rd one as well, even though it will land at a distance from it. And yes, those fire particles move together with the dynamite, so let's see how it's done.
action dynamite_launcher() // attach this action to your dynamite
{
set (my, PASSABLE);
while (!player) {wait (1);}
while (vec_dist(player.x, my.x) > 50) // wait until the player has come close to the dynamite
{
my.pan += 3 * time_step; // rotate until the player picks up the dynamite
wait (1);
}
snd_play(gotweapon_wav, 80, 0); // play the "got the weapon" sound
dynamite_weapon = ent_createlayer("dynamitehands.mdl", 0, 20); // create the dynamite entity on the 20th view layer
dynamite_weapon.flags2 |= SHOW; // show the dynamite+hands entity
dynamite_weapon.x = 60; // 55 quants ahead of the view, play with this value
dynamite_weapon.y = -5; // 25 quants towards the right side of the screen, play with this value
dynamite_weapon.z = -60; // 30 quants below, play with this value
dynamite_weapon.tilt = 20;
wait (1);
ent_remove (my); // remove the dynamite model from the ground
}
This action looks suspiciously similar with the one that was used for the rocket launcher, so I won't discuss it - they're virtually identical!
function gun_startup()
{
on_mouse_left = fire_dynamites; // call this function when the left mouse button is pressed
}
function fire_dynamites() // this function is triggered by any left mouse button push
{
var firing_once = 1;
VECTOR dynamite_origin, fire_pos;
if (!dynamite_weapon) return; // don't fire bullets if the player didn't pick up the machine gun yet
if (launcher_firing) return; // don't fire another dynamite before reloading
launcher_firing = 1;
vec_set(dynamite_origin.x, vector(80, -22, -18)); // the origin of the dynamite is offset by 80, -22 and 18 quants in relation to camera.x
vec_rotate(dynamite_origin.x, camera.pan);
vec_add(dynamite_origin.x, camera.x);
anim_factor = 0;
while (anim_factor < 97) // needs to be smaller than 100 here to fix a small weapon animation glitch
{
ent_animate(dynamite_weapon, "lit", anim_factor, ANM_CYCLE); // play the weapon "reload" animation
anim_factor += 3 * time_step; // 3 gives the weapon reload animation speed
wait (1);
}
snd_play(dynamitefired_wav, 100, 0); // dynamite throwing sound effect
anim_factor = 0;
while (anim_factor < 100) // needs to be smaller than 100 here to fix a small weapon animation glitch
{
ent_animate(dynamite_weapon, "throw", anim_factor, ANM_CYCLE); // play the weapon "reload" animation
if ((anim_factor > 20) && (firing_once))
{
firing_once = 0; // don't create several dynamites for a single left mouse button push
ent_create(dynamite_mdl, dynamite_origin, move_dynamite);
}
anim_factor += 5 * time_step; // 5 gives the throwing animation speed
wait (1);
}
launcher_firing = 0; // we can use the dynamite again
firing_once = 1; // the firing can begin again
}
Function gun_startup is very similar with the one that was used for the rocket launcher, but function fire_dynamites is a bit different, so we'll go through it. The main difference is the fact that the dynamite plays its full "lit" animation, and then it plays its "throw" animation. When the code has played about 20% from the "throw" animation frames (anim_factor > 20), we create a dynamite_mdl model, asigning it the move_dynamite function. We make sure to create a single dynamite per throw by using a firing_once variable that is set to 1 at the end of the function.
function move_dynamite()
{
set (my, PASSABLE); // don't collide with the player
VECTOR dynamite_speed, fire_pos;
var tempo_pos;
var vertical_speed = 0;
my.pan = camera.pan + 5;
my.tilt = camera.tilt;
wait (1);
my.emask |= (ENABLE_ENTITY|ENABLE_IMPACT|ENABLE_BLOCK);
my.event = remove_dynamite;
my.skill40 = 1235; // I'm a dynamite
my.skill20 = 0;
while (my.skill20 < 5000)
{
vec_for_vertex (fire_pos, my, 640);
effect (dynamite_fire, 2, fire_pos.x, normal); // generate fire particles
vertical_speed += 15 * time_step;
if (my.skill20 > 2) // the dynamite has moved away from the player? Then let's reset its passable flag
reset (my, PASSABLE);
dynamite_speed.x = 40 * time_step;
dynamite_speed.y = 0;
dynamite_speed.z = (camera.tilt - vertical_speed) * 0.1 * time_step;
my.skill20 += 1 * time_step;
c_move (my, dynamite_speed, nullvector, IGNORE_PASSABLE);
wait (1);
}
remove_dynamite();
}
A dynamite should have a different trajectory when compared with a rocket, right? Function move_dynamite takes that into account, setting dynamite_speed.z accordingly. We use the camera.tilt value for the vertical speed at first (looking upwards will help you throw the dynamite at longer distances), but then the vertical_speed variable will do its job, pulling the dynamite towards the ground.
function remove_dynamite()
{
if (you)
you.skill99 = 0; // kill the enemies from the first shot
my.event = NULL;
set(my, PASSABLE | INVISIBLE);
my.skill20 = 5000; // stop the dynamite for good
c_scan(my.x, my.pan, vector(360, 180, 200), IGNORE_ME | SCAN_ENTS); // play with 200, it give the enemy detection range
wait (1);
ent_playsound (my, exploded_wav, 1000); // play the explosion sound
ent_create (explo13_tga, my.x, explode_dynamite);
wait (-1);
ent_remove(my); // now remove it
}
When the dynamite hits the ground (or any entity), function remove_dynamite will run. First of all, if the dynamite has hit an enemy, it kills it instantly by setting its skill99 (health) to zero. Then, we stop the dynamite model, making it passable and invisible. A c_scan instruction will detect all the enemies that are closer than 200 quants, triggering their event functions and thus damaging them; you will see how this works soon. Finally, we play a sound, we create an explosion using an animated sprite, we wait for a second and then we remove the dynamite model for good.
function explode_dynamite()
{
set(my, BRIGHT | PASSABLE);
VECTOR temp;
my.frame = 0;
wait (1);
while (my.frame < 13) // go through all the animation frames
{
my.frame += 2 * time_step;
vec_set (temp.x, camera.x);
vec_sub (temp.x, my.x);
vec_to_angle (my.pan, temp); // turn towards the player to make sure that the explo looks great
wait (1);
}
set (my, INVISIBLE); // hide the explosion sprite, keep the sound playing
wait (-4); // for 4 more seconds
ent_remove(me); // now remove the explosion sprite
}
The explosion function uses the same sprite with 13 animation frames - there's nothing new here, so let's move on.
function fade_fire(PARTICLE *p)
{
p.alpha -= 25 * time_step;
if (p.alpha < 0) {p.lifespan = 0;}
}
function dynamite_fire(PARTICLE *p)
{
p->vel_x = 0;
p->vel_y = 0;
p->vel_z = 0.1 * random(3);
p.alpha = 10 + random(40);
p.bmap = fire_tga;
p.size = 10;
p.flags |= (BRIGHT | MOVE);
p.event = fade_fire;
}
Well, the particle effect functions are very similar with the ones that were used for the rocket launcher smoke trail; I would only note the fact that the fading speed is much bigger (25 * time_step) because we want the flame to look as natural as possible.
We are coming close to the end now, but I want to share with you one more thing. I had to change the enemy code a bit, in order to make it work properly with c_scan-based weapons as well, so we'll discuss it below.
action dummy_enemies() // attach this action to your helpless enemies
{
my.emask |= (ENABLE_SCAN); // these enemies are sensitive to c_scan instructions
my.event = decrease_health;
set (my, POLYGON);
var anim_percentage = 0;
my.skill99 = 100; // these guys are tougher
while (my.skill99 > 0)
{
ent_animate(my, "stand", anim_percentage, ANM_CYCLE); // play the "stand" animation in a loop
anim_percentage += 3 * time_step; // "3" controls the "stand" animation speed
wait (1);
}
// the enemy is dead here
anim_percentage = 0;
while (anim_percentage < 100)
{
ent_animate(my, "death", anim_percentage, NULL); // play the "death" animation
anim_percentage += 4 * time_step; // "4" controls the "death" animation speed
wait (1);
}
set (my, PASSABLE); // allow the player to pass through the corpse now
}
This time the enemies were made sensitive to c_scan instructions by setting their ENABLE_SCAN flag; their event will be the function named decrease_health. These enemies are tougher because they have 100 health points (skill99 = 100) and they play their "stand" animation until their skill99 reaches zero; if this happens, they play the "death" animation and become passable.
function decrease_health()
{
if (event_type == EVENT_SCAN)
{
my.skill99 -= vec_dist(my.x, you.x) / 2; // reduce the enemy's health depending on the distance between it and the dynamite
}
}
The enemy event function checks if the event was triggered by a c_scan instruction indeed; if this is the case, skill99 is decreased with a value that is proportional with the distance between the dynamite and the enemy. The closer the dynamite will be, the bigger the enemy damage.
This is all for this month! Next time we will create a few more interesting weapons, wrapping up the series.