The month we are going to look at two simple, and yet powerful c_trace usage examples, which add gravity to player's entity and allow us to build a basic, and yet fully functional c_trace-based weapon. Let's start by opening c_trace3.c and running it.
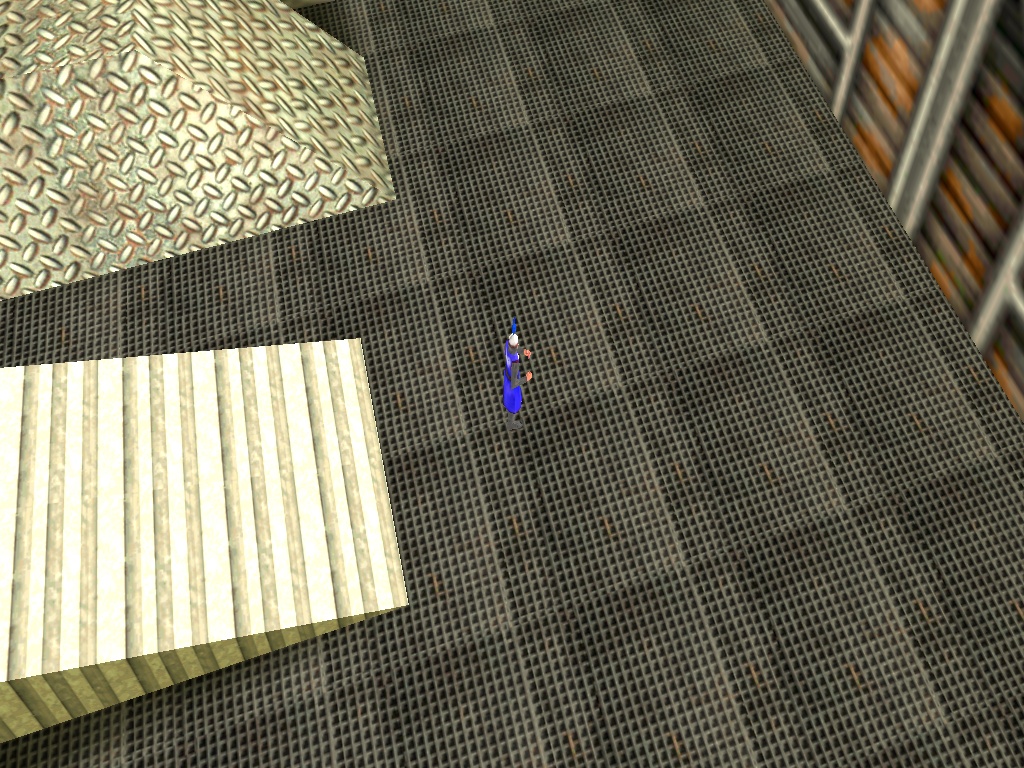
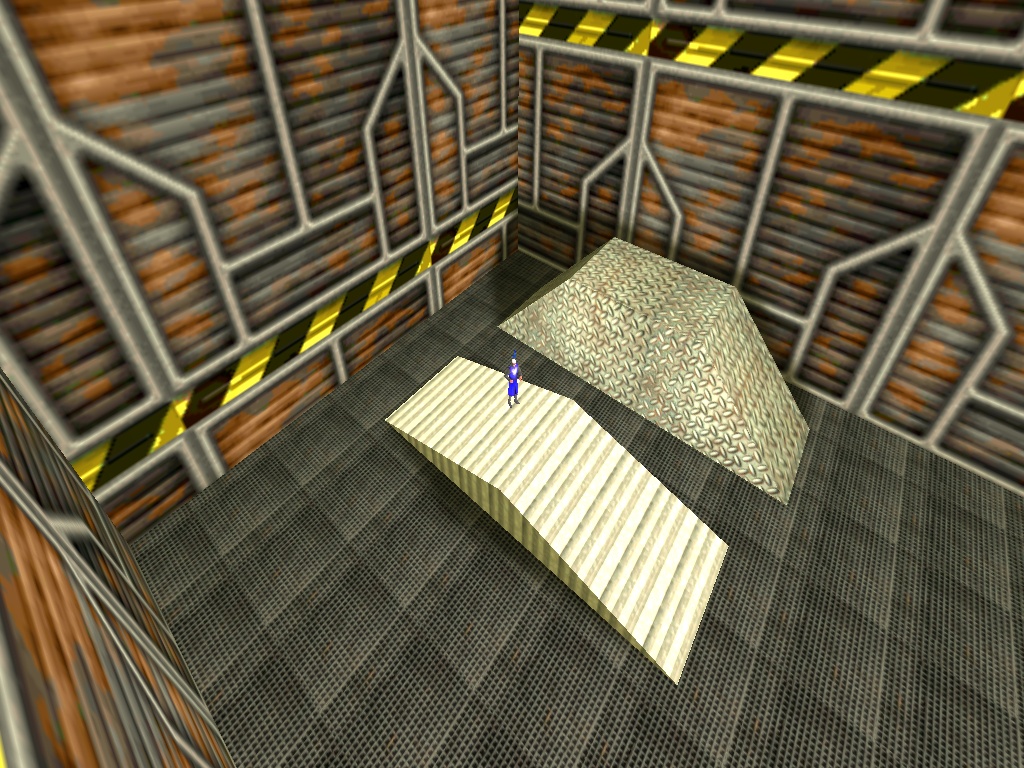
Move the player around using the "W" and "S" keys and change its pan angle with "A" and "D". Press the left or right mouse buttons to zoom in or out. The level includes a few weird-looking blocks; make the player step onto them and you will see that it manages to adjust its height properly, regardless of the angle of the slopes.
If you like short, simple snippets you're going to love the content of ctrace3.c:
STRING* ctrace3_wmb = "ctrace3.wmb";
function main()
{
video_mode = 8; // 1024x768 pixels
video_screen = 1; // start the engine in full screen
level_load (ctrace3_wmb);
while (!player) {wait (1);} // wait until the player appears in the level
camera.x = 300; // set the position of the camera
camera.y = -400; // on the x, y, z axis
camera.z = 400;
VECTOR temp;
while (1)
{
vec_set(temp, player.x);
vec_sub(temp, camera.x);
vec_to_angle(camera.pan, temp); // rotate the camera toward the player
camera.arc -= 2 * (mouse_left - mouse_right) * time_step; // zoom in / zoom out
camera.arc = clamp(camera.arc, 10, 100); // don't allow camera.arc to go below 10 or to exceed 100
wait (1);
}
}
What are we doing here? We're loading the level, and then we are setting a fixed position for the camera (x = 300, y = -400, z = 400). Then, we use vec_to_angle to rotate the camera towards the player at all times, keeping it in the center of the screen no matter where it goes. Finally, we increase or decrease camera.arc depending on the status of the mouse_left or mouse_right buttons, limiting it to a value that ranges from 10 to 100.
What about the c_trace stuff, I hear you asking? There you go:
action players_code()
{
var anim_percentage; // animation percentage
VECTOR movement_speed, temp;
var distance_to_ground; // will store the distance between player's origin and the ground
player = my; // I'm the player
while (1)
{
my.pan += 6 * (key_a - key_d) * time_step; // rotate the player using the "A" and "D" keys
vec_set (temp, my.x); // copy player's position to temp
temp.z -= 5000; // set temp.z 5000 quants below player's origin
// trace between player's origin and temp (5000 quants below player's origin on the z axis) using a thick c_trace ray
distance_to_ground = c_trace (my.x, temp.x, IGNORE_ME | USE_BOX);
movement_speed.x = 5 * (key_w - key_s) * time_step; // move the player using "W" and "S"
movement_speed.y = 0; // don't allow sideway movement
movement_speed.z = - (distance_to_ground - 17); // 17 = experimental value
movement_speed.z = maxv (-35 * time_step, movement_speed.z); // 35 = falling speed
c_move (my, movement_speed.x, nullvector, GLIDE); // move the player
if (key_w + key_s == 0) // the player isn't moving?
{
ent_animate(my, "stand", anim_percentage, ANM_CYCLE); // play the "stand" animation
anim_percentage += 2 * time_step; // 2 = stand animation speed
}
else // the player is moving?
{
ent_animate(my, "walk", anim_percentage, ANM_CYCLE); // play the "walk" animation
anim_percentage += 7 * time_step; // 7 = walk animation speed
}
wait (1);
}
}
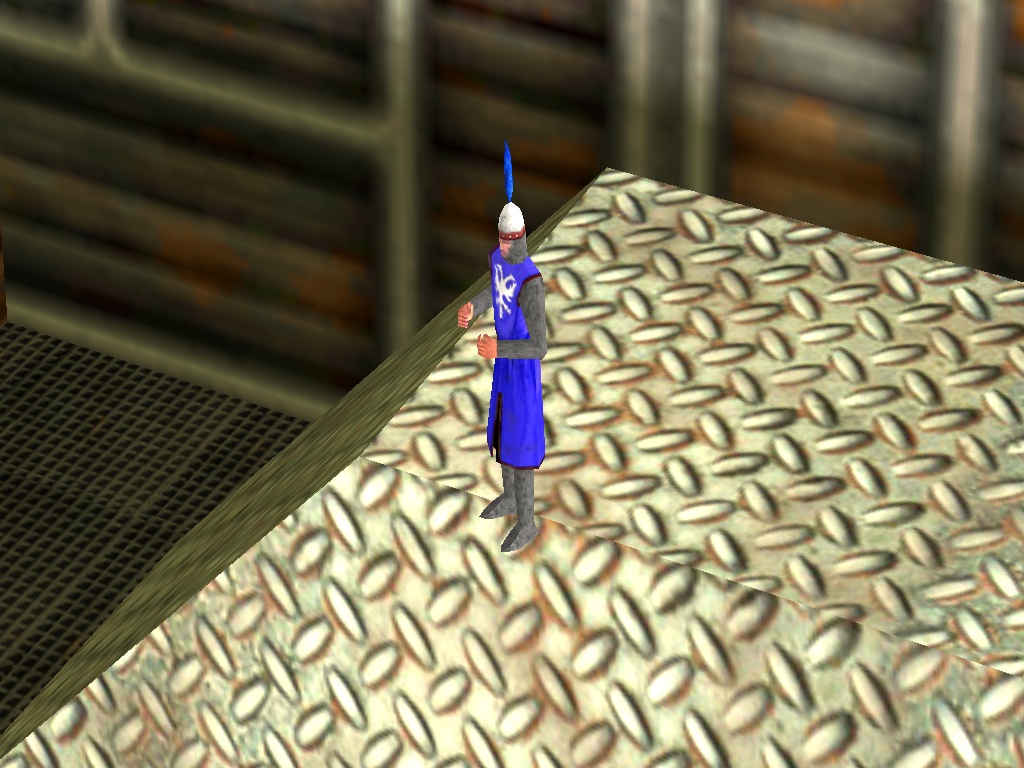
This is your typical, simple player movement code; we can change the pan angle using "A" and "D", and then we trace between player's origin (my.x) and temp.x, a vector that has similar coordinates with player's origin, but has a z value that's 5,000 quants less than player's z value. One thing to note: we are using a thick c_trace ray (USE_BOX) because this will allow us to keep the player at the proper height even if one of its legs doesn't stand on firm ground anymore, just like in the picture below.
But how does this gravity work? Here are the relevant lines of code, pasted from the action above for your (and my) convenience:
distance_to_ground = c_trace (my.x, temp.x, IGNORE_ME | USE_BOX);
movement_speed.x = 5 * (key_w - key_s) * time_step; // move the player using "W" and "S"
movement_speed.y = 0; // don't allow sideway movement
movement_speed.z = - (distance_to_ground - 17); // 17 = experimental value
movement_speed.z = maxv (-35 * time_step, movement_speed.z); // 35 = falling speed
c_move (my, movement_speed.x, nullvector, GLIDE); // move the player
First of all, we are using a c_trace instruction to measure the distance between player's origin and the ground surface below it. We are going to set the z (vertical) component of the movement_speed vector to a proper negative value, which will ensure that player's feet continue to be dragged towards the floor until they actually touch it. This process would be instantaneous, but in this example the falling speed is limited by -35 * time_step. Oh, and play with 17 until player's feet actually touch the ground (the value will be different depending on your player model).
if (key_w + key_s == 0) // the player isn't moving?
{
ent_animate(my, "stand", anim_percentage, ANM_CYCLE); // play the "stand" animation
anim_percentage += 2 * time_step; // 2 = stand animation speed
}
else // the player is moving?
{
ent_animate(my, "walk", anim_percentage, ANM_CYCLE); // play the "walk" animation
anim_percentage += 7 * time_step; // 7 = walk animation speed
}
These last few lines of code inside player's action animate the model, making it play its "stand" or "walk" animations depending on the status of the "W" and "S" keys. That's all!
The second example implements a simple, and yet fully functional c_trace weapon; let's open the ctrace4.c script and run it:
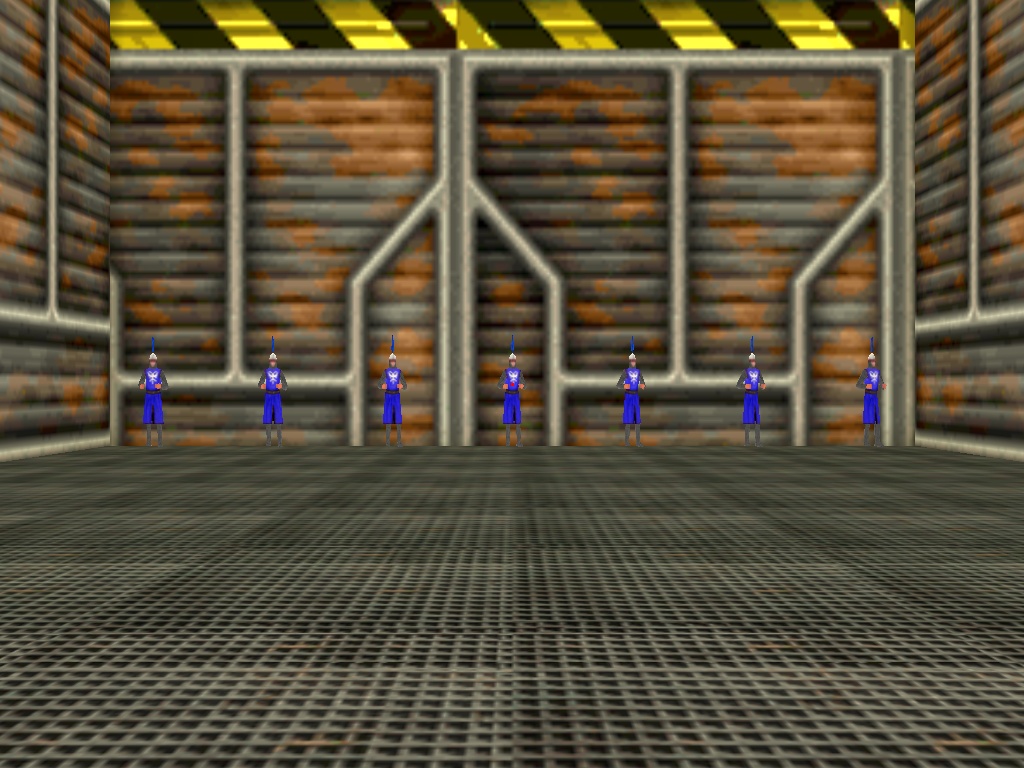
This example is using a 1st person camera, so feel free to move around using the WSAD keys and rotate the view using the mouse. But wait! What's with that tiny red dot in front of the camera? Well, that is our weapon's crosshair, and if you move it over one of those innocent models and click the left mouse button you are going to kill it!
The code is (once again) very simple:
action players_code()
{
var anim_percentage; // animation percentage
VECTOR movement_speed, target_pos, temp;
var distance_to_ground; // will store the distance between player's origin and the ground
player = my; // I'm the player
set (my, INVISIBLE); // we are using a 1st person camera, so there's no need to see the player model
while (1)
{
my.pan -= 7 * mouse_force.x * time_step;
vec_set (temp, my.x); // copy player's position to temp
temp.z -= 5000; // set temp.z 5000 quants below player's origin
// trace between player's origin and temp (5000 quants below player's origin on the z axis) using a thick c_trace ray
distance_to_ground = c_trace (my.x, temp.x, IGNORE_ME | USE_BOX); // compute the distance between player's model origin and the ground below it
movement_speed.x = 8 * (key_w - key_s) * time_step; // move the player using "W" and "S"
movement_speed.y = 5 * (key_a - key_d) * time_step; // sideway movement is done with "A" and "D"
movement_speed.z = - (distance_to_ground - 17); // 17 = experimental value, keeps player's feet on the ground
movement_speed.z = maxv (-35 * time_step, movement_speed.z); // 35 = falling speed
c_move (my, movement_speed.x, nullvector, GLIDE); // move the player
vec_set(camera.x, my.x);
camera.z += 20;
camera.pan = my.pan;
camera.tilt += 5 * mouse_force.y * time_step;
vec_set (target_pos.x, vector(10000, 0, 0)); // trace up to 10,000 quants in front of the player
vec_rotate (target_pos.x, camera.pan); // regardless of its orientation
vec_add (target_pos.x, camera.x);
c_trace (camera.x, target_pos.x, ACTIVATE_SHOOT);
ent_create("target.mdl", hit.x, create_target); // create a tiny red target model
wait (1);
}
}
You will notice that player's code is almost identical with the one used inside ctrace3.c; the most important difference is given by these lines of code:
vec_set (target_pos.x, vector(10000, 0, 0)); // trace up to 10,000 quants in front of the player
vec_rotate (target_pos.x, camera.pan); // regardless of its orientation
vec_add (target_pos.x, camera.x);
c_trace (camera.x, target_pos.x, ACTIVATE_SHOOT);
ent_create("target.mdl", hit.x, create_target); // create a tiny red target model
The first 3 lines create a target vector named target_pos that's placed 10,000 quants in front of the player's eyes, regardless of its orientation; we did something similar in last month's workshop. Then, we trace between the camera and that target_pos vector, using a tracing mode (ACTIVATE_SHOOT) that will trigger the event of the entities that are sensitive to c_trace instructions. Finally, we create a target.mdl model (our tiny red dot) and assign it a simple function named create_target:
function create_target()
{
set(my, PASSABLE);
wait (1);
ent_remove(my);
}
This simple function will make the red dot passable, display it for 1 frame, and then it will remove it because player's action will create a tiny red dot model each and every frame (and you thought that your office job was boring!)
What about our target practice models? Believe it or not, their code is also surprisingly simple:
action target_practice()
{
set (my, POLYGON);
my.emask |= ENABLE_SHOOT;
my.event = kill_target;
}
The targets will use polygonal based collision detection, so they will only react to c_trace instructions that will actually hit their bodies. We make them sensitive to c_trace instructions; they will run their kill_target events as soon as they are hit by one of the invisible c_trace rays.
function kill_target()
{
if (!mouse_left) {return;}
my.event = NULL; // don't allow the target to be hit by more than one c_trace instruction (it shouldn't die several times :)
if (event_type == EVENT_SHOOT)
{
while (my.skill40 < 95) // don't play all the animation frames because the result doesn't always look good (play up to 95%)
{
ent_animate(my, "death", my.skill40, NULL); // play the "death" animation
my.skill40 += 5 * time_step; // "death" animation speed
wait (1);
}
set (my, PASSABLE); // the corpse will be passable from now on
}
}
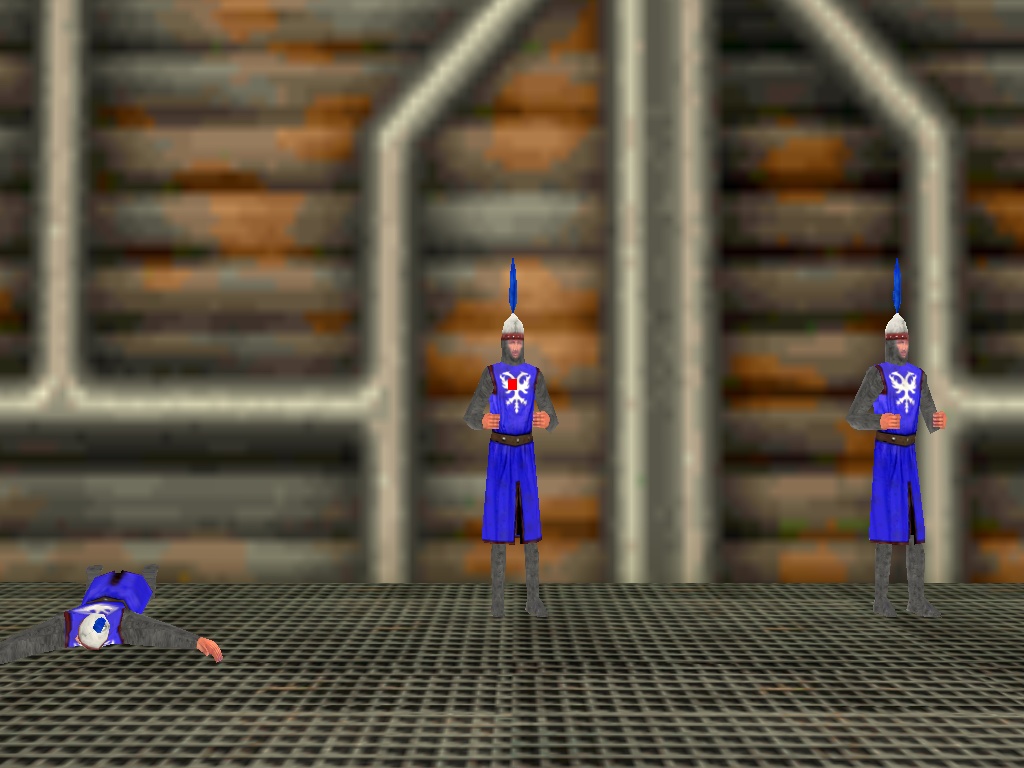
If one of the targets is hit, we check to see if the player has pressed the left mouse button or not; as you might remember, the c_trace instruction inside player's action runs at all times, in order to display the tiny red dot at all times. You would normally use two separate c_trace instructions (one that is used to compute the position and display the tiny red dot, and another one for the actual shooting) but I wanted to keep the code as simple as possible.
As soon as the target is hit by a c_trace ray, we set its event to NULL; this way, the target won't react to other c_trace hits (a dead corpse should stay dead for good!). If the target was hit by a tracing ray, we run a while loop which plays the "death" animation sequence for the model. Since the "death" animation of this particular model doesn't look that good close to its end, we are only displaying about 95% off the frames. Finally, we make the corpse passable, thus allowing the player to pass through it.
I hope that c_trace looks much friendlier now; don't forget to browse the magazines and you'll discover many other c_trace usage examples. Start with Aum67; it's the first magazine which contains 100% lite-C code.