Welcome to a new game business workshop episode! This time we are going to install two different visitors tracking tools on our website.
Actually, we don't need to install them both; any of them will do the job! However, each one of them has its advantages; that's why I'll let you choose the tool that works best for you.
1. Google Analytics
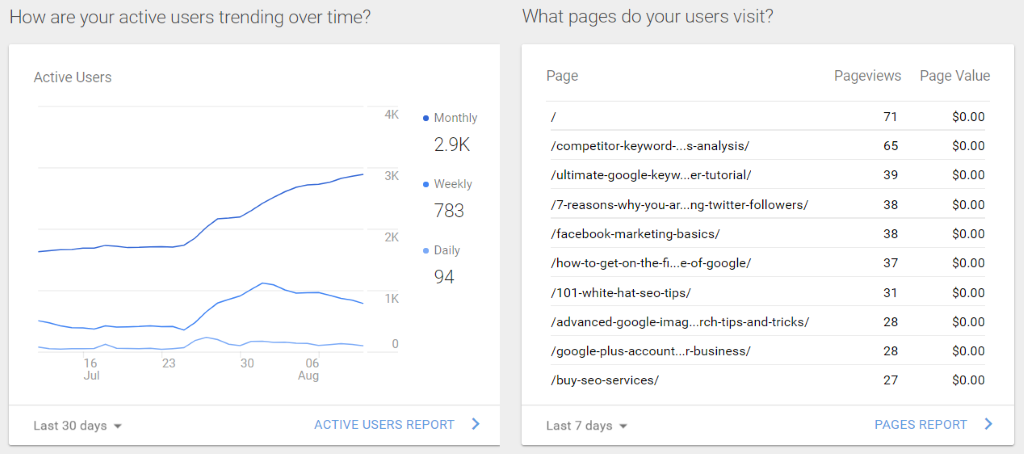
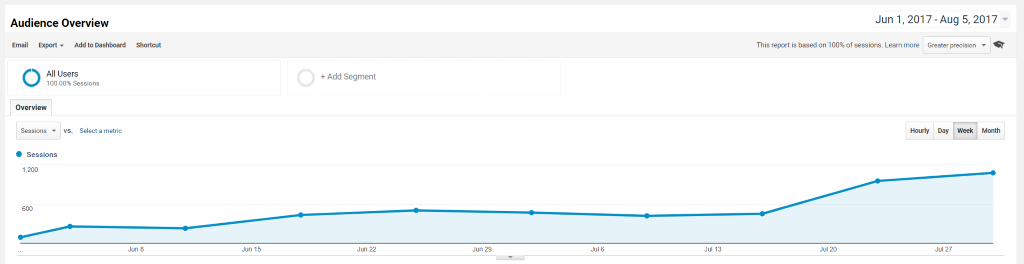
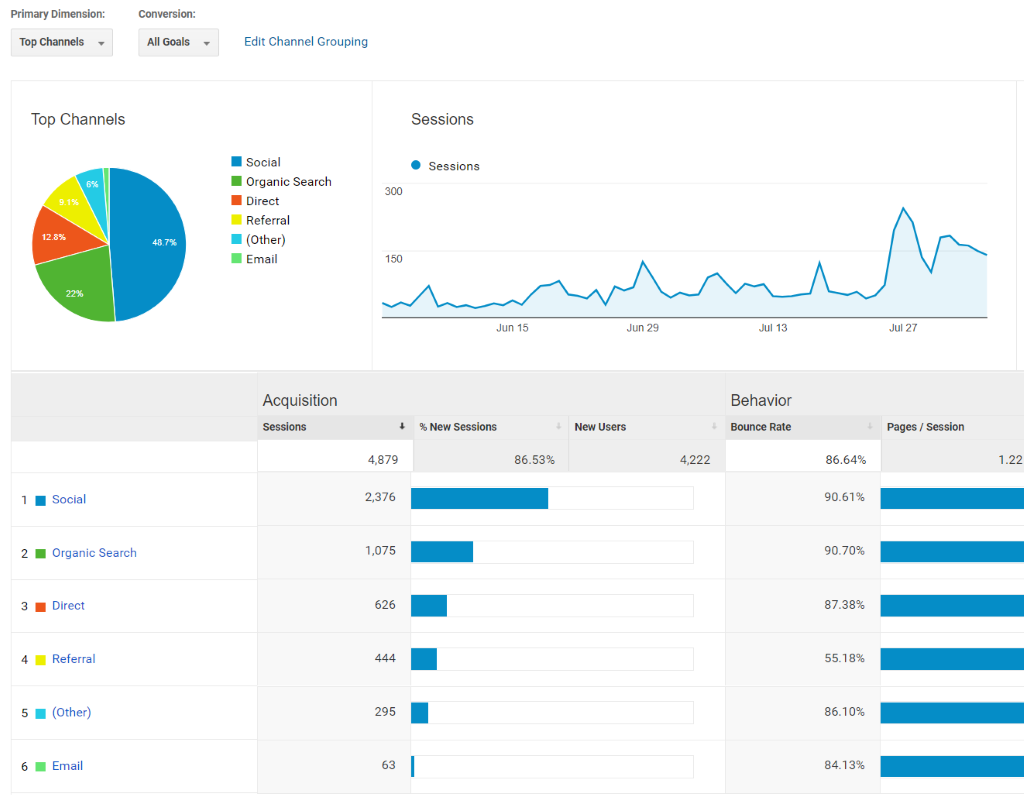
This free website analytics tool provides a lot of information. Here are just a few examples.
You can learn the basics of Google Analytics (and much more) by taking the free online courses that are provided by Google itself here:
https://analytics.google.com/analytics/academy/
There are many more resources on the web, of course; just search Google for "google analytics tutorial for beginners" (without using the quotes) and you will discover several relevant results.
So, how can we install and use Google Analytics for our own website?
I am pretty sure that you've got a Gmail account; you can create a free one, if needed. Then, use the user/pass combination to log into Google Analytics:
http://www.google.com/analytics/
Click Sign In -> Analytics, and then input your email address and password. Explore the dashboards and the left side menu; it may look a bit intimidating at first, but I'll be your guide.
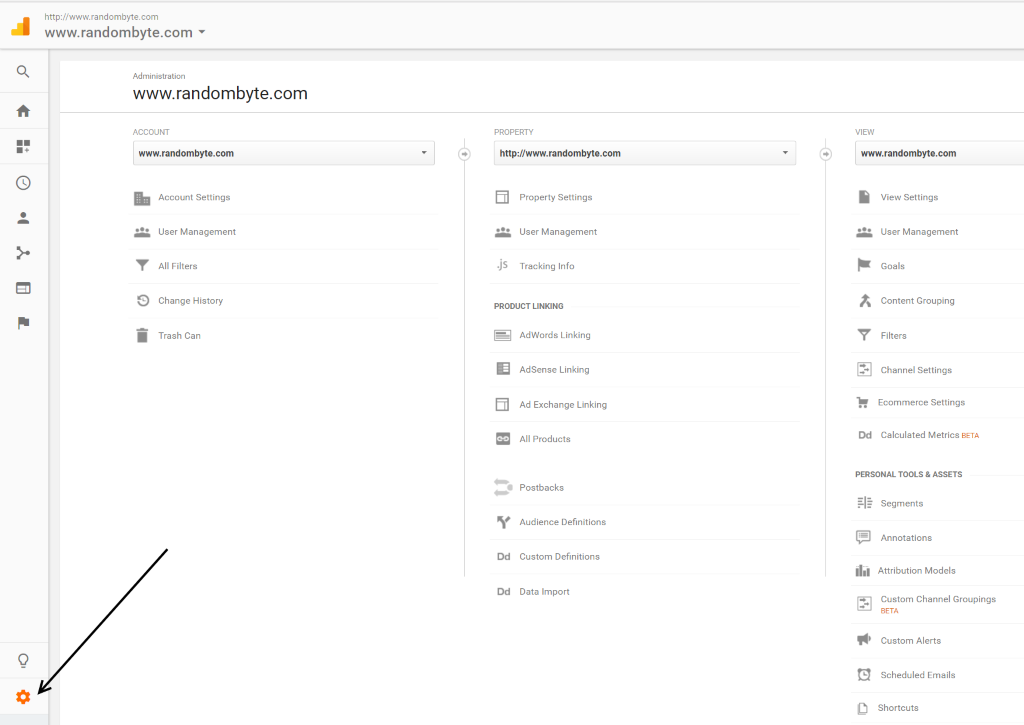
First of all, we need to generate a tracking code for our website. Click the "Admin" cogwheel in the lower left corner of the screen to bring on the administration panel.
Click Property -> Create New Property.
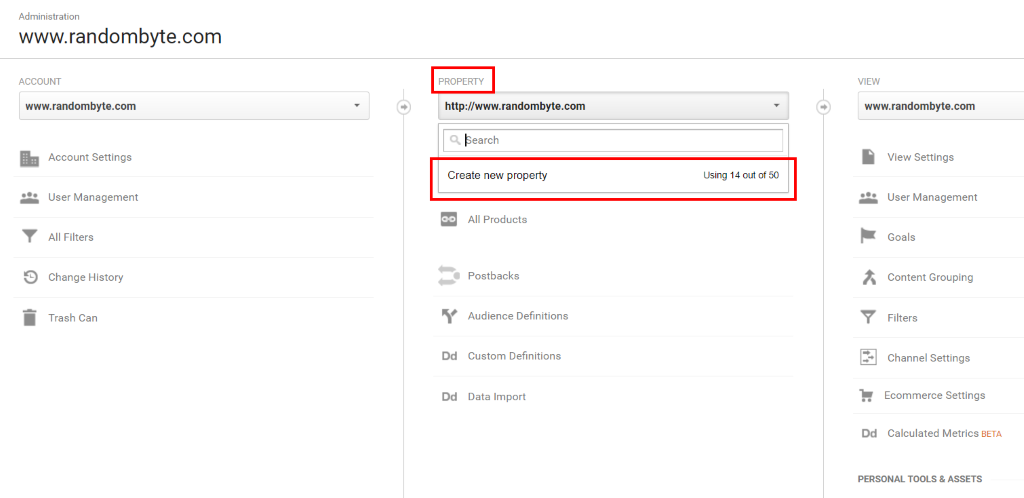
As you can see, even a free Google Analytics account can be used for up to 50 websites; you won't need to create a separate account for each new site.
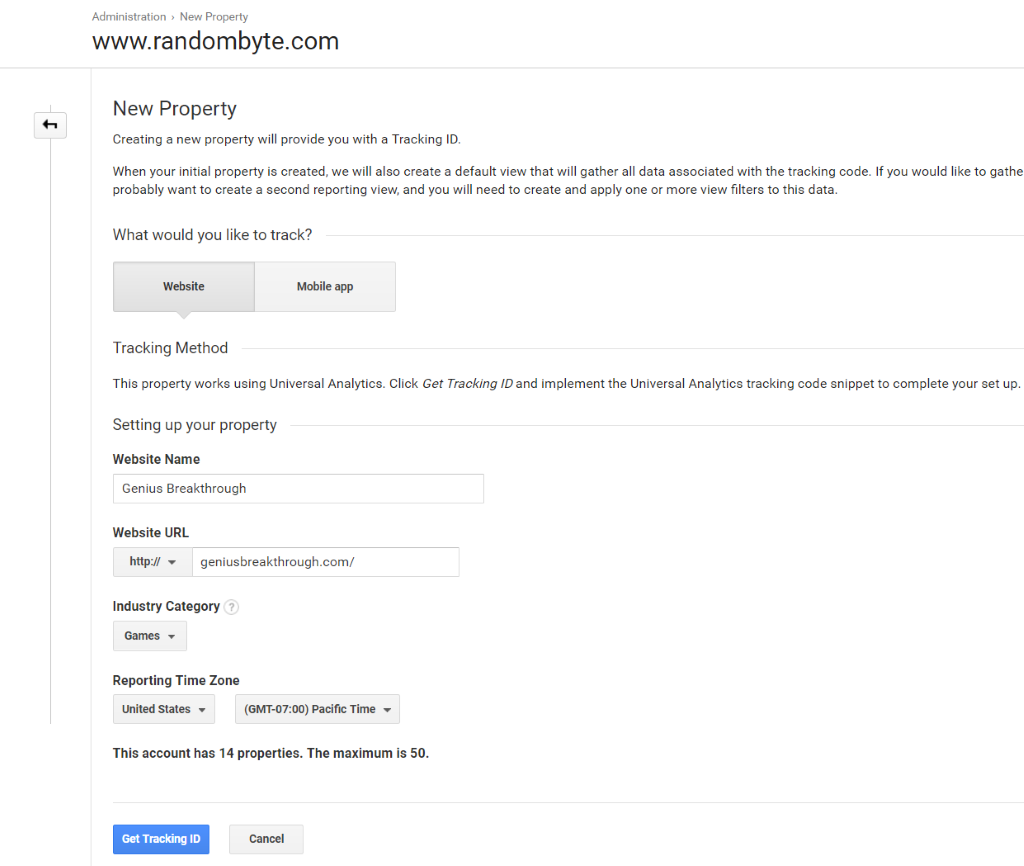
Fill in the website name and URL, choose the industry category, the reporting time zone, and then click the blue "Get Tracking ID" button.
Here's how the tracking code looks like.
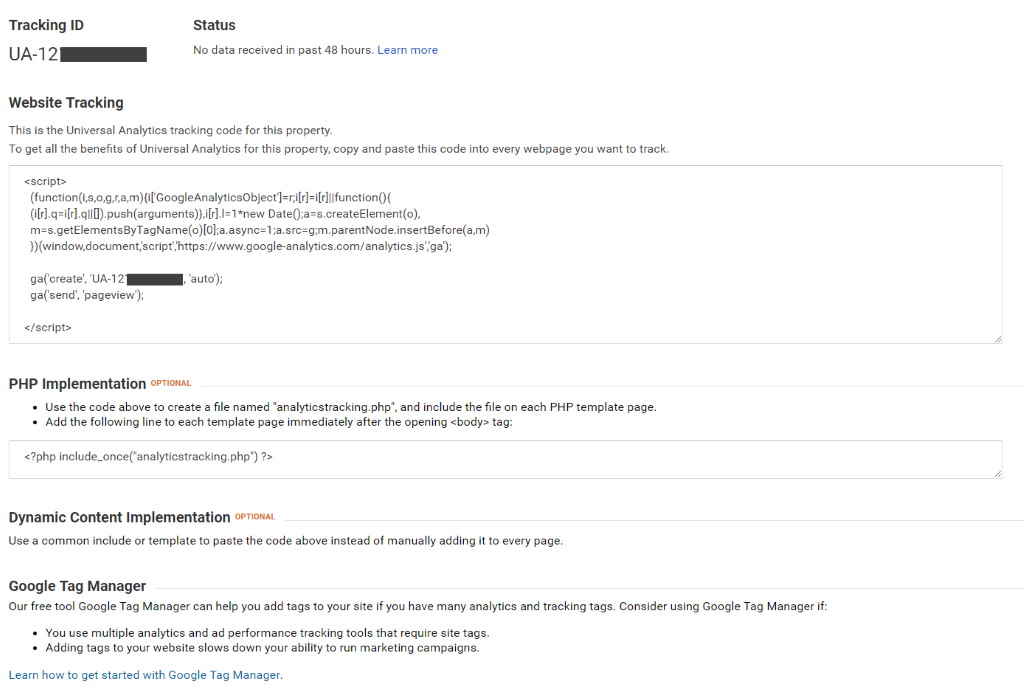
In theory, you need to add the code to each website page. Fortunately, there are several WordPress plugins that will do the job for you.
I use Google Analytics for WordPress by MonsterInsights; here's where you can download it:
https://wordpress.org/plugins/google-analytics-for-wordpress/
There may be better options, of course, but I've been using this plugin for years and I've never had any problems with it.
Install it, activate it, and then click its "Settings" link; you will see the plugin configuration window.
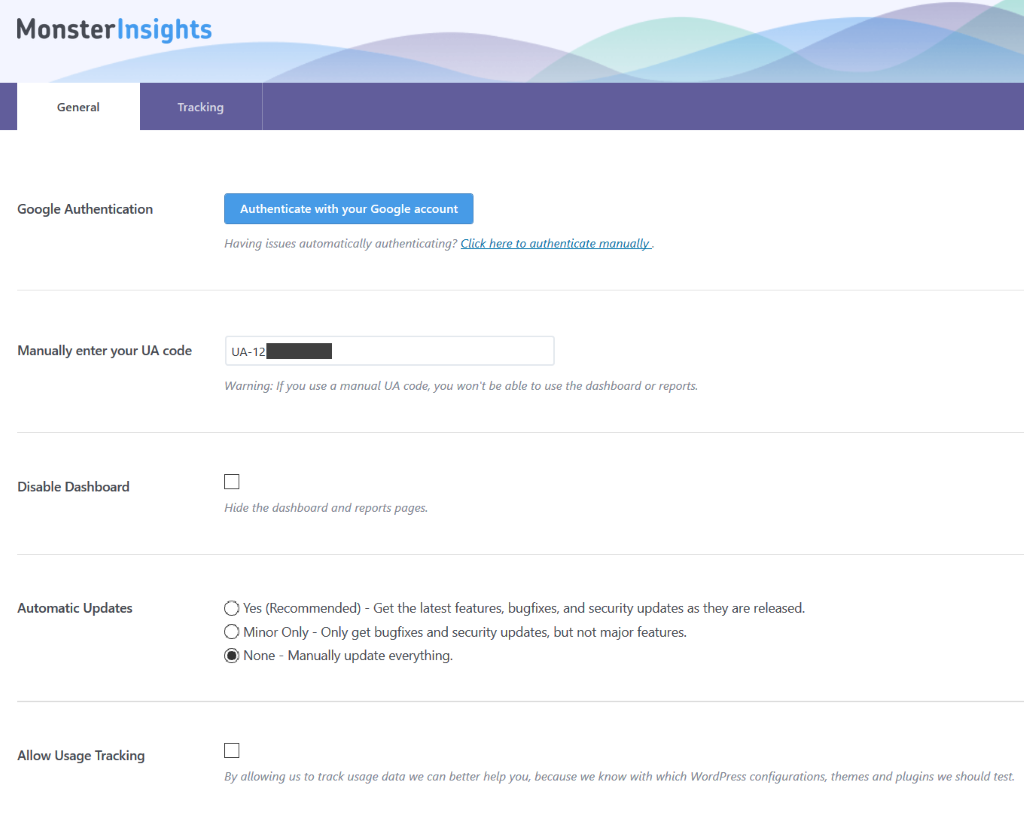
Simply copy/paste your UA tracking code into the proper field, click the "Save" button at the bottom of the screen and you'll be set! There's no need to authenticate using your Google account.
It's important to know that there may be some delays at the very beginning, so you may not see people coming to your website right away. Everything should work fine after an hour or so, though.
To see the stats, you can log into Google Analytics using the URL above, or (my favorite method) you can install an app on your smartphone.
gAnaltyics Pro is the best app I could find on Android, and Quicklytics is my favorite website app for iOS. You may like other apps, of course, but at least you've got a good starting point.
Google Analytics works great when it isn't plagued by spam bots, which make it report fake website traffic. This tutorial can help you fix the problem, but it looks like Google itself is finally doing something about it; otherwise, I wouldn't have recommended Google Analytics.
These things being said, there are other great, 100% traffic monitoring tools out there. Introducing...
2. Wordfence Security
Yes, this is a WordPress security plugin, and it's the best I've ever worked with. And even the free version has a huge set of useful features! Here's where you can learn more about it:
https://wordpress.org/plugins/wordfence/
If you choose to install and use this plugin, you can safely deactivate, and then delete brute force security plugins like Loginizer, etc, because Wordfence Security does their job as well.
Here are the settings I'm modifying after installing this plugin on a new site:
- Check "Update Wordfence automatically when a new version is released?"
- How long is an IP address blocked when it breaks a rule: 10 days
- Set up "Login Security Options" (brute force attacks settings) to 2 hours, 2 hours, 2 hours, 10 days
- Check "Immediately lock out invalid usernames"
- Check "Hide WordPress version"
- Check "Disable Code Execution for Uploads directory"
Feel free to tweak the numerous plugin options according to your preferences, and don't forget to save the options. Then, run a scan, to make sure that your website is clean. From now on, Wordfence Security will automatically run security scans for you.
What about Wordfence's website analytics features? To activate them, be sure to check the "Enable Live Traffic View" checkbox, if it isn't already activated.
Then, you will have access to a lot of interesting information, more than what Google Analytics will share with you!
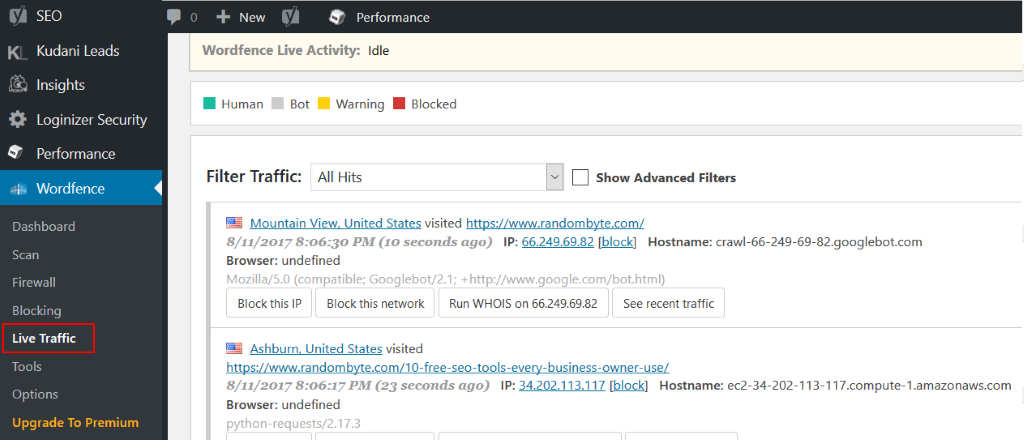
You can filter the website traffic according to its type (Human, Bot, Warning or Blocked) and even use advanced filters: user name, IP address, referral, start and end dates, and more.
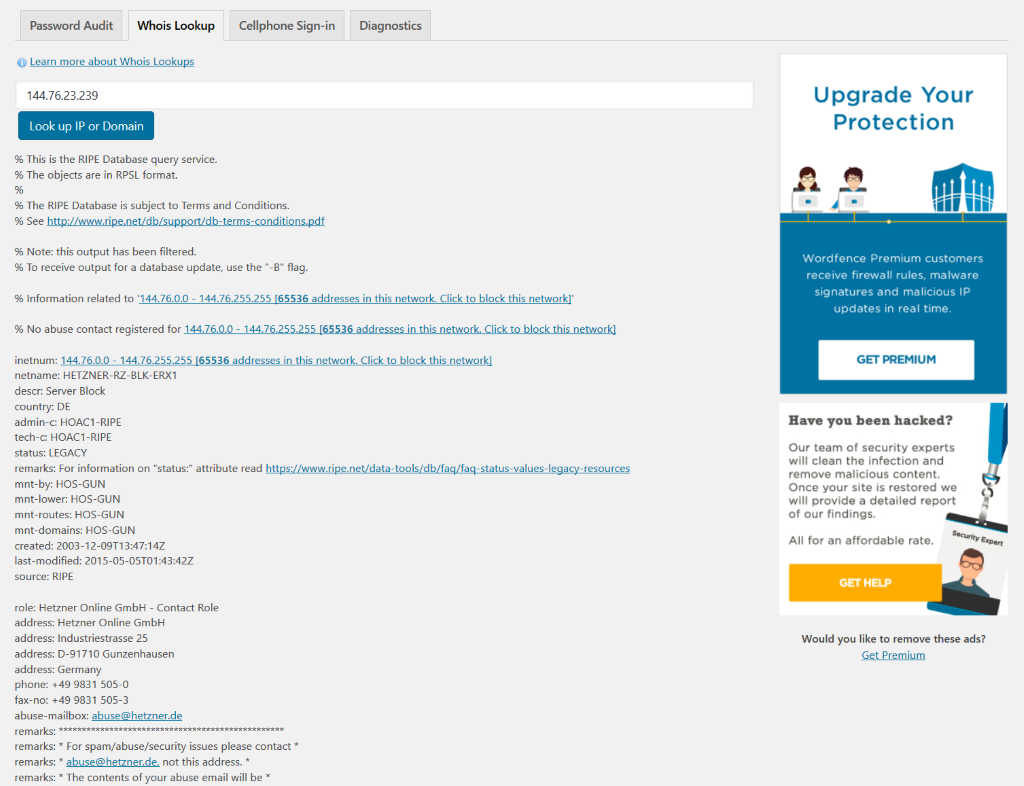
Then, you can use a Whois Lookup tool that's built into the plugin to find out more about a potential visitor. Here's the output for one of my German website visitors.
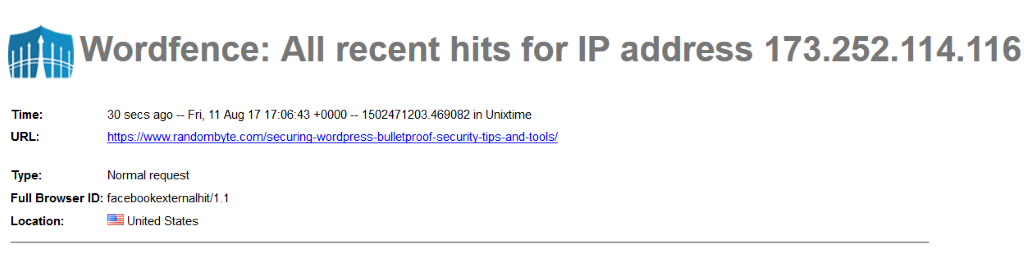
You can also determine the website traffic source. Take a look at the image below; this visitor has landed on my website after clicking a link on his/her Facebook page.
So, if you want to learn more about your individual users, Wordfence is a great tool.
But are there any negative aspects when using it? Well, if your hosting account is cheap, the "Live Traffic View" will slow it down a bit.
Also, if your website receives thousands of visitors per month, you may lose too much time examining their behavior. It's the only reason why I have disabled this great feature on my site, even though I keep the plugin installed and activated for its fantastic security features.
I hope that you've learned at least a few new things today. My suggestion is to test both visitor tracking tools and choose the one that does the job for you.
Now that our website is built and we've got visitor tracking installed, we are ready to bring some visitors to our website!
We will discuss the most powerful website traffic generation methods. This is a huge topic, so we'll get to it in the next AUM issue.
I'll see you all then!