This month we will learn to create some code for close-range weapons. I have used a sword as an example, but the same code can be used for knives and even for natural weapons (legs and hands in a martial arts combat game, etc). To get started, load the work36.wmp file and run it using the work36.wdl script; you will see the following picture.
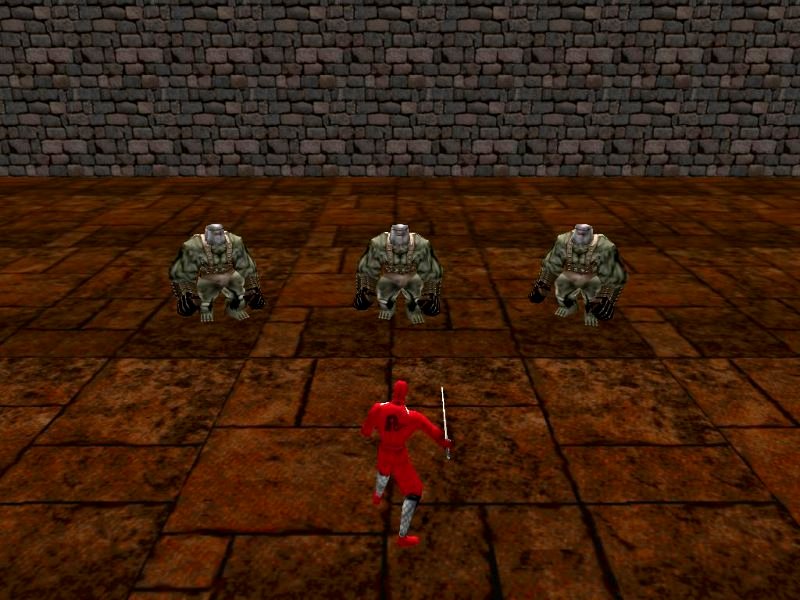
Step closer; those monsters are dummy enemies so they can't hurt our red ninja. Move close to them (WSAD) and then use your sword on them by pressing the left mouse button; you will hear a sound every time (in fact, every frame) when the sword penetrates a monster. Let's examine the script file.
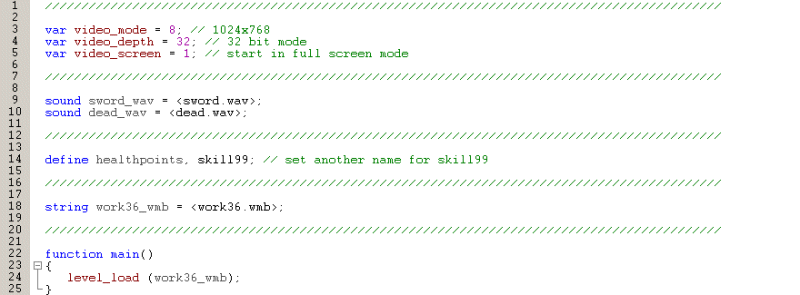
Nothing special here! Please note that I will store the health points inside skill99.
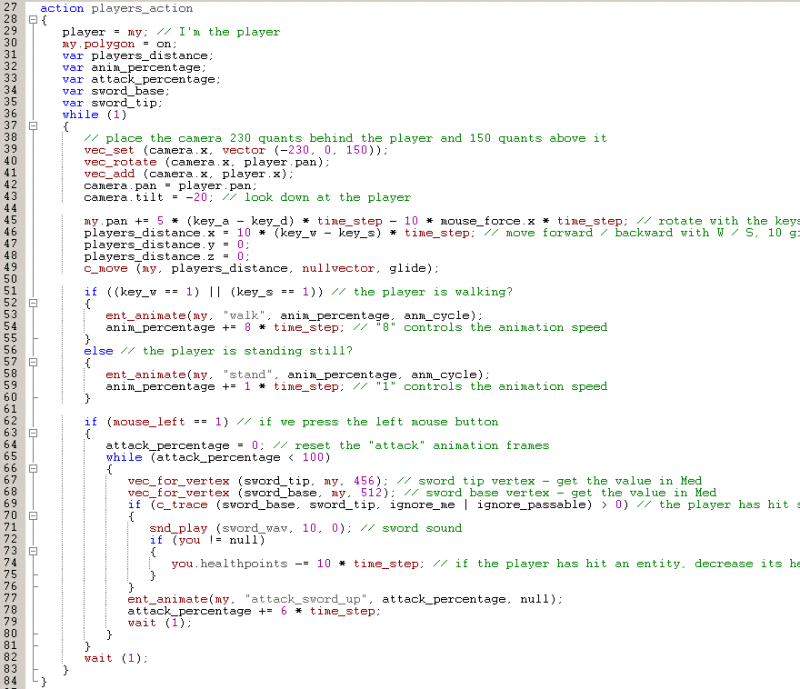
This is the entire code that's used for the player and the camera. We start by defining a few local variables which will store player's covered distance, animation percentages and the coordinates of the sword's base and tip.
The first lines of code inside the "while" loop places the camera 230 quants behind player's origin and 150 quants above it. Our camera will keep the same pan angle with the player at all times, looking down at it because its tilt is set to -20. We have used vec_rotate in our previous workshops (Aum54, etc) so you should know how it works by now.
The following lines of code allow the player to move and rotate using the WSAD keys and the mouse. If the player is moving forward or backward using "W" or "S", the player will use its "walk" animation, which is played with the speed given by 3 * time_step. If those keys aren't pressed, the player will use its "stand" animation, which will be played with the speed given by 2 * time_step.
Let's take a closer look at our short and yet efficient sword code.
if (mouse_left == 1) // if we press the left mouse button
{
attack_percentage = 0; // reset the "attack" animation frames
while (attack_percentage < 100)
{
vec_for_vertex (sword_tip, my, 315); // sword tip vertex - get the value in Med
vec_for_vertex (sword_base, my, 293); // sword base vertex - get the value in Med
if (c_trace (sword_base, sword_tip, ignore_me | ignore_passable) > 0) // the player has hit something?
{
ent_playsound (my, sword_wav, 50); // sword sound
if (you != null)
{
you.healthpoints -= 10 * time_step; // if the player has hit an entity, decrease its health
}
}
ent_animate(my, "attack_sword_up", attack_percentage, null);
attack_percentage += 6 * time_step;
wait (1);
}
}
If the player presses the left mouse button, we reset "attack_percentage", and then we run the "while" loop until attack_percentage reaches 100 (until all the "attack_sword_up" animation frames are being played).
The code inside that loop gets the coordinates of the sword tip and base every frame. Let's examine our ninja model from within Med.
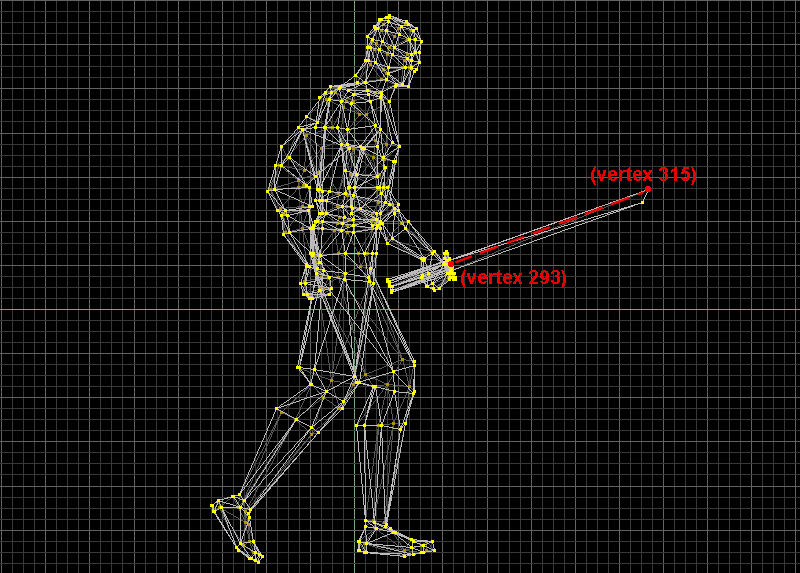
You can see the position of the base and tip vertices, as well as the imaginary, red dashed line created by the c_trace instruction. We trace from the base of the sword to its tip, ignoring any passable entities and the "me" entity - the ninja model and its sword. If something was hit, we play a sword_wav sound; more than that, if "you" isn't null (c_trace has hit an entity and not a level block), we decrease the health points for the hit entity with a speed given by 10 * time_step. The last few lines of code inside the loop animate the player using its "attack_sword_up" animation, with a speed given by 6 * time_step.
That's everything you need to know in order to create close-range weapons! If you would want to create a karate combat game, you would c_trace from player's elbow to its fingers, making its punches dangerous for the enemies, get it? All you'd have to do would be to replace the sword vertices numbers with those that are used for the elbow and fingers.
Before saying good bye, let's see the code that is used by our dummy enemies.
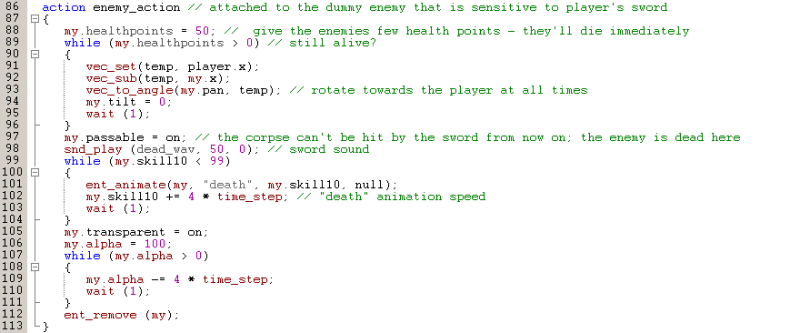
We set the initial health points for our enemies to 50, and then we run a loop which makes them face the player (using vec_to_angle) until they die. When this happens, we make their corpses passable, we play a dead_wav sound, and then we play a one-shot "death" animation. As soon as the enemies have fallen to the ground, we make them transparent, we set their alpha to 100, and then we decrease their alpha, making them more and more transparent. Finally, we remove the invisible enemies from the level.
This episode concludes our weapon creation workshop series. I could have gone even further with other types of weapons, but now you've got enough information to start building your own guns. It's time for me to move on and start working at the code for another exciting workshop, so I'll see you all next month!