C_trace is a useful instruction indeed! You will want to use it every time when one of the entities (a player, a monster, and so on) wants to check if another entity (the player, a monster, and so on) is visible. Need to know if the player can hit its enemy? Use c_trace! Want to check if enemy1 can see enemy2? Then c_trace between them! Let's see the general form of c_trace:
c_trace(start, target, mode);
C_trace sends an invisible ray from "start" to "target" and checks if this ray has hit an obstacle on its way or not. The instruction looks pretty friendly to me: you specify the starting point, the destination point and the mode in which c_trace is supposed to be performed. I could choose player.x as the starting point and enemy.x as the destination point, which would send an invisible ray from the player to the enemy model (if the "player" and "enemy" pointers were defined, of course).
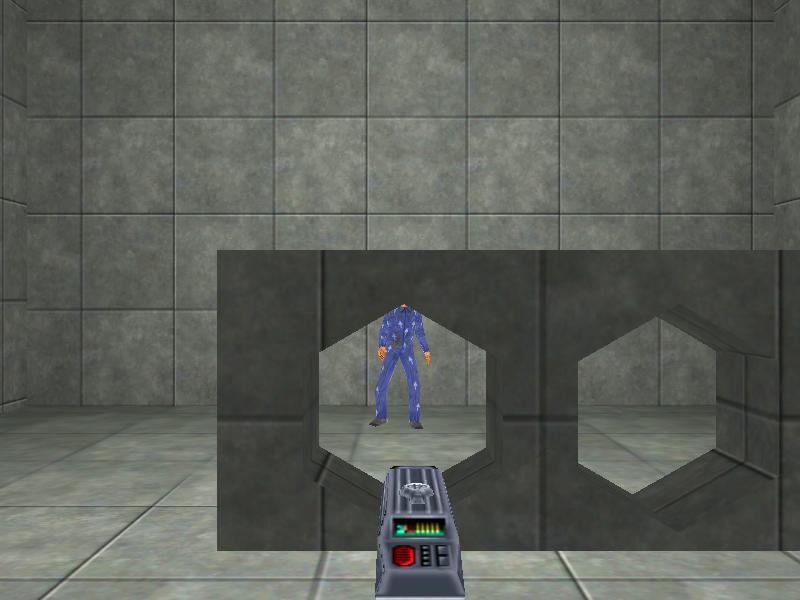
Believe it or not, this is a screenshot from our test level! Copy the entire \workshop26 folder inside your 3DGS folder, start Wed, open work26.wmp and then run the level using the script26.wdl file. Use the "Z" and "X" keys to move the grey wall around and press "space" to shoot; you will see a text displaying "Missed the enemy!" or "Got the enemy!" depending on the position of the wall (you can shoot the enemy through the holes in the wall, btw).
Let's examine the script file:
The script might look a bit complicated, but you shouldn't have any problem with it if you went through the previous C-Script workshops. Let's see what needs to be discussed here...
var video_screen = 1; // start the engine in full screen
This line of code does exactly what the comment says: it starts the engine in full screen mode, and not in the (default) windowed mode. You should be aware that some of the error messages can't be displayed in full screen mode, so make sure to comment this line while you are debugging your game.
entity* enemy;
action first_enemy
{
enemy = my; // I'm the enemy!
}
The lines above create an entity pointer that is named "enemy" and attach it to our enemy, the guy with the blue suit. This means that if I attach the action named "first_enemy" to the blue guy (which I did in Wed), the script will be able to set and read values from the blue guy using its "enemy" name.
You might have noticed that I have ignored the text definition and function main; you know what these do already. Ok, for those of you that don't remember this from my workshops, if we don't specify the font that is going to be used by a certain text, the engine will pick up and use the predefined _a4font for it. Let's move on to the exciting stuff:
action moving_wall // don't move pieces of level geometry this way unles you have to!
{
while (1)
{
if (key_z == on) {my.y += 5 * time;} // "Z" was pressed? Then move the wall to the left
if (key_x == on) {my.y -= 5 * time;} // "X" was pressed? Then move the wall to the right
wait (1);
}
}
This action is attached to the grey wall (a wmb entity) that can be moved using the "Z" and "X" keys. I am using a "while" loop here; if the player presses the "Z" key, the wall is moved to the left side of the screen, and if the player is pressing the "X" key, the wall is moved toward the right side of the screen. I am moving the wall by changing its y coordinate directly; this works ok for a quick test, but you should move the objects around using c_move if you don't want them to penetrate the level geometry. Check the 18th workshop for more information about c_move.
action players_gun
{
player = my; // I'm the player
while (1)
{
while (key_space == off) {wait (1);} // wait until the player presses the "space" key
while (key_space == on) {wait (1);} // wait until the player releases the "space" key
c_trace (player.x, enemy.x, ignore_me + use_box); // trace from the weapon to the enemy
if (you == enemy) // got the enemy?
{
status_txt.string = "Got the enemy!";
}
else // something else was hit along the c_trace ray?
{
status_txt.string = "Missed the enemy!";
}
status_txt.visible = on; // show the text
sleep (1); // for 1 second
status_txt.visible = off; // and then hide it
}
}
Take a good look at action players_gun - this is our first gun script! The first line of code tells the model that has this action attached to it (our weapon) that it will be known as "player" from now on. Don't forget that "player" is a predefined pointer, so we don't need to define it, like with did with the "enemy" pointer.
What comes next? A "while (1)" loop! These loops tend to repeat every instruction that is captured inside the hairy, curly brackets, all the time. The first two lines of code wait until the player presses the "space" key, and then wait until the player releases the "space" key. That's an easy method of disabling auto-fire for a weapon.
c_trace (player.x, enemy.x, ignore_me + use_box); // trace from the weapon to the enemy
Take a good look at the long awaited c_trace line of code! We c_trace from the player (our weapon) to the enemy (the blue guy), using a tracing mode that is composed of ignore_me and use_box. Let's discuss about these c_trace modes:
- ignore_me tells the engine to ignore the entity that has performed the tracing; in our case, the engine is going to ignore the gun model. Now why would we need to ignore the gun model?
C_trace does exactly what we tell it to do: it traces from the origin of the player model (player.x) to the origin of the enemy model (enemy.x). Where is the problem then? The invisible tracing ray will hit the gun itself, because the origin of the gun model is usually placed inside the model! By using "ignore_me" we tell the engine to ignore the model that has performed the tracing; for those of you that are feeling adventurous there's also an "ignore_you" which tells the engine to ignore the "you" entity, which in our case would be the enemy.
- use_box is another important c_trace option; it tells the engine to use a thick, fat tracing ray, more like a large pipe that has the size of the player entity (the gun) instead of using a thin, slim tracing wire. Do we need this feature? Of course we do! If we c_trace without adding "use_box", our tracing ray will go through any hole, even if it is a tiny hole! This means that you could kill an enemy by shooting at it through a small crack in the wall! This might be a neat feature for some of you, but might disturb the others, so feel free to add use_box (or not!) to the tracing mode according to your needs.
There are many other tracing options; you will find them all in the C-Script manual. Many of them tell the engine to ignore (pretend that they aren't present) the passable entities, the maps, the models, the sprites, and so on. This means that you could create a window using a transparent sprite and if you would trace this way:
c_trace (player.x, enemy.x, ignore_me + use_box + ignore_sprites);
the player would be able to hit the enemy even if there's this sprite-based, transparent window that separates them, because we have told the engine to ignore the sprites. If we wouldn't use "ignore_sprites", the tracing ray would hit the window and it would stop there, without hitting the enemy.
Time to discuss the last few lines inside action players_gun:
if (you == enemy) // got the enemy?
{
status_txt.string = "Got the enemy!";
}
else // something else was hit along the c_trace ray?
{
status_txt.string = "Missed the enemy!";
}
status_txt.visible = on; // show the text
sleep (1); // for 1 second
status_txt.visible = off; // and then hide it
If the tracing ray has hit the enemy (you == enemy), we set the "Got the enemy!" string for our previously defined status_txt text, and then we show the text for 1 second. If we didn't hit the enemy, we set the "Missed the enemy!" string for our text, and then we display it for 1 second. Please note that c_trace will set the predefined "you" entity pointer to the name of the entity that was hit by the tracing ray, or to "null" if we didn't hit any entity (maybe we have hit a level block); however, you should check the content of "you" immediately after the c_trace instruction, just like I did in my example; otherwise, if you insert a "wait" or "sleep" instruction in between them, the name of the "you" entity might get lost.
The entire loop can run once again if we press the "space" key, so you can fire an unlimited number of invisible c_trace "bullets" and see if and when you can hit the enemy.
We are going to take a break here; the following workshop will teach us how to create our first player action with animation, movement and gravity. We will use ent_animate, c_move and (of course!) c_trace for that, so you'd better read the 18th and 21st workshops until we meet again.