This month we are going to try some scary stuff: we will start editing the xml files that come with the templates and control the behavior of our entities. In fact, if you have done some basic word processing in your life you won't have any problems doing this.
Let's create a new project by invoking File -> Project Wizard.
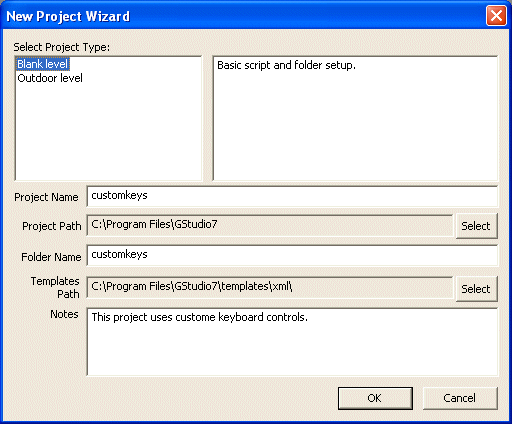
You can use my settings or your own information; just make sure that you know the name of the project - we are going to need it.
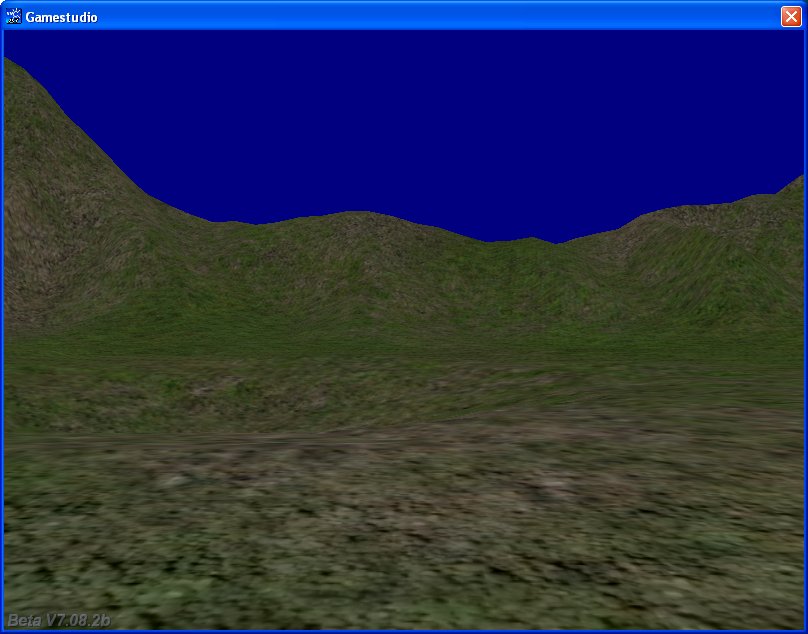
Add a terrain to the level (feel free to use small.hmp that comes with my demo) and set a proper scale for it. Add a player model (I chose sf_woman.mdl) and attach it the action named t7_biped_player. Save, build and run the level - you should be greeted by an image that looks like this:
As you know, the player can move around using the WSAD keys. But what can we do if we'd rather want to use the arrow keys instead?
All the relevant template7 data is nicely stored inside several xml files. XML stands for eXtensible Markup Language and allows us to create documents that contain storage units called "entities" (these have nothing to do with GameStudio's entities). In plain English (or German), an xml file contains the needed data and the syntax rules, allowing us to transmit data across different systems, networks, the internet and so on.
The default xml-based configuration for our projects is stored inside our GameStudio's \templates\xml folder; there are quite a few xml files in there, but we'll only talk about UserInput.xml today - this is the file that allows us to change the controls.
We could edit this file directly, but the result would affect all our projects and would baffle your little brother, who wouldn't be able to understand why his little project isn't working as it used to. Well, if you want to play with the default settings and make changes that will influence all your future (and past) projects, you can edit the xml files right where they are.
We will copy the UserInput.xml file inside our project file - this would be \customkeys if you have followed my steps. Double click UserInput.xml; it should be opened inside your favorite xml editor. I'd rather use Sed for that; right click the xml file, select "Open With" and then "Choose Program". Pick "Script Editor" from the list of programs, and then check the "Always use the selected program to open this kind of file" checkbox.
From now on, a simple double click on any xml file will start Sed and open the xml file inside it. Let's do that right now!
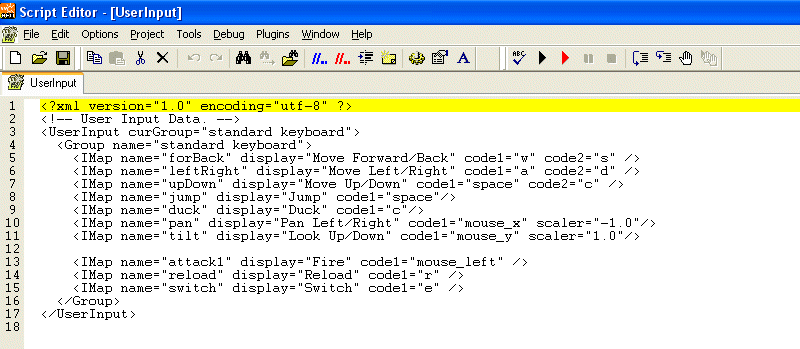
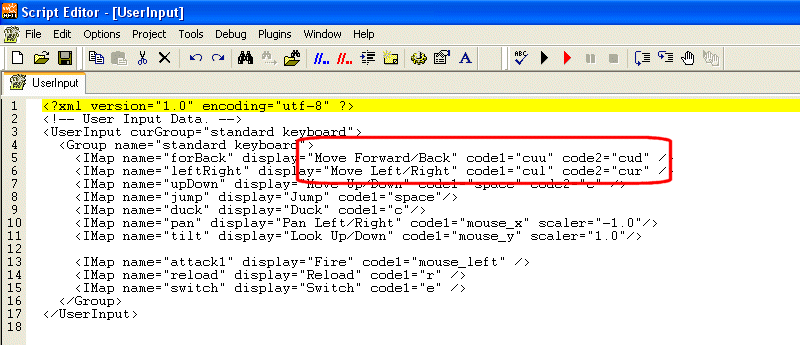
The content of our file is quite easy to understand; what interests us is the area that has to deal with the movement.
Right now, the movement is using the standard WSAD keys; let's change that to the cursor keys. If you have read the manual, you know that cuu stands for cursor up, cud is cursor down and so on.
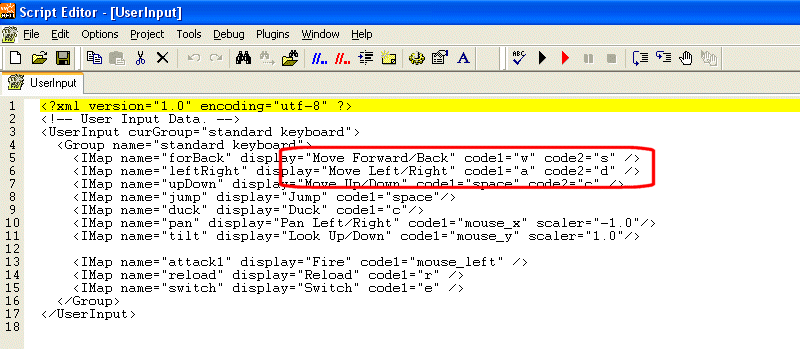
Let's make the changes right now:
Save the file, and then run the project again; you will notice that the player can now be moved only by pressing the arrow keys.