Planet Survivors
This month I have wrapped up all the levels so that they can be played in a sequence, I have added more code to make the pieces work together, I have fixed some bugs and so on. There's a lot of fresh code under the hood, but let's review some of the gameplay-related elements.
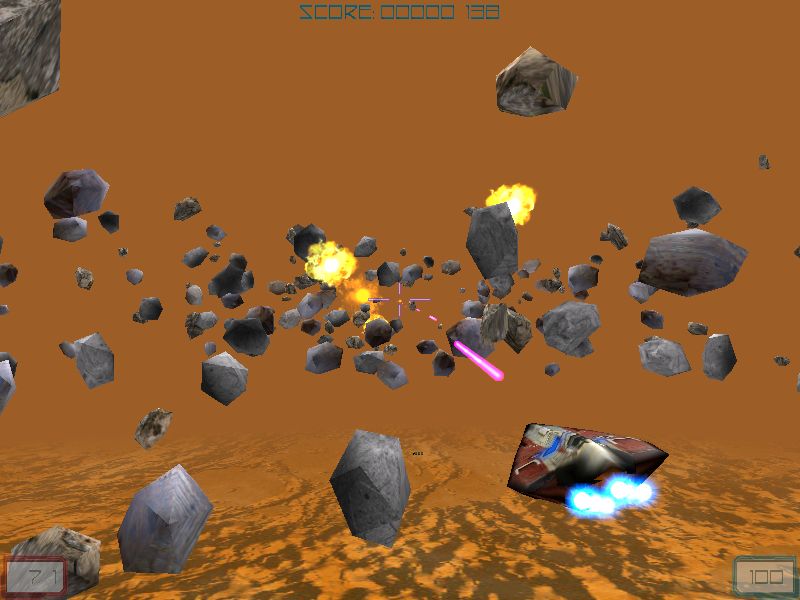
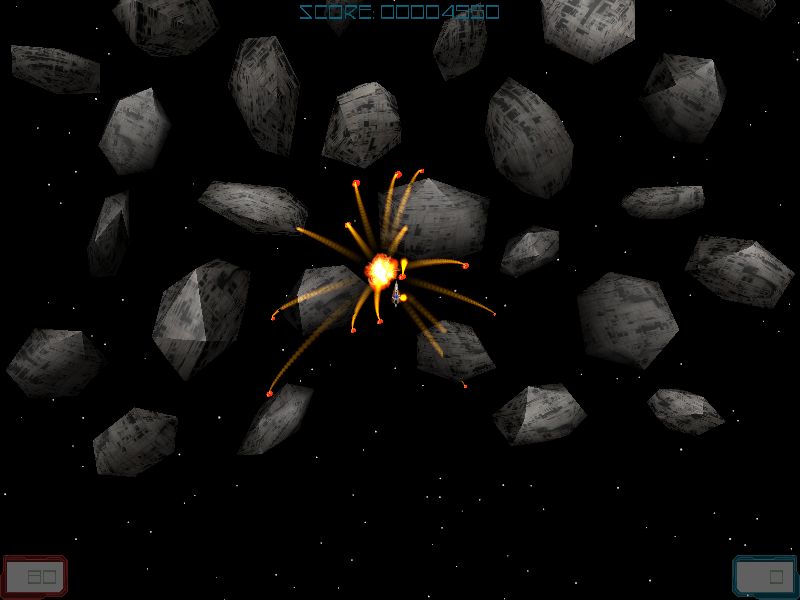
The action starts with a 3D space shooter where you have to shoot some asteroids:
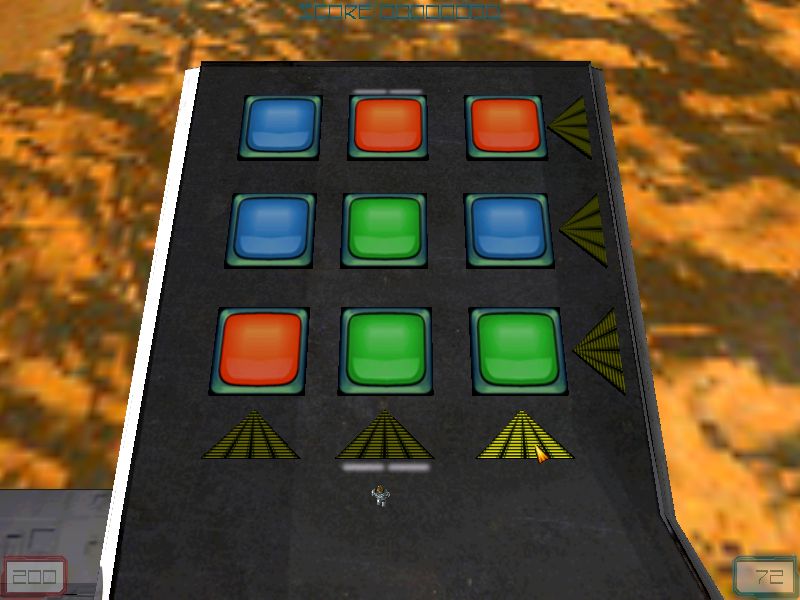
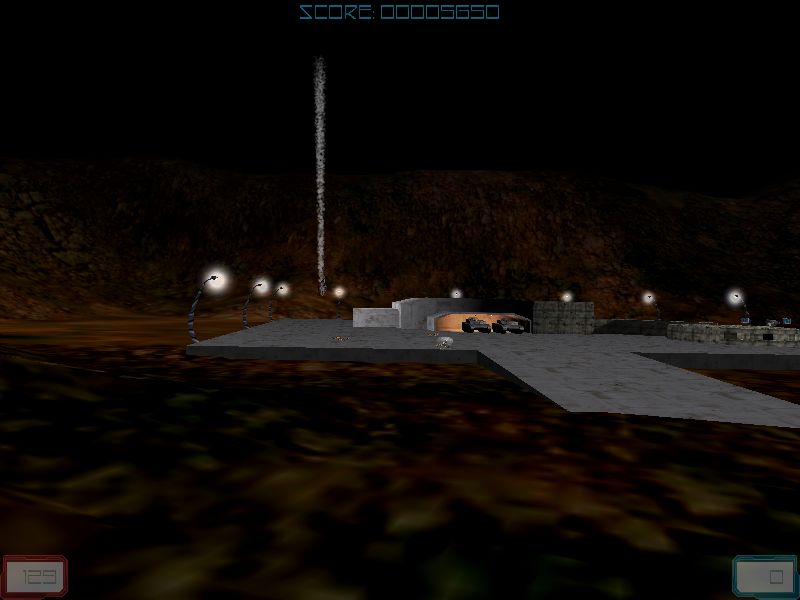
A few minutes later, the ship lands on a platform:

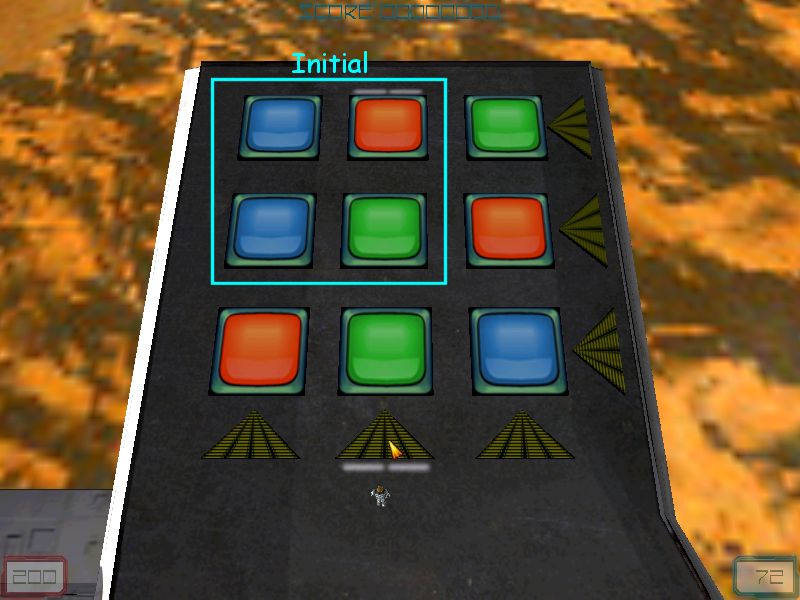
The player has to solve a small logical game (a puzzle) in order to move on to the next level; it has to create 3 lines or 3 rows of identical colors:
If the player solves the puzzle it receives ammo and shield points and the ship takes off, resuming player's mission:
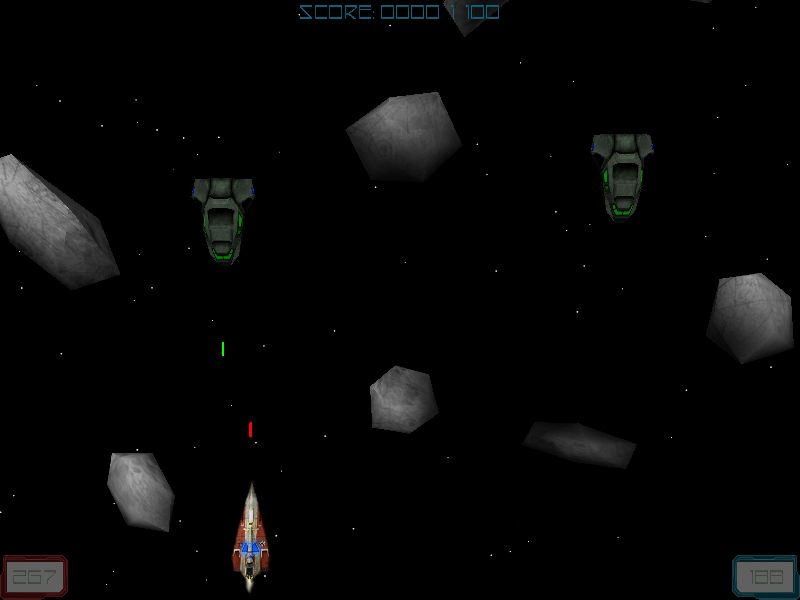
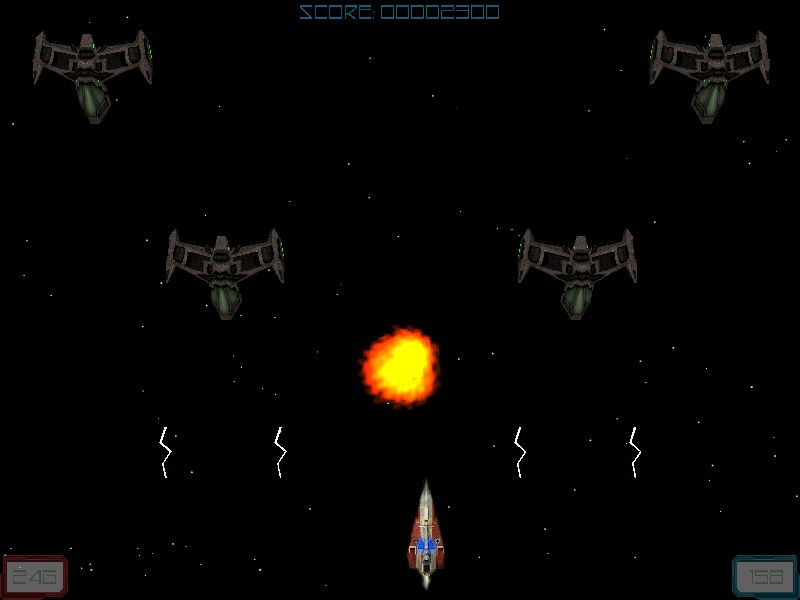
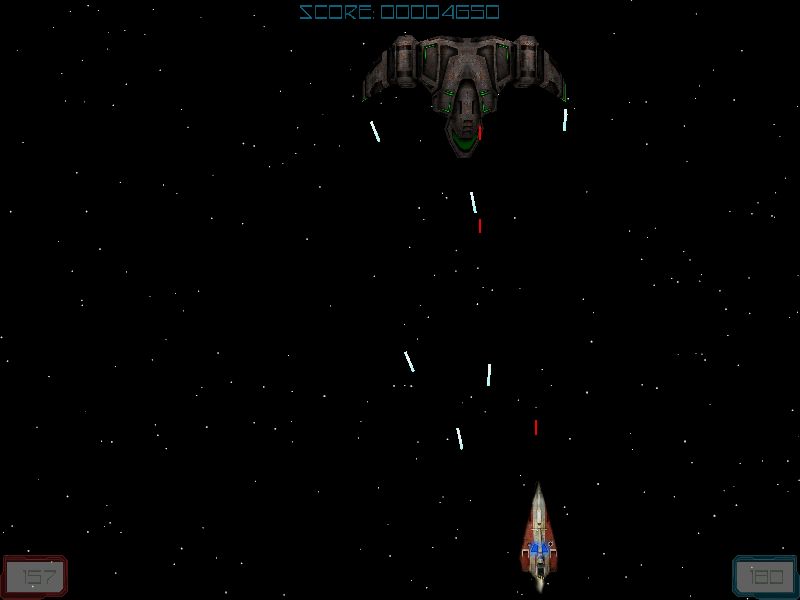
The action moves to a 2D top view space arcade with 3 different enemies and a boss at the end of the level:

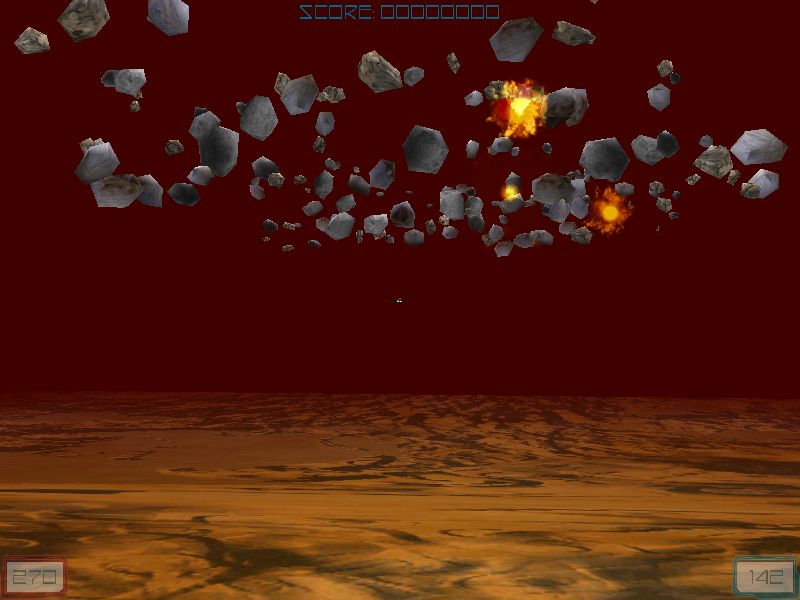
The player moves into a field of asteroids that can't be destroyed, so its ship is severely damaged:
The ship crashes into the soft soil of a planet:
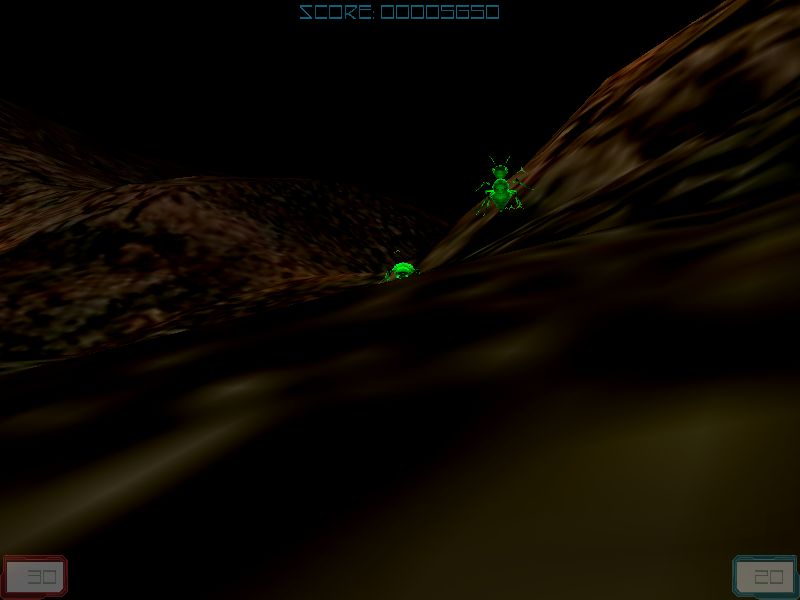
The player manages to get away from the ship, gets a sniper riffle and is prepared to meet two new enemy types: some green, gigantic ants and some alien rocket shooters:
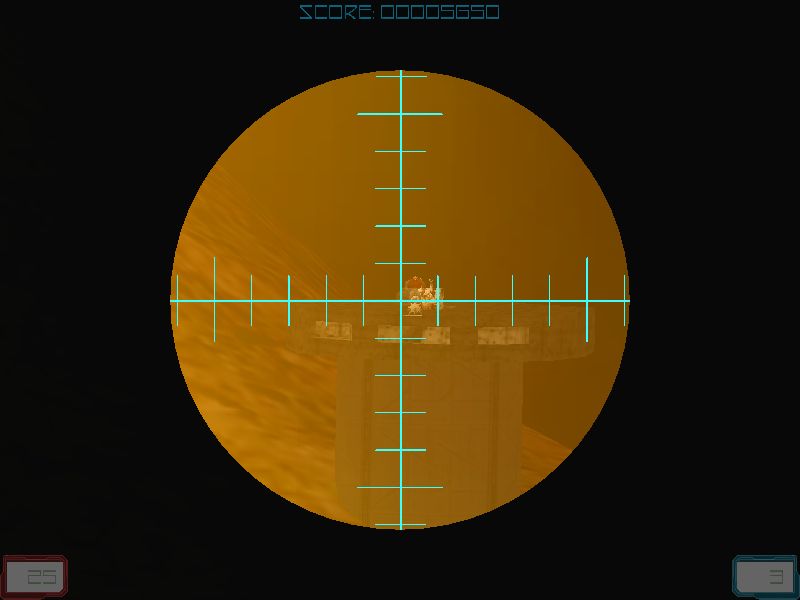
The player manages to get to a new ship and takes off, ending the game. You can make the player fly in the shooter level by pointing its nose upwards; this way you will be able to move over the hills and get to the end of the level in a few minutes (if you can kill the aliens, of course).
Ok, I'll answer your most asked question about this project: how do I solve the puzzle level using a scientific method (not by trial and error)?
I'll use the very example that comes with the project but this method will work with any other combination.
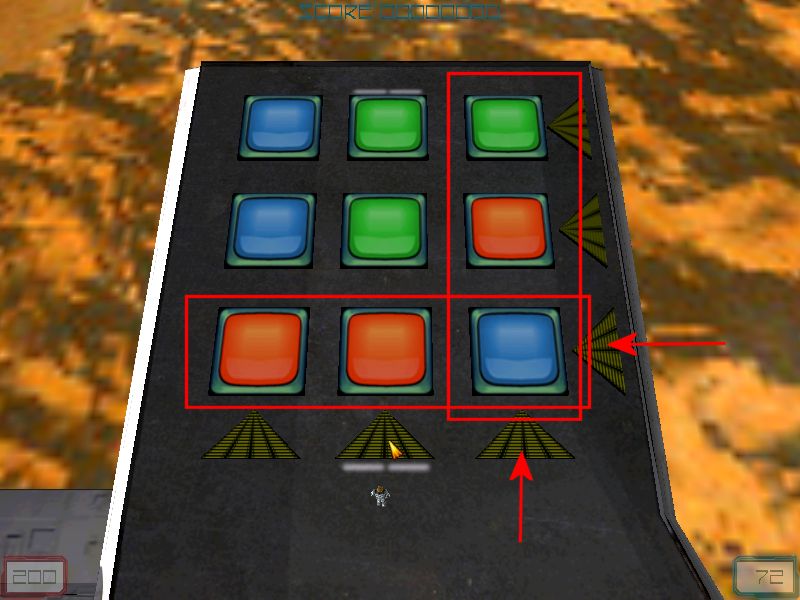
1) Create a 2x2 square with properly aligned colors:
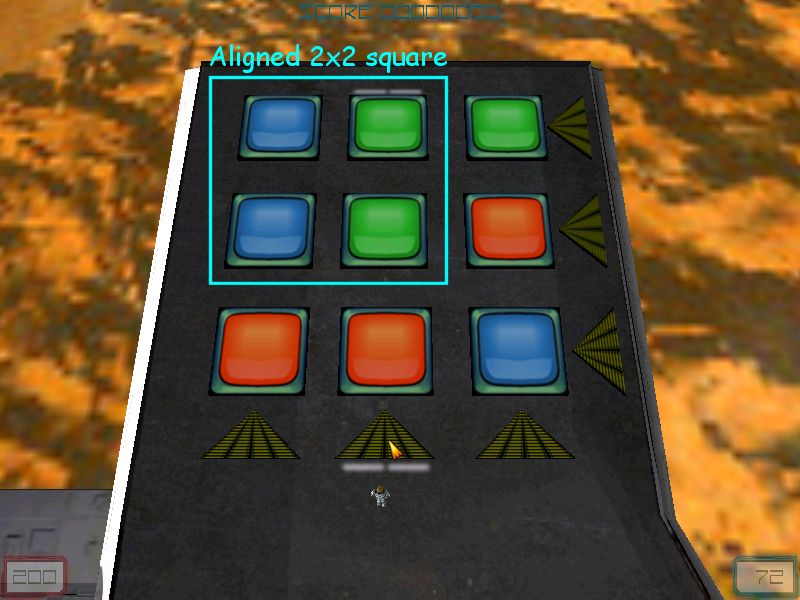
The good news is that you'll only have to play with the (red) row and column that don't include our aligned square from now on:
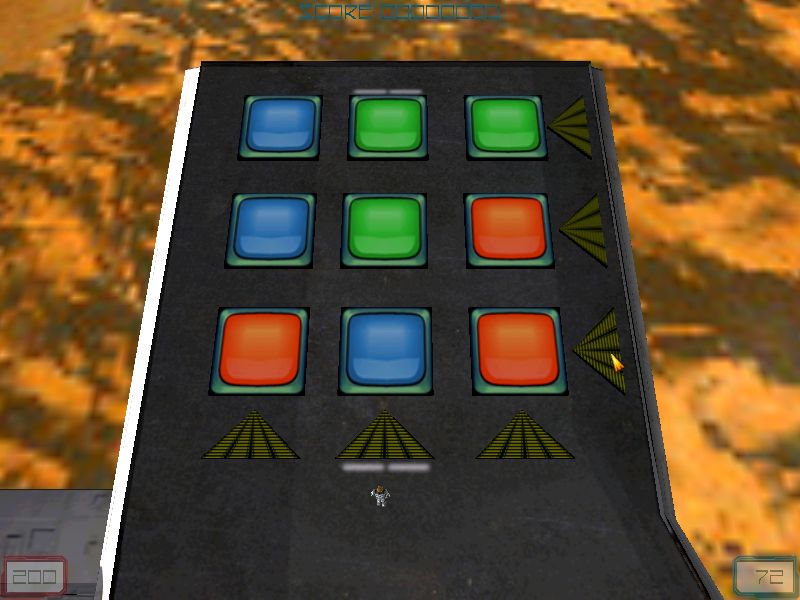
Let's examine the color sequence of the first two cells in the upper row: it is blue followed by green. This means that the lower row must start with blue as well and green should follow it. We push the blue cell from the lower row one step to the left:
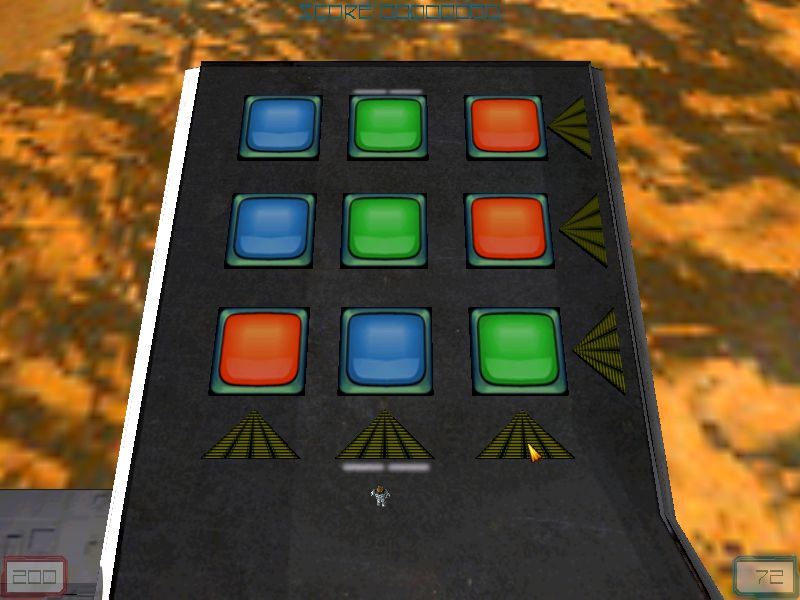
Now we have to bring the green cell down:
We've got the same color sequence (blue, green) on the lower row; let's push the two cells to the left:
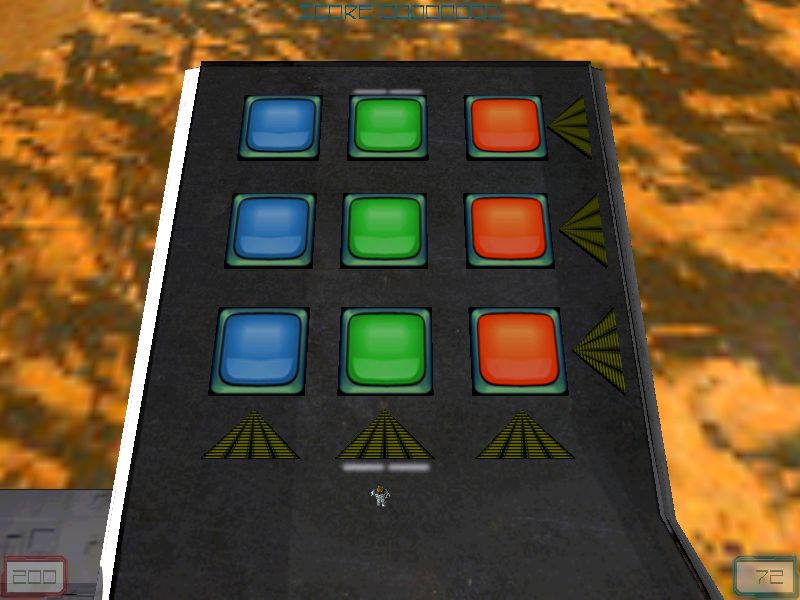
That's it! The level is solved and the player can continue the game; we have aligned two columns / two rows and the third row / column got aligned automatically. Don't forget that you get more bullets and shield if you solve the puzzle quickly. Next month we will take care of the level loading and saving.
Train tracks
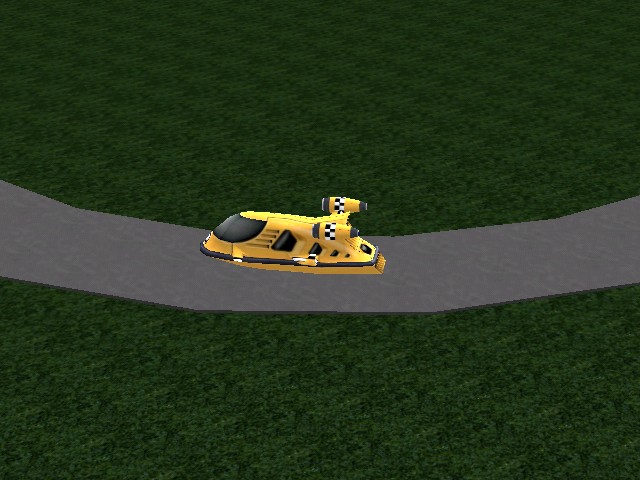
The purpose of this article is simple: to help us create code for an entity that "knows" how to follow the road. You can use the code for NPCs, pedestrians walking on the street, trains, light signs, and more. Let's see a brief explanation of the method and then we'll look at the code that makes it happen.
We've got a blue vehicle and we compute the coordinates for two points in front of it: front_left and front_right. We trace below these points every frame in order to get the name of the texture. If the name we've got is the name of the texture used for the track, we don't do anything; otherwise, we rotate the vehicle until trace returns the correct texture name, so we keep the vehicle on the track without using a predefined path. If you wanted to have pedestrians that use the sidewalk correctly and you didn't want to program complex AI in order to make it happen, now you've got a simple piece of code that does what you need.
var danger_zone = 0;
define none 0;
define left 1;
define right 2;
function main()
{
fps_max = 60;
level_load(level_wmb);
wait (3);
camera.x = -3500; // choose a convenient camera position
camera.y = -2100;
camera.z = 1000;
camera.pan = 31; // and angles
camera.tilt = -20;
}
I have defined "none", "left" and "right" as 0, 1 and 2. Function main loads the level and sets a convenient camera position and angles.
action train
{
var train_speed;
var front_left;
var front_right;
while (1)
{
train_speed.x = 20 * time;
train_speed.y = 0;
train_speed.z = 0;
ent_move (train_speed, nullvector);
front_right.x = my.x + 400 * cos(my.pan) + 300 * sin(my.pan);
front_right.y = my.y + 400 * sin(my.pan) - 300 * cos(my.pan);
front_right.z = my.z;
vec_set (temp.x, front_right.x);
temp.z -= 1000; // trace 1000 quants below
trace_mode = ignore_me + ignore_passable + ignore_models + ignore_sprites + scan_texture;
trace (my.x, temp);
if ((str_cmpi ("metalplain4", tex_name) == 0) && (danger_zone == none)) // if the texture below the train isn't named "metalplain4"
{
danger_zone = right;
my.pan += 2 * time; // rotate the train toward left, play with this value
}
else
{
danger_zone = none;
}
The train moves with 20 * time quants / frame. Front_right is placed 400 quants in front of the train and 300 quants sideways (in relation to its origin). We trace 1000 quants below front_right, checking if the name of the texture returned by scan_texture is correct (metalplain4, used for the track in my demo) and if danger_zone is zero or not. Danger_zone is a simple variable that is controlled by the first "antenna" that gets outside the track. If danger_zone was zero (none) we can control the train by changing its pan angle and we set danger_zone to right; play with 2 * time if you want to adjust the rotation speed. As soon as the train (in fact, front_right!) is back on the track, danger_zone is set to none, allowing either front_left or front_right to take control when needed.
front_left.x = my.x + 400 * cos(my.pan) - 300 * sin(my.pan);
front_left.y = my.y + 400 * sin(my.pan) + 300 * cos(my.pan);
front_left.z = my.z;
vec_set (temp.x, front_left.x);
temp.z -= 1000; // trace 1000 quants below
trace_mode = ignore_me + ignore_passable + ignore_models + ignore_sprites + scan_texture;
trace (my.x, temp);
if ((str_cmpi ("metalplain4", tex_name) == 0) && (danger_zone == none)) // if the texture below the train isn't named "metalplain4"
{
danger_zone = right;
my.pan -= 2 * time; // rotate the train toward right, play with this value
}
else
{
danger_zone = none;
}
wait (1);
}
}
The things repeat for front_left; the only thing that might bother you is this: why do we need that danger_zone variable? The answer is simple: we don't want front_left and front_right to take control at the same time, and this variable makes sure that the train is rotated until it is back on the track, and only after that it allows other rotations.
I have used big values (400 and 300 quants) for front_left and front_right; this makes the train follow the track in a more random way. If you want to see a tight contour tracing path you can reduce these values (especially 300).