This month I have decided to include both versions of the template project inside the "Resources"; experiment_init was used as a starting point, while experiment is the finished version of the template project. I am using the latest and greatest A6.506 official version; make sure to use this version of the engine as well.
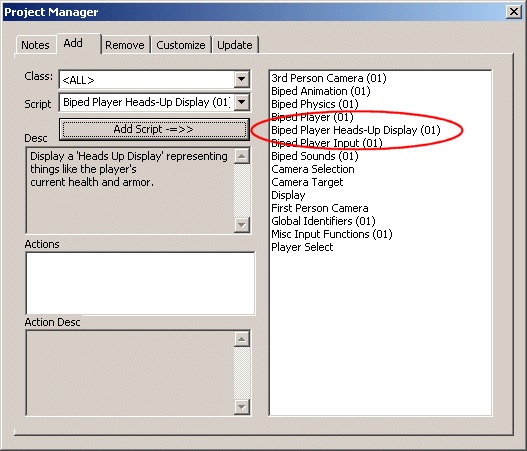
Let's get started! Open exp1.wmp in Wed, choose File -> Project Manager, and then click the Add tab. Choose the Biped Player Heads-Up Display (01) script. Click the Add script -=>> button and you should see the sky script being added to the project, just like in the picture below.
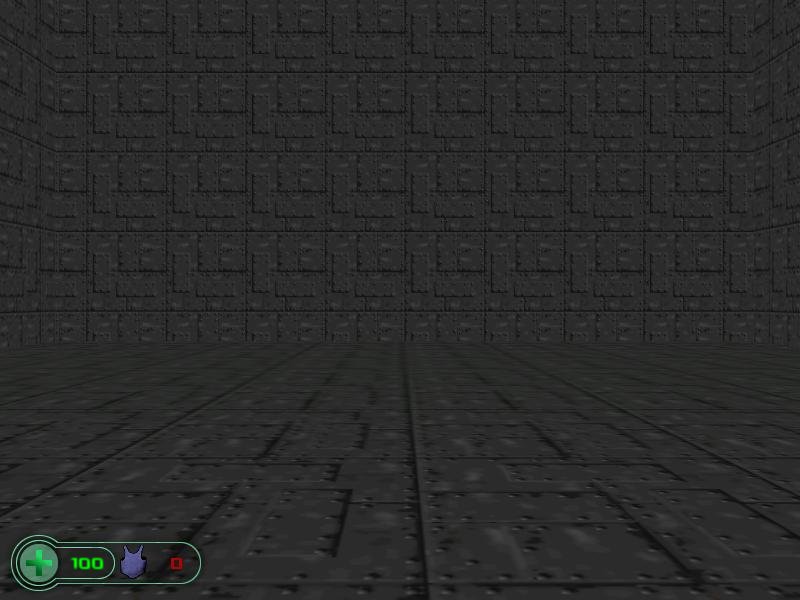
Build the level, and then run it using the existing exp1.wdl file. You will see that the heads-up display has appeared in the lower left corner of the screen.
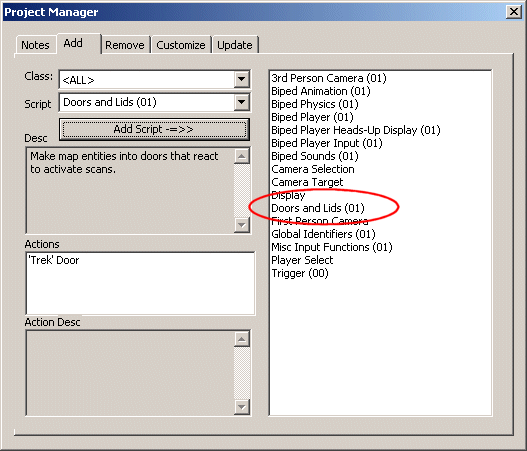
Let's add a door to our level! Bring on the Project Manager, and then add Doors and Lids (01) to our project.
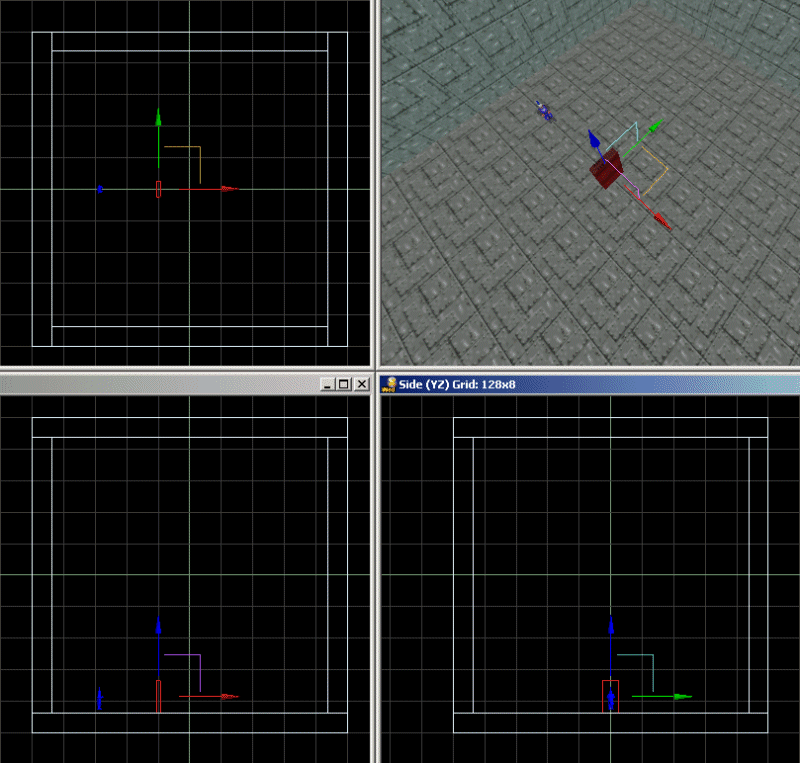
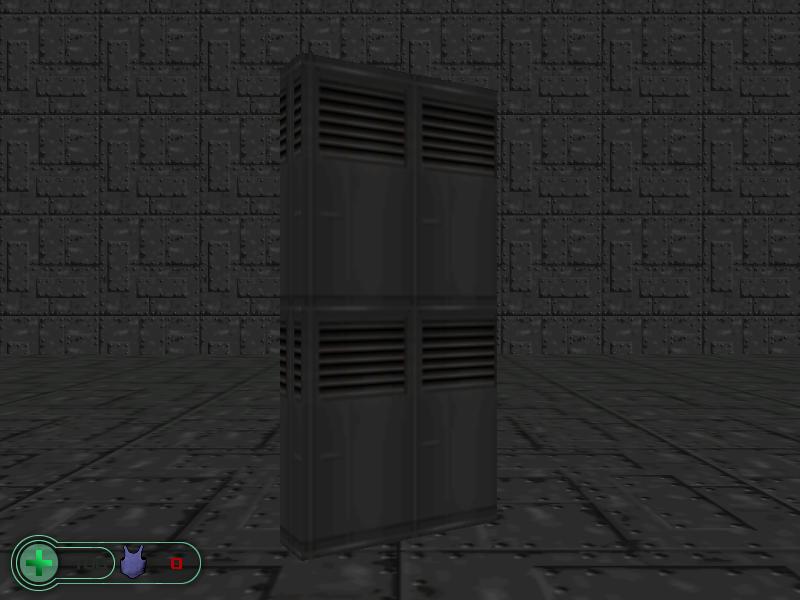
Now add the door.wmb entity to the level, in a vertical position, as indicated by the picture below.
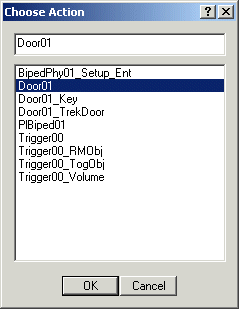
Let's attach the Door01 action to our door.
Time to save and build our level again. Run it and you will see the brand new door standing in front of the player. Come close to it, and then press the Ctrl key to open it.
It works! Now let's see what can be customized; right click the door in Wed, and then choose Behavior to bring on the following window:
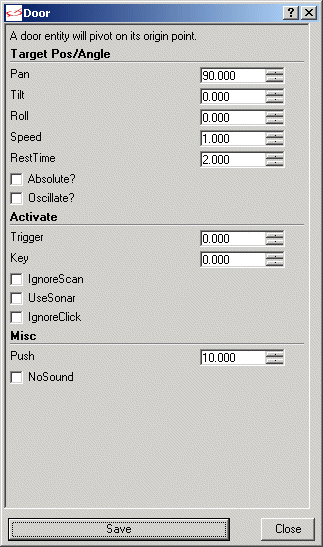
Pan, Tilt and Roll set the door's rotation angles; this means that we could easily create a lid! Let's add the bridge.wmb entity to the level.
Now let's attach the same Door01 action to our door; however, we will make it rotate around its tilt angle this time by editing its Behavior as indicated below.

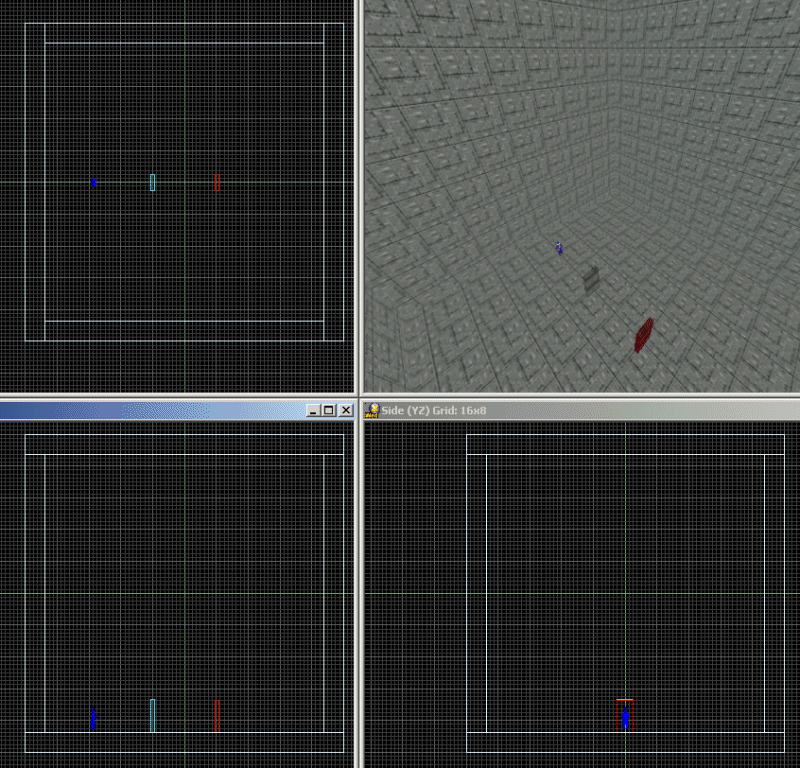
The bridge will rotate around its tilt angle, as instructed by the entity's behavior. Examine door.wmp and bridge.wmp to see where I have placed their origins. Oh, and you can notice that I have also increased the rotating speed from the lid from 1 to 3.
The Absolute flag will make the door / lid / whatever rotate around the absolute angles given by the coordinates of the level; you won't use that too often. RestTime and Oscillate aren't useful here, so don't bother with them.
Our doors or bridges can use keys; to do that, we will have to make a few changes under the Activate tab in Door01's behavior.
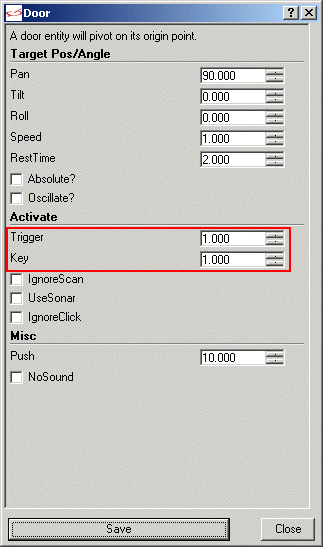
Our door will now open only if the player has got the key whose id number is 1. So let's create that key! A the key model (a small cube) to the level and attach it the action named Door01_Key. Then, customize the action as shown below.
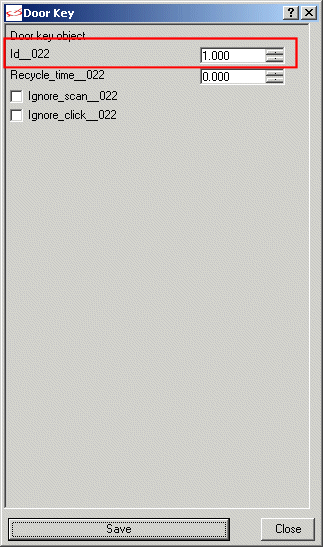
We gave now told our key to open all the doors that have their Key set to 1. Save the level, build it and run it, and then approach the door. Press Ctrl and you'll hear a weird sound which signals that our door is locked and won't open. Now run into the key to pick it up, and then approach the door and press Ctrl - the door will open. Set different id values for keys and doors and you'll be able to play with different keys that open different doors.
Let's discuss the last few parameters of the door. First of all, IgnoreScan make the door insensitive to c_scan (the default method that is being used for for opening the template doors). We don't want to check this flag. The last two flags named UseSonar and IgnoreClick can be ignored; they don't play an active role for this door.