This month we will learn how to play with some of the template functions that are grouped under the Envir category and allow us to create good looking skies. I have used last months level as a base, but I have removed all the entities that were generating particles, etc from it. I have kept the player model and its associated action, though. I am using A6.503, the latest and greatest (and most of all, free) official A6 update. Make sure to use the same engine version; otherwise, you might run into trouble.
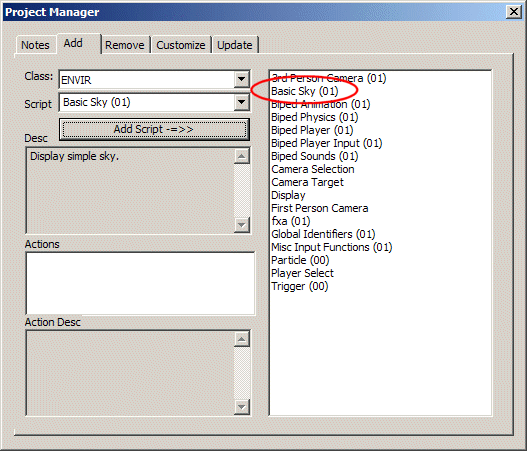
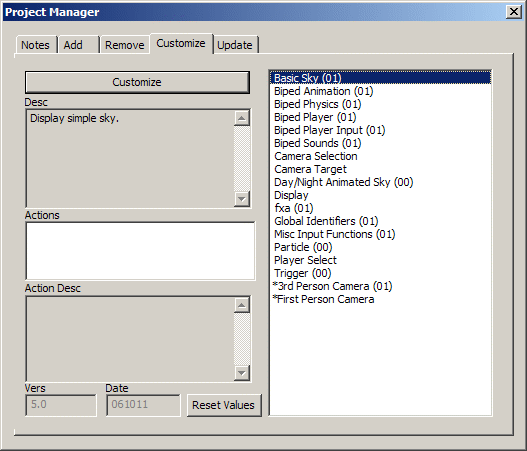
To get going, open last month's exp1.wmp level in Wed, choose File -> Project Manager, and then click the Add tab. Select Class: ENVIR, and then choose the Basic Sky (01) script. Click the Add script -=>> button and you should see the sky script being added to the project, just like in the picture below.
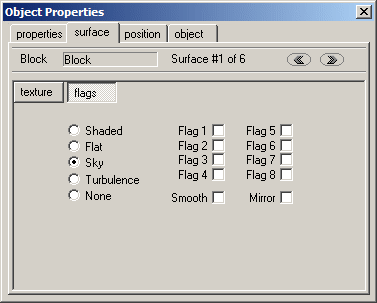
Build the level, and then run it using the existing exp1.wdl file. Nothing has happened because the walls use a regular (and not a "sky") texture; however, we can change that quickly. Select the four walls and the ceiling one by one (dont edit the floor!), right click them, and then choose Properties you will see the Object Properties window. Click the surface tab, and then check the Sky checkbox for each one of them.
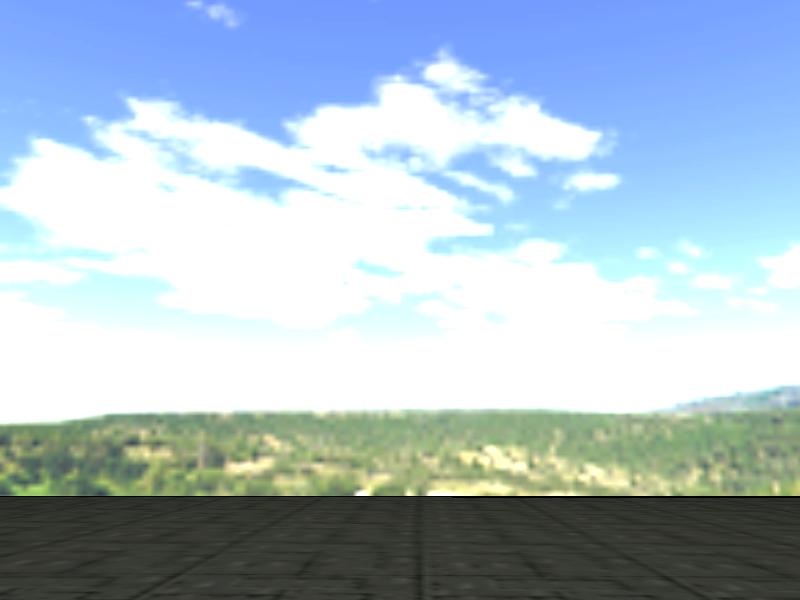
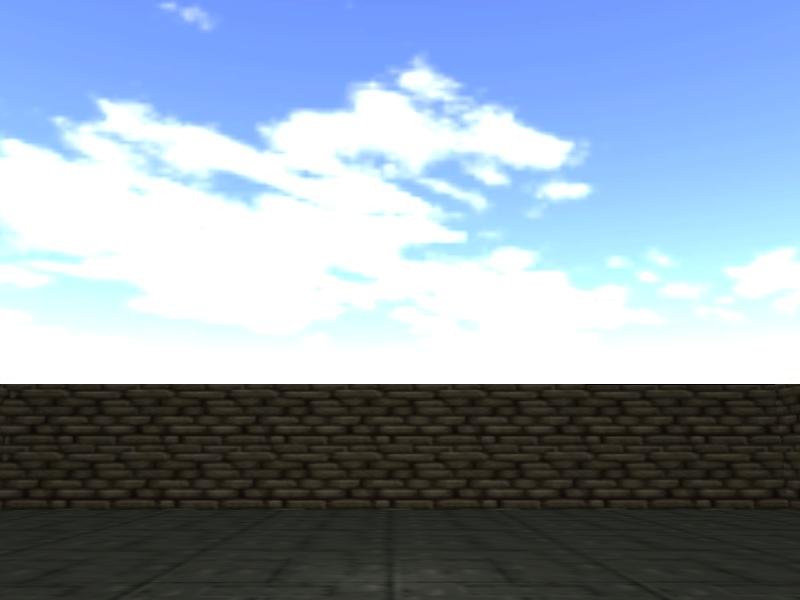
Save the level, and then build it and run it. You can now see a nice looking sky and the good old floor.
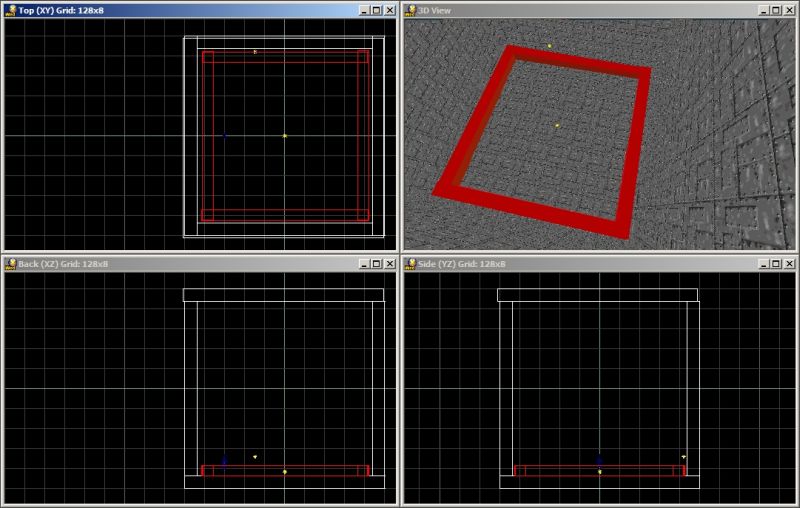
The sky looks good, but our level could use a set of real walls, because the old walls have now turned into sky boundaries. This is, once again, an easy task; add another set of four walls that will act as a border for our player, making sure that their surfaces are Shaded, and not Sky. This is, in fact, the default setting, so if you create the new walls by adding new blocks to the level you wont have to touch the surface tab at all.
The following picture show the new (red) set of walls, which have a smaller height.
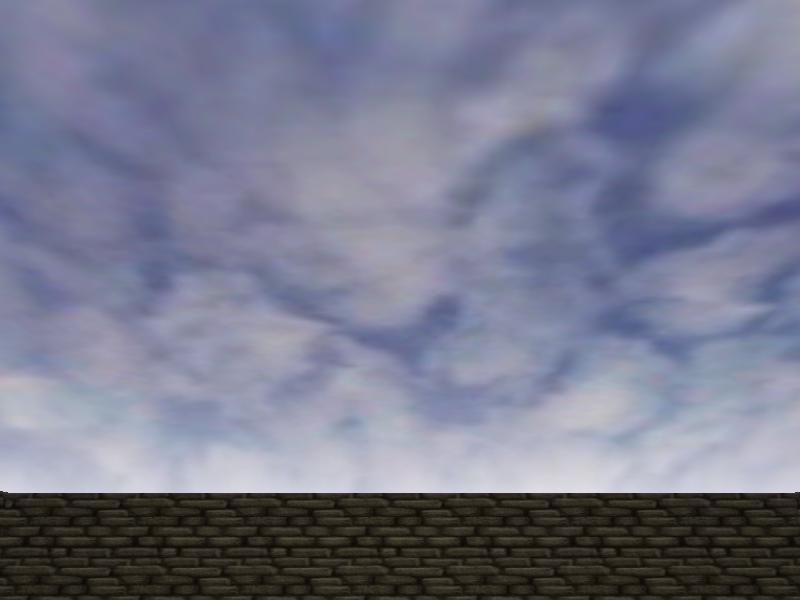
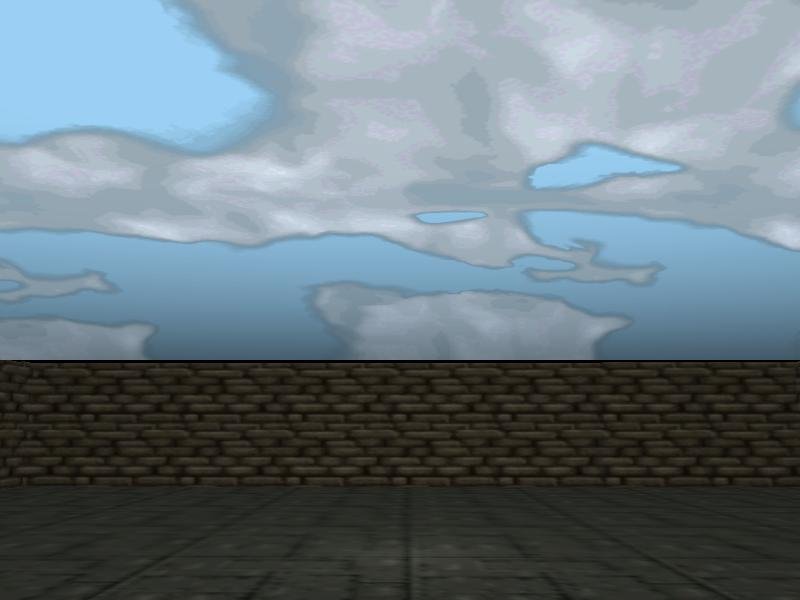
Save the level again, build it and run it; you should see the following picture.
Now thats a credible outdoor area! For those of you that dont agree with me on this, heres the opposite affirmation: now thats an incredible outdoor area! Pick the version that pleases you most ;)
One way or the other, you can customize the sky system to your liking; fire up the Project Manager, click the Customize tab, select Basic Sky (01), and then click the Customize button.
You will see the following window.
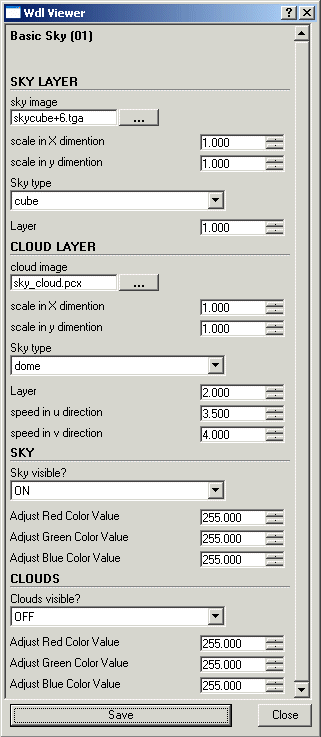
The "SKY LAYER" section allows us to choose the image (up to 2048 pixels wide) that will be used for our sky. If we choose "dome" for the "Sky type", we can adjust the x and y scale of the bitmap. We can also set the "Layer" parameter for the sky.
The "CLOUD LAYER" section allows us to choose the cloud bitmap image, set its x and y scale and type. We must choose a bigger layer for our clouds if we want them to appear over the sky layer. Finally, we can set the u and v movement speed for the clouds. If you are wondering why you didn't see any cloud movement, the answer is simple: we didn't make the clouds visible in the "Clouds visible?" section. Change that, press "Save", "Close" and then build the level and run it.
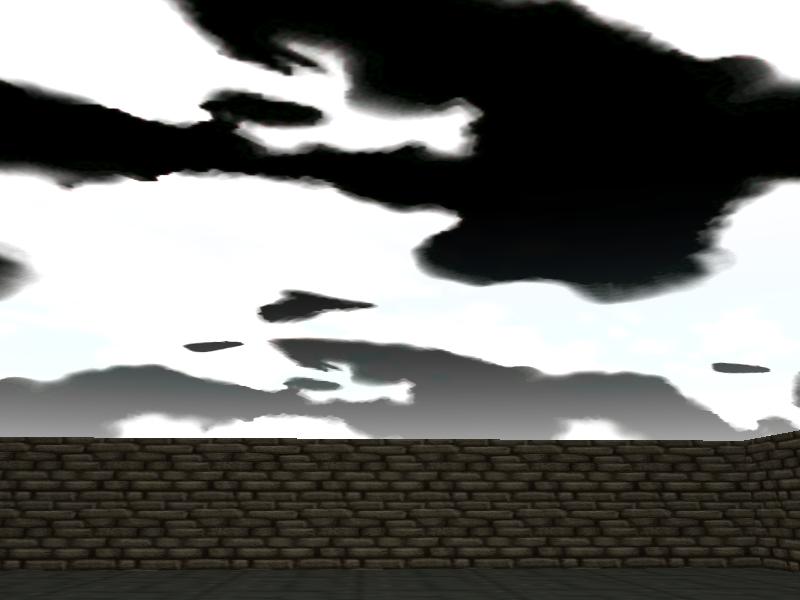
There goes my serenity... how can we change these clouds now? Let's customize the sky script once again: replace the cloud bitmap with cloud2.pcx, which can be found in the same \experiment1 folder, and then change the numerical values as shown below.
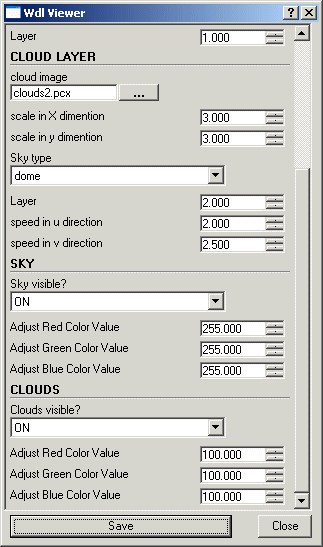
"Save", "Close" and then build the level again; you will see the new cloud layer, which is friendly and scary at the same time :)
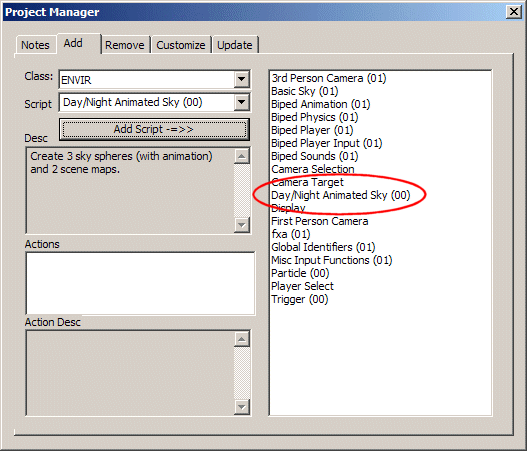
The templates also include a more advanced sky system, so let's get back to the design board! Choose File -> Project Manager, click the Add tab, select Class: ENVIR, and then add the Day/Night Animated Sky (00) script to the project.
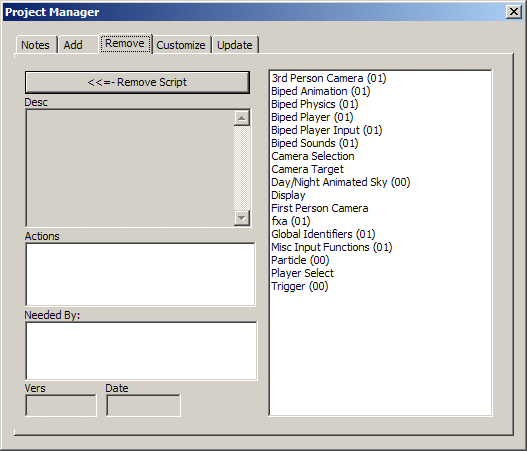
Now its the time to remove the old Basic Sky (01) script because the two skies cant work together at the same time. Select the Remove tab, click Basic Sky (01), and then click the <<=- Remove script button.
The old sky script has disappeared; however, the new Day/Night Animated Sky (00) script should be visible. Save the level, build it and run it; you will see the new sky in action.
This sky system is more advanced so let's see what can be customized; fire up the Project Manager, select the "Customize" tab, click the "Day/Night Animated Sky (00)", and then click the "Customize" button to display the following window.
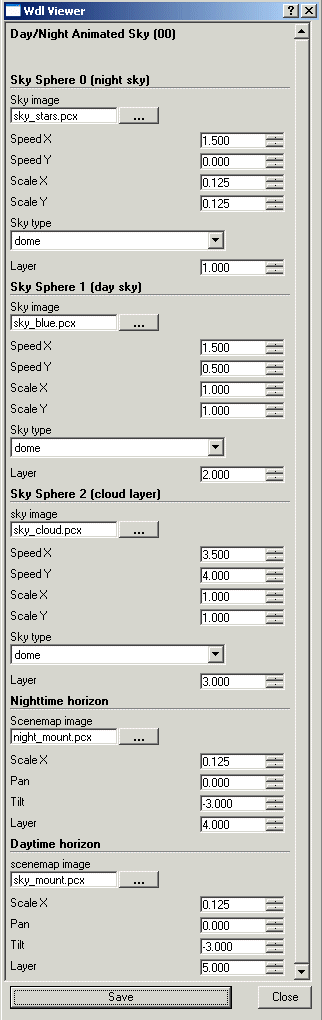
As you can see, we can choose the night, day and cloud layer bitmaps, their movement speeds and scales, their types, and so on. We can also set the night time horizon bitmap, as well as the day time horizon bitmap and choose their pan and tilt angles.
Those of you with a more adventurous spirit will want to play with the day / night transitions as well. To do that, run the test level, press the "Tab" key to bring on the console, and then type the following line of script and press Enter.
Sky00_Day_To_Night(100);
This will change the sky from day to night, with a speed given by 100; feel free to play with that value. To restore the daylight, press "Tab" again and then type the following line of code, followed by Enter.
Sky00_Night_To_Day(100);
You can trigger these function calls from within your levels, for example when the player passes through a gate, loads a new level, and so on.