This time we will play with some of the special effects that come with the templates. Copy or overwrite the \experiment1 folder inside your 3DGS folder, start Wed, and then open exp1.wmp and run it using the exp1.wdl script. As an alternative, you could start by loading last month's exp1.wmp file and going through all the steps that I am discussing throughout this article.
Select File -> Project Manager to bring on the "Project Manager" window. Click the "Add" tab, choose "Class -> ENVIR" and then select "Script -> fxa (01)" from the drop-down list. Click the "Add Script -=>>" button and you will see that "fxa (01)" was added to the project.
Take a look at the "Actions" list to see what's inside the fxa (01) script file; we can create blinking lights, mirrors, short circuit sparkers, smoke machines and
transparent entities.
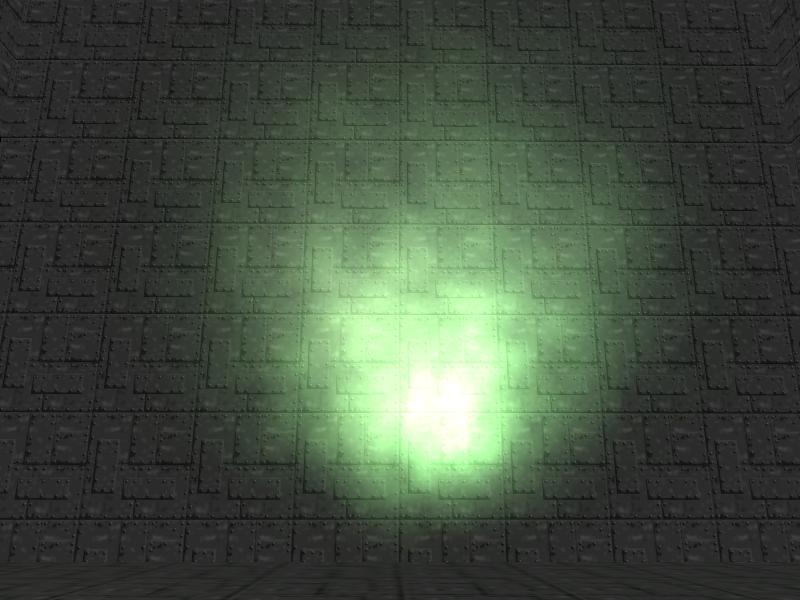
Let's start with the blinking light effect! Go back to Wed, add the gem1.mdl model to the level, move it close to the floor and then attach it the "FXA_LightBlink" action.
Save the level, build it and run it; you will see a white blinking light that is generated by our model. If you don't want to see the model that generates the light, you can simply check its "invisible" flag in Wed's "Object Properties" window. You can also make the model "passable" from the same window if you want to.
Let's customize our blinking light; right click its model, and then choose "Behavior" to display the proper window.
What do we have here? First of all, a field named "Trigger" that would allow us to activate the light only when certain conditions are met (the player pushes a button, opens a door, and so on). We'll leave it untouched for now. Then, we've got the "Red", "Green" and "Blue" fields, which give the color of our dynamic light. Feel free to experiment with different RGB values here, "Save", build and then run the level to see the changes; valid RGB values range from 0 (completely dark) to 255 (fully lit).
This blinking light uses four steps, each one of them having its own light range and delay; this way you can create the illusion of a randomly flickering light, like one of those used neon lights. Or, to bypass the delay1...delay4 pauses and make the things even more random, you can check the "Randomize" checkbox. The opposite is true, of course: uncheck the "Randomize" checkbox if you want to see the delay1... delay4 pauses in action.
We won't discuss the FXA_Mirror effect here; I have taken good care of that in Aum55, where you will also find a detailed description on how to create the needed wmb entity. I am really curious to see how the FXA_ShortCircuit effect looks like, so add another gem model to the level and attach it the proper action. Looks really good (much better in motion) and it's even got its own sound!

Let's see what can be customized.
We've got the same "Trigger" which can start our particle generator only when certain conditions are met, "Red", "Green", "Blue" and "LightRange" to set the color and the light range of the dynamic light that is generated together with the sparks, and then the "Spark" section, which allows us to control the size of the spark particles, their RGB color and their life span (in ticks).
PerSpark comes from "PercentageSpark" and gives the sparking chance for the particle emitter; the default value of 55 will give a 55% chance for the spark to appear every 0.25 seconds, while a value of 99 will give a far greater chance for the particle to spark every 0.25 seconds. DirSpark gives, as you have might (have not) guessed, the duration of each spark shower in ticks. Set bigger values here if you need "fountains" of sparks.
Time to move on to the following effect; add another gem model to the level and then attach it the action named "FXA_Smog".
Now that's a nice particle effect! It is twirling in a hypnotic way... almost got me dizzy... hey, who am I and why am I attacking myself? Seriously, it's a good looking, highly customizable particle effect.
You can see our old "Trigger" friend and lots of other parameters grouped under the "Smoke" category:
- "Bitmap" allows you to select one of the 2 predefined bitmaps, so use a value of 1 or 2 here. My brave readers might even want to place their own smog_03.tga file inside the template_6\images folder and set "Bitmap" to 3 - the code for that is in place already.
- "PuffDelay" gives the delay (in ticks) between two consecutive smoke puffs.
- "MaxPuffs" gives the maximum number of smoke puffs that can be seen at once.
- "StartScale" sets the initial scale of the particle bitmap.
- "Scale" gives the particle size growth during its lifetime.
- "Speed" gives the speed with which the particle moves away from its emitter.
- "Drag" sets the value which diminishes the speed of the particle during its lifetime.
- "UpDrift" sets the vertical speed of the particle. You can also use negative values here if you want your particles to move downwards.
- "Rotation" gives that hypnotic rotation movement speed.
- "Fade" gives the fading speed for the particles.
Now that you know what all these parameters do, it's going to be really easy to set up this effect and use it for nice looking entrances, portals and so on.
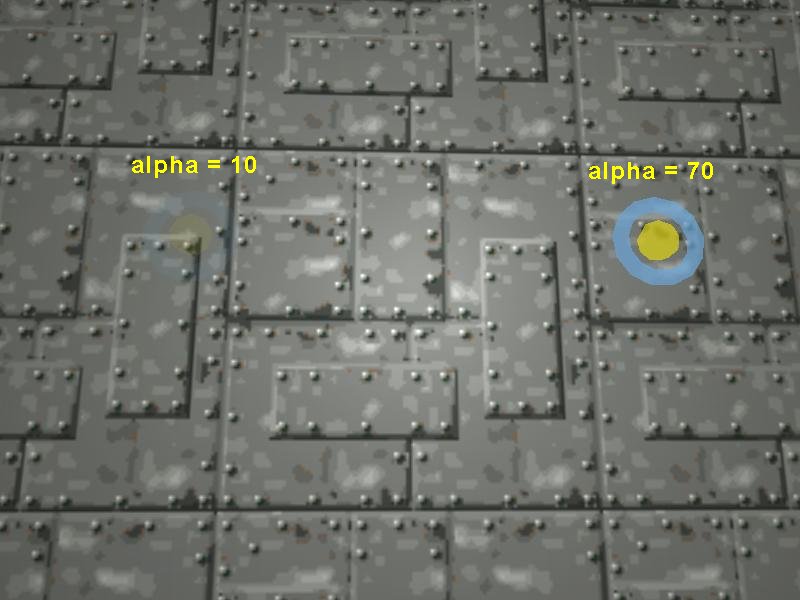
Time to add another gem to the level; in fact, I have added two gems because I wanted to show you two different instances of the same "FXA_Transparent" effect. The only parameter that can be adjusted under "Behavior" is the "Alpha", aka the transparency factor. A value of 0 will create an invisible entity, while a value of 100 will create a completely opaque object. Take a look at the picture below to see my two entities with alpha values of 10 and 70.
This concludes our fxa (01) exploration. I'll see you all again next month!