This time we will add more interactive elements; please use the scifi1_done.wmp level from Aum52 as a base. The final version of this month's demo is available inside the archive that can be downloaded under "Resources".
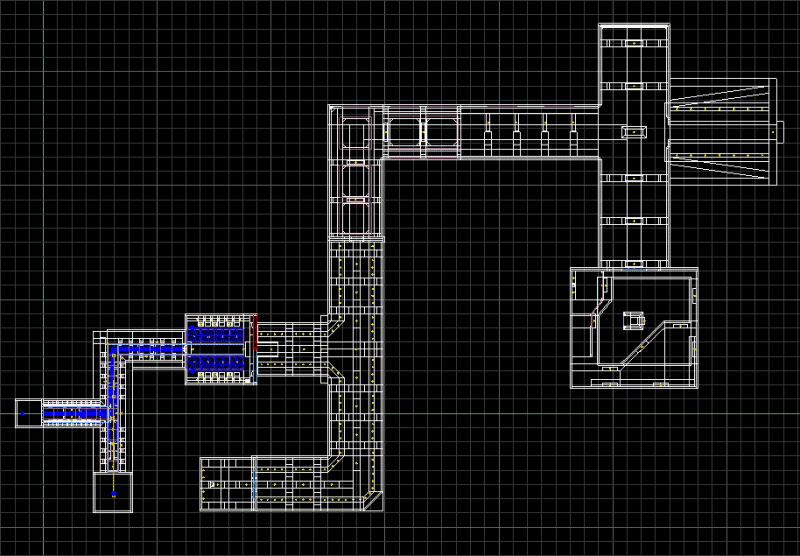
Let's start by adding the code for a door! Find the door that is highlighted in red in the picture below.
Right click the door entity, choose "Properties" and then attach it the Lift01_Basic action.
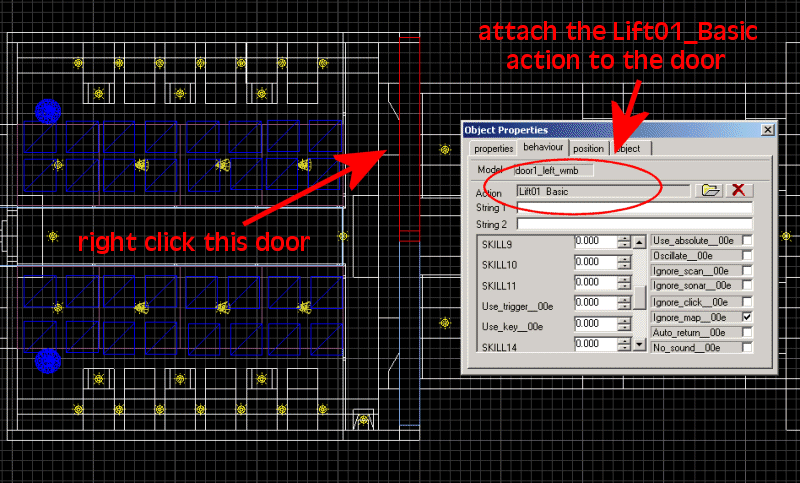
Dismiss the window, right click the entity again and this time choose "Behavior"; you will see the following window:
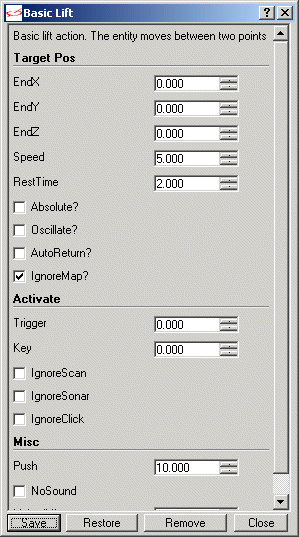
This lift / door code can move any entity from its initial position to another position that is specified by us. We will want to increase the Y coordinate of our wmb entity because this way it will act like a sliding door.
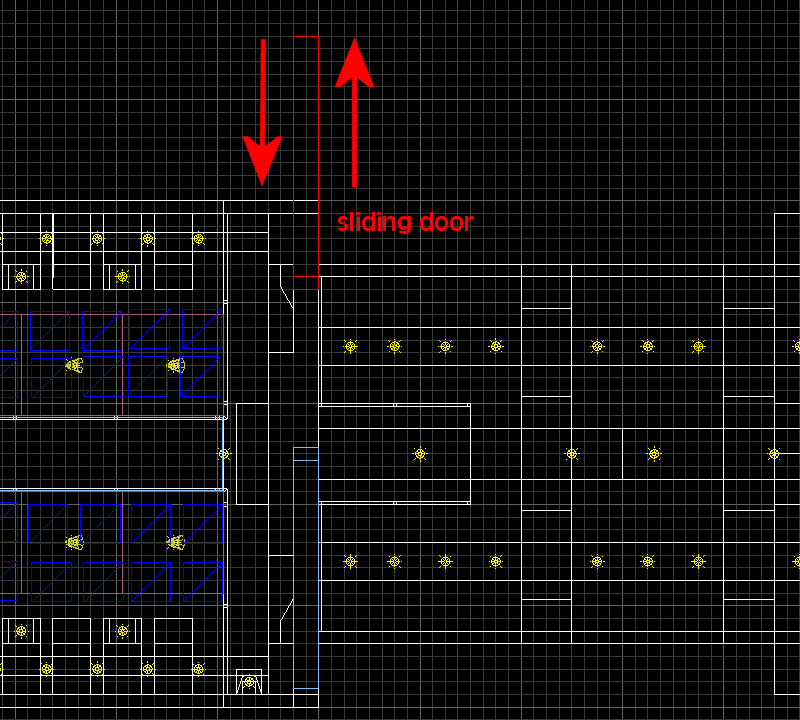
The sliding door needs to change its Y coordinate from the initial position of 568 quants to the final position = 784 quants. This means that the door travels 784 - 568 = 216 quants, and that's what we will want to put in the "EndY" field. Oh, and before I forget about it, I have removed the two UFOs that were waiting in the same room with the sliding doors; we want to learn a few things here, not to shoot a lot of stuff.
I have set the "Speed" of the doors to 2 and "Trigger" to 1; take a look at the pictures below to see the settings for both doors.
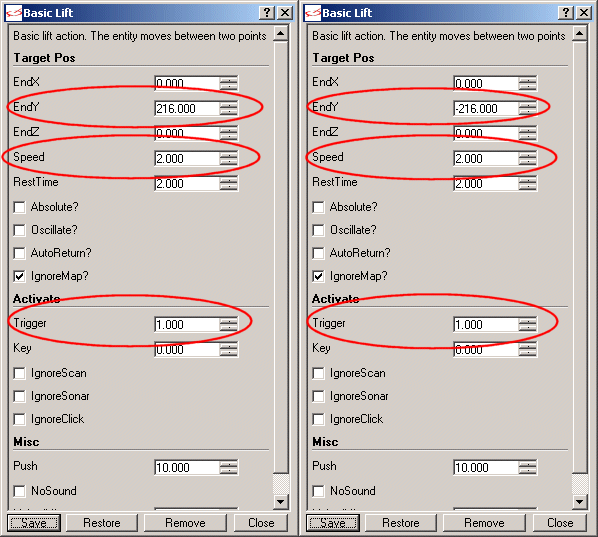
Please note that the second door has its EndY value set to -216 quants, because it moves in the opposite direction.
Ready for action? If you would test the doors right now you would find out that they aren't opening, because we didn't add any entity to trigger them. Return to Wed and add a cube.mdl model above the computer that is placed near the doors.
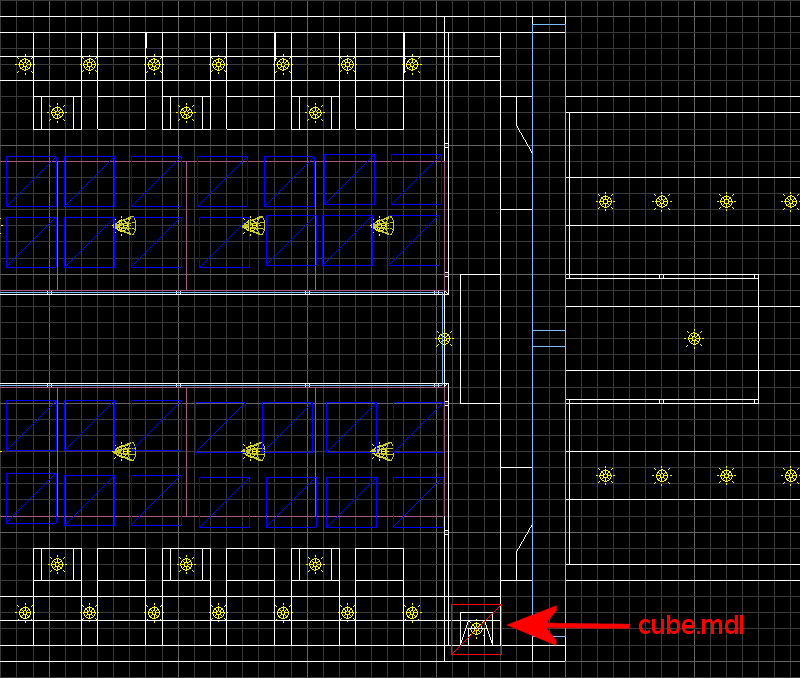
Set cube.mdl's "invisible" flag and then attach it the "Triger00" action.
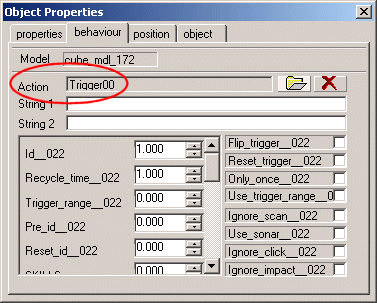
Well, you have got me: I'm using the latest and greatest Wed; you should get it in a few weeks, together with the following free A6 update. Back to our trigger entity: dismiss the "Object Properties" window, and then right click the cube.mdl entity again and choose "Behavior". Set "ID" to 1; we must set the same value we've used for the "Trigger" field on our doors.
All is set now! Build the level (update the entities), and then run the scifi1_done.wdl script. You will have to kill the UFO, but then you can come close to the doors and you will see that they start to open if you approach the computer.
If you want the doors to open when you approach them you can edit some settings for the trigger entity as shown in the picture below.
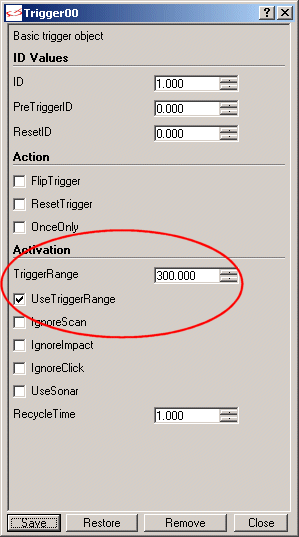
You will have to check the "UseTriggerRange" checkbox; don't forget to set a proper TriggerRange value as well. These changes make the trigger sensitive on a radius of 300 quants, creating the illusion that the doors open because you approach them, and not because you approach the trigger.
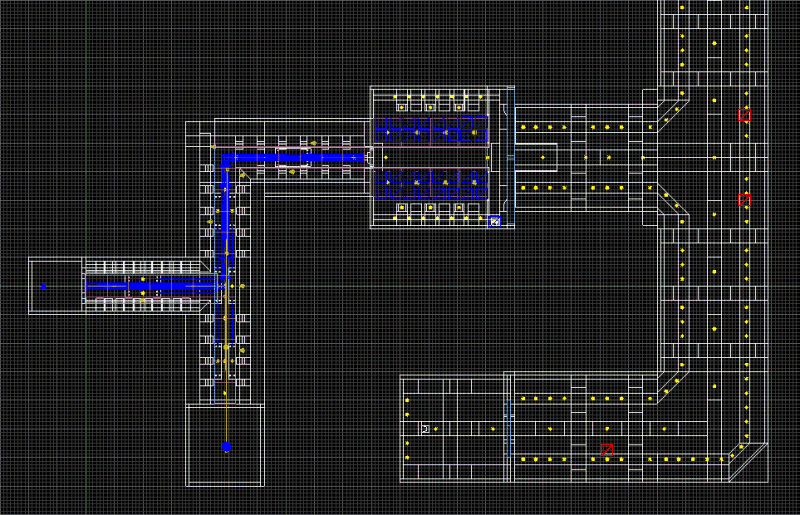
Let's add a few blinking lights! Move down the hallway and place 2-3 cube.mdl models in the level; take a look at the screenshot below to see how I have placed my (red) cubes.
Set the "invisible" flag for the cubes, and then attach them the "FXA_LightBlink" action.
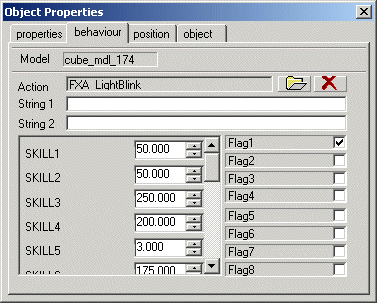
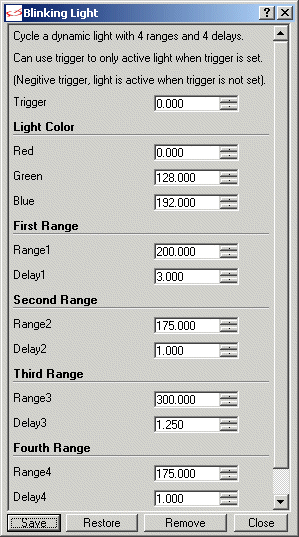
Dismiss the window; right click a cube, choose "Behavior" and then set the desired light color, light range, and so on. These are the values used for my demo.
Time to customize player's weapons; choose File -> Project Manager to bring on the Project Manager's window.
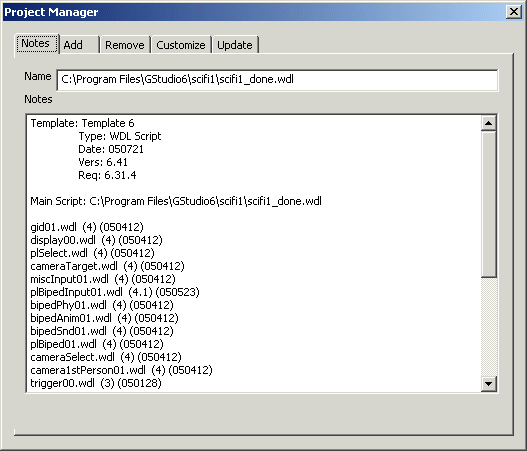
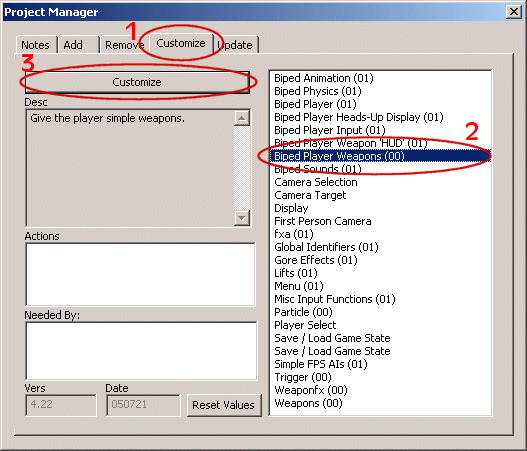
Click the "Customize" tab, select "Biped Player Weapons", and then click the "Customize" button.
You will see the following window.
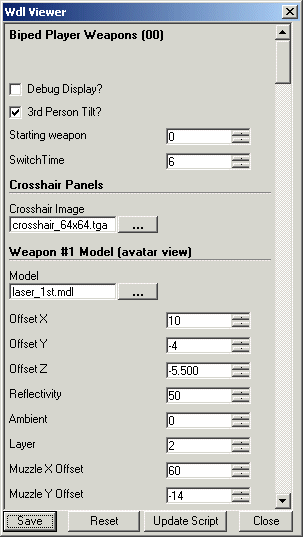
The player has got too many weapons, so we will remove some of them. Scroll down until you see "Player Weapons".
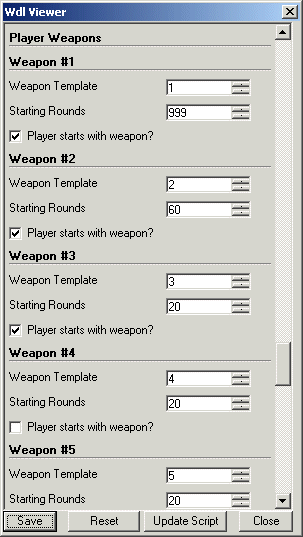
Uncheck "Player starts with weapon" for the 1st and 3rd weapon. You can scroll down if you want to set different keys for reloading, choosing the previous / following weapon, and so on. Click "Save", "Close" and then dismiss the project manager. Run the level again and you will see that the player has a single weapon now: the machine gun.
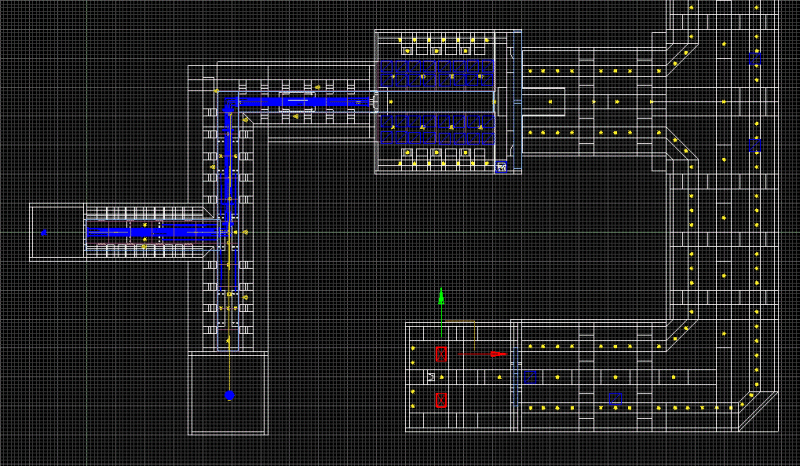
We are going to fight some more enemies in the future, so it would be nice to give the player more ammo for this gun. But before doing this, we have to place the ammo box in a room with some doors that open automatically when you approach them. I have drawn player's path towards the doors with a red line.
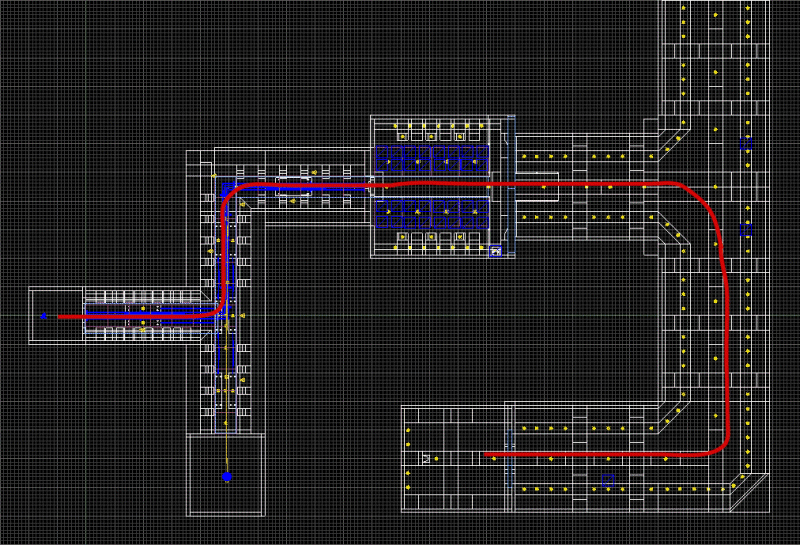
The new doors will use the same setup with the old ones, excepting the EndY parameter, which should be set to 88 and -88 quants.
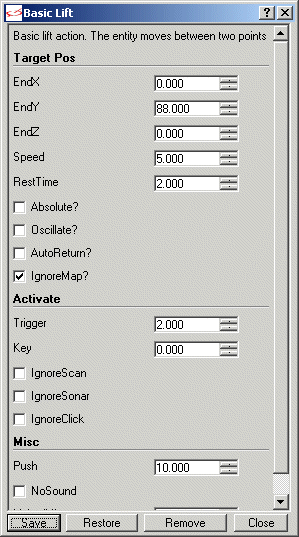
You will also have to add an invisible, passable trigger entity in front of the doors; make sure to set the trigger ID to 2 for the doors, as well as for the trigger.
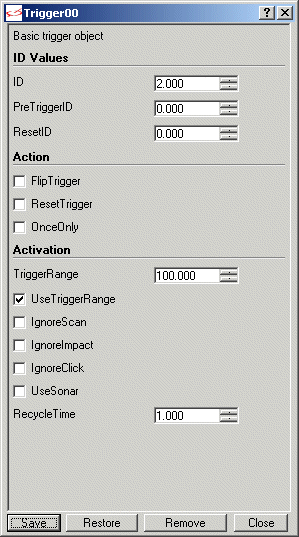
The trigger will open the doors when the player comes closer than 100 quants to it; feel free to play with "100" if you'd like to have a different triggering distance.
Let's add two ammo boxes right now; place two ammo.mdl models in the small room.
Right click one of the ammo boxes, choose "Properties" and attach it the "PlBipedWeap00_AmmoP" action.
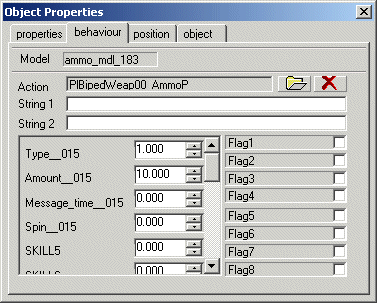
Dismiss the window, right click the model again and this time choose "Behavior". I have chosen to give the player 60 bullets for each ammo pack but you can set other values here.
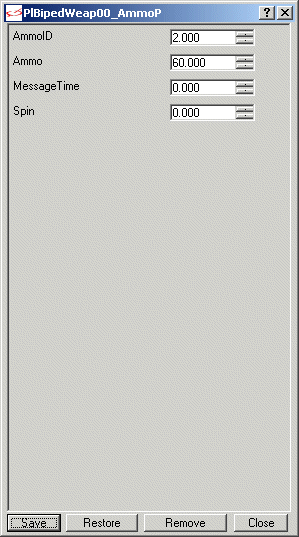
Don't forget to set a matching AmmoID value; the bullets and the existing gun (weapon 2) should share the same value. Now build the level, updating the entities, go to the ammo boxes and pick them up. You won't see any changes, but if you run out of ammo you can press reload (the default key for that is "R") and you'll get a fresh round of bullets. Stay tuned for more action in the following episode!