Using several physics objects
If you have bought A6 commercial you might find that "1 physics object only" limit pretty annoying. Fortunately, there are legal ways to overcome this obstacle, and this article will teach you how to do that. I promise to entertain the A6 pro owners too, because we will also learn to create shootable light sources.
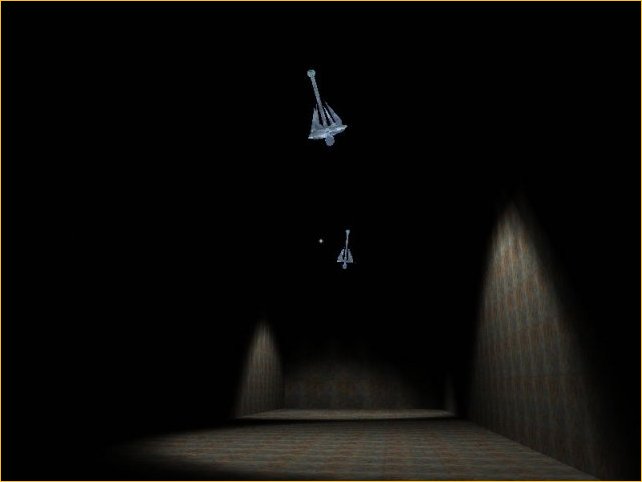
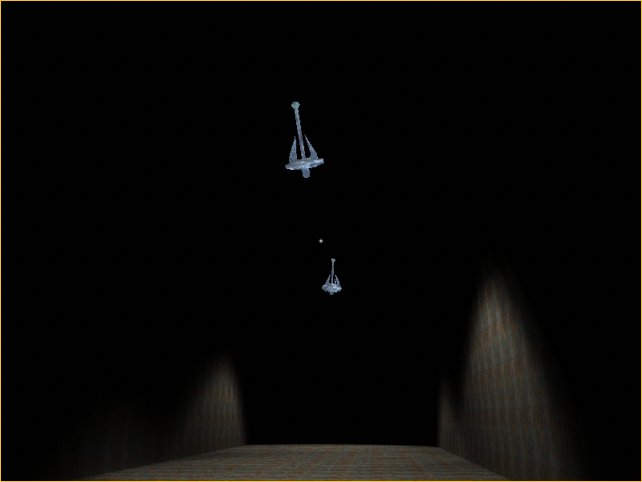
The article includes 2 projects, so load physics1.wmp, build it and run it using physics1.wdl. You will see a dark hallway; move the mouse a little until you see the first lamp:
Make sure that the crosshair is placed over the lamp, and then fire an orange ball by pressing the left mouse button; you will see that the lamp starts to move, creating nice lights and shadows on the floor and on the walls:
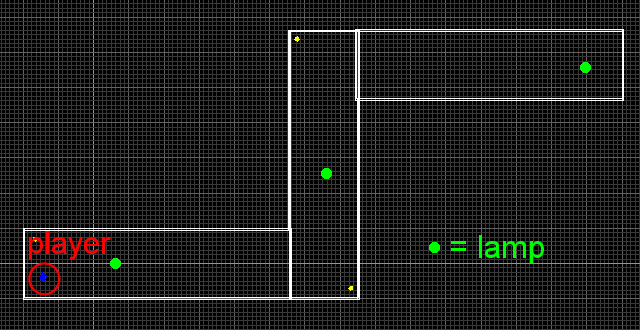
There are 3 lamps like this in the first demo level, and each one of them controls a radius of 700 quants, acting like a "physics" object when the player approaches it. I invite you to explore the level; I'm going to show you Wed's top view of the first demo.
Let's take a good look at the code now. Function main simply loads the physics1_wmb level:
function main()
{
level_load (physics1_wmb);
}
The crosshair is a simple 6 x 6 pixels bitmap that was defined as a panel and placed in the center of the screen:
panel crosshair_pan
{
bmap = pointer_pcx;
pos_x = 397;
pos_y = 297;
flags = visible, overlay;
}
Time to take a look at the action used for the player:
action player1
{
player = my;
my.invisible = on;
while (1)
{
vec_set (camera.pos, my.pos);
camera.pan = my.pan;
camera.tilt += 10 * mouse_force.y * time;
my.pan -= 10 * mouse_force.x * time;
temp.x = 10 * (key_w - key_s) * time;
temp.y = 5 * (key_a - key_d) * time;
temp.z = 0;
ent_move (temp, nullvector);
wait (1);
}
}
The player model is made invisible; the camera inherits the x y z position and the pan angle from the player. We can change the tilt angle of the camera by moving the mouse vertically, and the pan angle of the camera by moving the mouse horizontally. The player can move forward / backward by pressing the "W" and "S" keys and strafes with the "A" and "D" keys. These values are stored in temp every frame and move the player using the ent_move instruction. You can see that temp.z is set to zero, so the player isn't using gravity in this project.
What happens when the player presses the left mouse button? Take a look!
on_mouse_left = fire_bullet;
function fire_bullet()
{
ent_create (bullet_mdl, camera.x, move_bullet);
}
Every time we press the left mouse button, function fire_bullet() is run. This function creates a bullet_mdl entity at the position given by the camera and makes it run the function named move_bullet():
function move_bullet()
{
my.unlit = on;
my.enable_block = on;
my.enable_entity = on;
my.enable_impact = on;
my.pan = camera.pan;
my.tilt = camera.tilt;
my.event = remove_bullet;
This bullet entity isn't affected by the lights in the level, because we want to see it even if it is moving in the darkest corners of the level. The bullet is sensitive to level blocks and entities; it inherits the pan and tilt angles of the camera and runs its remove_bullet() function every time it collides with a level block or with another entity.
while(1)
{
if (vec_dist (my.x, camera.x) < 50)
{
my.passable = on;
}
else
{
my.passable = off;
}
temp.x = 30 * time;
temp.y = 0;
temp.z = 0;
move_mode = ignore_you + ignore_passable + glide;
ent_move (temp, nullvector);
wait(1);
}
}
The bullet mustn't collide with the player entity, so it will be made passable until the distance between it and the camera grows above 50 quants. The bullet moves with the speed set with temp.x, ignoring passable objects. Let's see what happens when the bullet hits a wall or one of the lamps:
function remove_bullet()
{
wait (1);
ent_remove(me);
}
This simple function waits for a frame and then removes the bullet. Let's see the most interesting piece of code - it's the one attached to every lamp model:
action physics_lamp
{
while (player == null) {wait (1);}
my.unlit = on;
my.ambient = 100;
my.lightrange = 300;
my.spotlight = on;
vec_set (d3d_spotlightcone, vector (75, 30, 4));
The lamp waits until the player is created, then turns its "unlit" flag on and sets its ambient to 100. We did this because we need to see our lamps glowing in the dark; otherwise our bullets might miss them most of the time! The lamps will generate dynamic light on a range of 300 quants and have their "spotlight" flag turned on. We set d3d_spotlightcone to a convenient value given by our vector (75, 30, 4); you can play with these values from vector (1, 1, -5) to vector (90, 90, 5).
ph_setgravity (vector (0, 0, -386));
phent_settype (my, ph_rigid, ph_box);
phent_setmass (my, 10, ph_box);
phent_setdamping (my, 20, 50);
my.skill20 = phcon_add (ph_ball, my, 0);
phcon_setparams1 (my.skill20, vector (my.x, my.y, (my.z + 35)), nullvector, nullvector); // play with "35"
The lines above turn our regular lamp into a physics entity. First of all we set the gravity to 9.81 m/s2 if we agree to use 1 quant = 1 inch, and then we tell the engine that our lamp is to be treated as a physics object, with its collision hull being similar to a box. The lamp will have a mass of 10 and its rotational behavior will be similar to a box. Finally, we set the linear damping for our lamp to be 20 and the angular damping to 50.
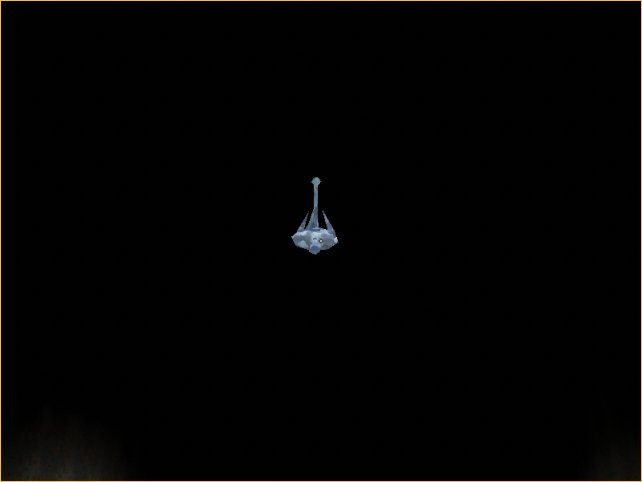
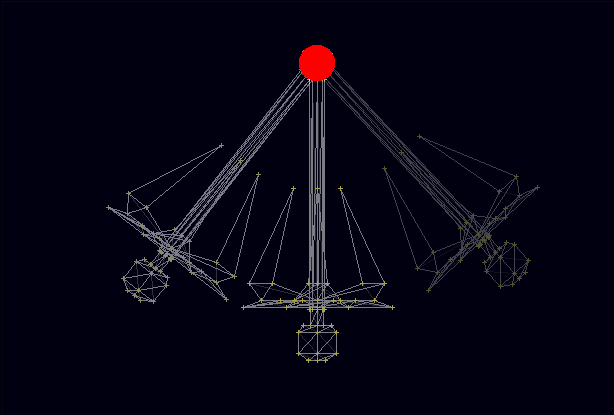
We need to add a constraint to our lamp entity, because we want it to be able to swing just like in the picture below:
my.skill20 = phcon_add (ph_ball, my, 0);
phcon_setparams1 (my.skill20, vector (my.x, my.y, (my.z + 35)), nullvector, nullvector); // play with "35"
I have copied the two lines of code again so that you can take a better look at them. The first line sets a ball-like constraint on the lamp entity and stores the id for the constraint in skill20 for further manipulation; the second line of code sets the parameters of the constraint whose id was stored in skill20. We use a vector that gets the x and y values from our lamp and adds 35 quants on the z axis; these will be the coordinates of the swinging point for the lamp. The rest of the parameters are set to nullvector because (according to the manual) ph_ball needs to have only its anchor point set.
That was all the physics-related stuff! For those of you who continue to feel a bit foggy, here's a more friendly explanation: we tell the lamp that it is going to move as if it would rotate around a sphere, and we set the center of the sphere with vector (my.x, my.y, (my.z + 35). This means that the center of the rotation will have the same x and y positions with the lamp, being placed 35 quants above the lamp (the red point in the picture above).
while (1)
{
if (vec_dist (player.x, my.x) < 700) // 700 = experimental value
{
phent_enable (my, 1);
}
else
{
phent_enable (my, 0);
}
wait (1);
}
}
The while loop above enables or disables the physics entity depending on the distance between the player and the lamp. Feel free to remove the while loop if you own A6 pro because that loop won't help you at all; the rest of the article is useful especially for the A6 commercial owners.
All the lamps checks the distance between them and the player every frame; if the player comes closer than 700 quants to a lamp, that lamp starts to act like a "physics" object, while the other lamps freeze. This wouldn't look too good if the player could see all the lamps at the same time, but that's why I have created the level this way. You should play with "700"; I chose a smaller value because I wanted you to observe the behaviour of the lamps; I feel that "1000" is a decent value for this demo level.
The method above allows you to use several physics objects throughout the level; use a lamp here, maybe a barrel or a vehicle there (and so on) but make sure that they aren't visible / used at the same time. Run distance checks for all the physics objects and set phent_enable to 1 or 0 depending on the distance from them to the player.
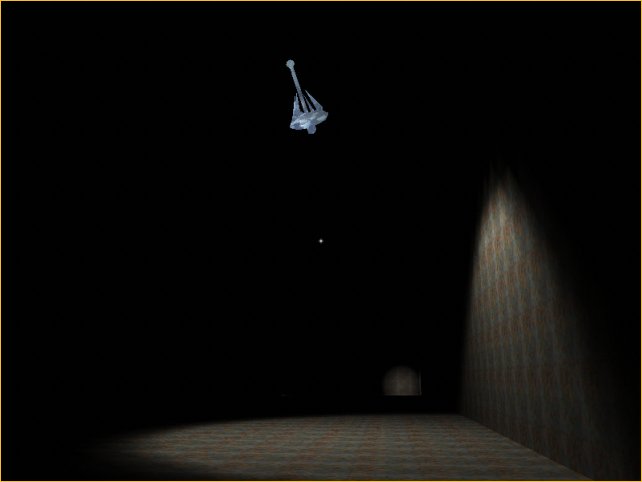
Ok, I know I've told you that you can use several "physics" entities at the same time even with A6 commercial, and the trick above didn't quite do it, because those lamps can't be used at the same time. So why don't you load the physics2.wmp level, build it and run physics2.wdl? You should see a room with 2 lamps:
These 2 lamps are true physics objects and can be used at the same time, even with A6 commercial! Now how can this be?
Most of the code inside physics2.wdl is similar with the one inside physics1.wdl, so we will only discuss the changes here. First of all, we have a starter function that looks like this:
starter multiple_objects()
{
while (1)
{
ent_number = 1;
wait (2);
ent_number = 2;
wait (2);
}
}
That's a simple function! It sets a variable named ent_number to 1 for two frames, then sets ent_number to 2 for two frames and so on. This variable is used inside the action attached to the lamps:
action physics_lamp
{
my.unlit = on;
my.ambient = 100;
my.lightrange = 300;
my.spotlight = on;
vec_set (d3d_spotlightcone, vector (75, 30, 4));
ph_setgravity (vector (0, 0, -386));
phent_settype (my, ph_rigid, ph_box);
phent_setmass (my, 10, ph_box);
phent_setdamping (my, 20, 50);
my.skill20 = phcon_add (ph_ball, my, 0);
phcon_setparams1 (my.skill20, vector (my.x, my.y, (my.z + 35)), nullvector, nullvector);
All the code above is identical with the one used in physics1.wdl, so we won't discuss it again.
while (1)
{
if ((my.skill1 == 1) && (ent_number == 1))
{
phent_enable (my, 1);
}
if ((my.skill1 == 2) && (ent_number == 2))
{
phent_enable (my, 1);
}
wait (1);
phent_enable (my, 0);
}
}
This time the while loop makes the first lamp an active physics object for 2 frames (that's how much time ent_number is set to 1) and then it allows the second lamp to become the active physics object for 2 frames, because every lamp has its skill1 set to a different value (1, 2, ...) in Wed. If we need to have 3 physics objects running at the same time, we could use something like this:
starter multiple_objects()
{
while (1)
{
ent_number = 1;
wait (2);
ent_number = 2;
wait (2);
ent_number = 3;
wait (2);
}
}
action physics_lamp
{
....................................................
while (1)
{
if ((my.skill1 == 1) && (ent_number == 1))
{
phent_enable (my, 1);
}
if ((my.skill1 == 2) && (ent_number == 2))
{
phent_enable (my, 1);
}
if ((my.skill1 == 3) && (ent_number == 3))
{
phent_enable (my, 1);
}
wait (1);
phent_enable (my, 0);
}
}
That's how it works! We continue to have a single physics object (that's the limit set by A6 commercial) but it is shared by several entities really fast, as if we would run several physics objects at the same time!
How many different objects can we have at the same time? Well, this depends on the nature of your project; if the game runs at 80 fps and we have 4 lamps that are visible at the same time, each one of them will move with 80 fps / 4 = 20 fps, which is ok. If you plan to create a pool game, you could create all the balls for it as physics objects if they run at 10 fps.
My tests show that you can use at least 3-4 physics objects on a decent PC, which I consider to be a big step ahead when compared to the 1 object limit set by A6 commercial. Don't forget that you can combine the techniques that were used in these 2 projects to get even more physics objects in your level.