It's time for a new workshop series! This time we are going to start discussing about 2D applications and 2D games. I know it's hard to believe it, but these 2D applications and games refuse to die and some of them prove to be even more fun than their 3D counterparts. I don't know about you, but a game of Worms in 2D is much more fun than 3D Worms in my opinion. On top of that, regular 2D games are easier to learn and run great even on old computers, so they are perfect if you plan to design and sell a casual game.
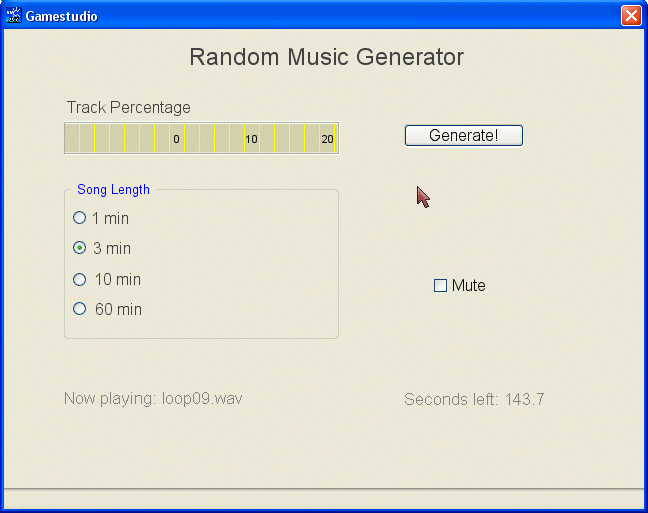
These things being said, we are going to start this series with two "serious" applications. We need to know what 2D tools we have at our disposal, and these applications include them all. Let's open and run randmusic.c first:

Believe it or not, this is a random music generator that can create soundtracks that run for months! I have limited it to 60 minutes tracks, but you can easily change that. How does this thing work? I have used a series of loops that blend in together nicely; this set is known as a "construction kit" in the computer musicians' world. Our 12 loops are glued one after the other in a random fashion, creating decent sountracks.
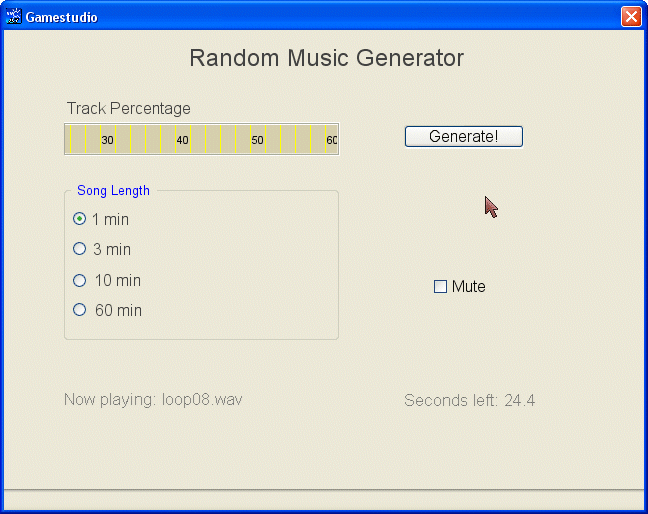
Choose the length of the song (the default value is 1 minute) using one of the radio buttons, and then press the "Generate!" button; as you hear the song, the "Track Percentage" window indicator starts sliding towards the left side of the screen, showing 10, 20, ... 100. Click the "Mute" checkbox to mute the sound or enable it again. We have also got a text that displays the current loop that is being played, as well as a digit that displays the number of seconds that are left to play. All these elements are applied over a grey panel that serves as a background for the application.
Now take one more look at the words in bold; all these words describe 2D elements that can be used in 2D games as well. If you have followed my previous workshops, you already know quite a few things about texts, panels, buttons or digits; however, there are some 2D elements that weren't discussed in any of my workshops yet.
I won't paste the code that takes care of the variable definitions, bitmaps, sounds, and so on - that's trivial stuff. The first thing that interests us is the main panel definition:
PANEL* main_pan =
{
bmap = "main.tga";
layer = 10;
pos_x = 0;
pos_y = 0;
red = 128;
green = 128;
blue = 128;
button (400, 95, generate1_tga, generate1_tga, generate2_tga, generate_song, NULL, NULL);
button_toggle (429, 249, checkbox_on_tga, checkbox_off_tga, checkbox_on_tga, NULL, mute_track, NULL, NULL);
button_radio (68, 181, radio_on_tga, radio_off_tga, radio_off_tga, NULL, set_length, NULL);
button_radio (68, 211, radio_on_tga, radio_off_tga, radio_off_tga, NULL, set_length, NULL);
button_radio (68, 243, radio_on_tga, radio_off_tga, radio_off_tga, NULL, set_length, NULL);
button_radio (68, 272, radio_on_tga, radio_off_tga, radio_off_tga, NULL, set_length, NULL);
digits(400, 360, "Seconds left: %.1f", arial_font, 1, current_length);
window (61, 95, 272, 28, window_tga, window_var, 0);
flags = VISIBLE;
}
The panel uses a 640 x 480 pixels bitmap; we will set the screen resolution to 640 x 480 pixels as well, so the panel will cover the entire screen. The panel has an RGB color set of (128, 128, 128); this way, all the texts and all the numerical values that are displayed by the panel will have a grey color. Let's see all its elements:
- The "button" definition creates the "Generate!" button. When we click this button, function "generate_song" is run (more on that a little bit later).
- The "button_toggle" definition creates the "Mute" checkbox, which can be either checked or unchecked.
- The "button_radio" definitions create the four radio buttons that allow us to choose the length of the song. The "Song Length" button frame was painted by me over the panel; it isn't created by the "button_radio" definitions.
- The "digits" definition displays "Seconds left:" and a numerical value, in our case given by "current_length".
- The "window" definition creates a window bitmap. Here's how our window_tga bitmap looks like:
![]()
As you can see, it's a big bitmap and only a part of it is visible on our main panel.

The window definition "cuts" the desired area in the main panel, allowing the window bitmap to slide towards the left or right side of the screen, depending on our needs. A window definition can make the bitmap slide vertically as well.
void main()
{
randomize();
fps_max = 70;
video_mode = 6; // run in 640 x 480 pixels
video_depth = 32; // 32 bit mode
video_screen = 2; // start in window mode
}
As you can see, function main() is very simple; it limits the frame rate to 70 fps, it sets the video resolution and depth, and then makes sure that the application starts in window mode. GameStudio runs in window mode by default anyway, but that line doesn't hurt anyone and can prove itself useful in future versions of the engine.
function mouse_startup()
{
mouse_mode = 2;
mouse_map = pointer_tga;
while (1)
{
vec_set(mouse_pos, mouse_cursor);
wait(1);
}
}
Function mouse_startup( ) is our typical mouse function; it doesn't do anything special. Let's take a look at the function that runs when we press the "Generate!" button:
function generate_song()
{
if (current_length > 0) {return;}
current_length = music_length;
var temp;
while (1)
{
temp = 1 + integer(random(12)); // generate a random number in the 1...12 interval
switch(temp)
{
case 1:
loop_handle = snd_play (loop01_wav, 100, 0);
str_cpy(playing_str, "Now playing: loop01.wav");
break;
case 2:
loop_handle = snd_play (loop02_wav, 100, 0);
str_cpy(playing_str, "Now playing: loop02.wav");
break;
.......................................................
case 12:
loop_handle = snd_play (loop12_wav, 100, 0);
str_cpy(playing_str, "Now playing: loop12.wav");
break;
}
We are using a variable named current_length; it stores the number of seconds that are left from our song. If the song is still playing (current_length > 0) we don't allow the player to start a new one. We are using another variable named music_length; its role is to store the duration of the song in seconds (60, 180, 600 or 3600 seconds). The value of the variable named temp is set to a random value in the 1...12 interval, and then a switch / case statement plays the corresponding, random loop. We also use this to display the name of the loop that is currently being played.
while (snd_playing (loop_handle))
{
current_length -= time_step / 16;
if (current_length < 0)
{
current_length = 0;
return;
}
if (music_length == 60)
{
window_var = 752 - current_length * 12.533; // 12.533 = 752 / 60
}
if (music_length == 180)
{
window_var = 752 - current_length * 4.178; // 4.178 = 752 / 180
}
if (music_length == 600)
{
window_var = 752 - current_length * 1.254; // 1.254 = 752 / 600
}
if (music_length == 3600)
{
window_var = 752 - current_length * 0.209; // 0.209 = 752 / 3600
}
wait (1);
}
str_cpy(playing_str, "#50");
}
wait (1);
}
The loops have started to play, but we must make sure that they don't overlap, so we use a "while" loop that waits until the previous loop has stopped for good. Meanwhile, the same "while" loop decreases 1 from current_length each second, acting as a countdown timer as well. If the song has stopped (current_length < 0), we set current_length to zero because we don't want to display negative time values on the screen, and then we get out of this function.
Believe it or not, the very same "while" loop controls "window_var", which, as you may recall, shifts our window horizontally, displaying the song percentage from 0 to 100%. Our window_tga bitmap has a width of 1024 pixels and the "window" definition has a cutout of 272 pixels; this means that we can shift only 1024 - 272 = 752 pixels horizontally. This value, divided by the number of chosen seconds, gives those weird looking numerical values that multiply current_length, the variable that does the window shifting. Finally, the "str_cpy" line of code resets the "playing_str" as soon as a loop is being played.
We've only got two tiny functions to discuss, so hold on.
function mute_track()
{
master_vol = (master_vol == OFF) * 50; // set the volume at 50%
}
Function mute_track sets master_vol to either 0 or 50, depending on the number of clicks on the "Mute" checkbox.
function set_length(button_number)
{
if (button_number == 3) // the first radio button was clicked?
{
music_length = 60; // then set the length to 60 seconds (1 minute)
}
if (button_number == 4) // the second radio button was clicked?
{
music_length = 180; // then set the length to 180 seconds (3 minutes)
}
if (button_number == 5) // the third radio button was clicked?
{
music_length = 600; // then set the length to 600 seconds (10 minutes)
}
if (button_number == 6) // the fourth radio button was clicked?
{
music_length = 3600; // then set the length to 3600 seconds (60 minutes)
}
}
Function set_length receives the number of the pressed button on our main panel as a parameter. Let's not forget that we've got more than these radio buttons in the panel definition; if you take a look at main_pan you will notice that the first "button_radio" definition is the 3rd panel element, so button_number is set to 3 for the first radio button, and so on.
This function simply sets "music_length" to the desired length for the song: 1, 3, 10 or 60 minutes. And there you have it: a jukebox that can run for hours, days, months or even years without repeating itself. What if you throw in 100 similar loops, or even 100 totally different loops and sound effects? If you do that, I'd be interested in seeing (and most of all, hearing) the result of your work.
Time to move on to the second example in this workshop; open the "guitartuner" folder, and then open and run guitartuner.c:

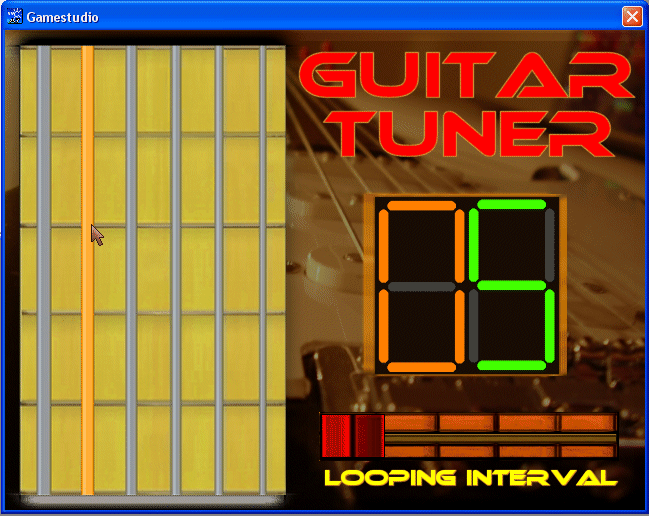
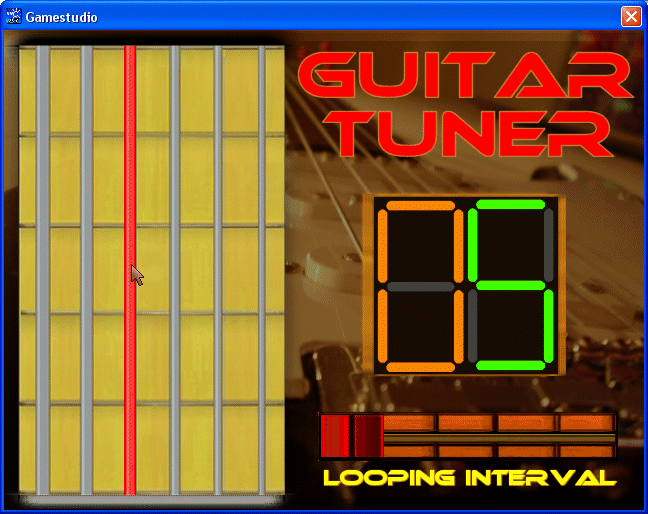
The title says it all: it's a guitar tuner. You simply click the desired chord and the proper sound is being played. On top of that, you can have one-shot sounds or looping guitar sounds that repeat themselves at the interval specified by you. Click a few chords to get started, and then adjust the slider to a non-zero value and click a chord again; this time, you will hear the selected chord playing its sound over and over. Oh, and the green 5 is in fact an S from "Seconds", get it?). Let's see the code that makes it tick now:
PANEL* main_pan =
{
bmap = "main.tga";
pos_x = 0;
pos_y = 0;
button (31, 16, chord1on_tga, chord1off_tga, chord1over_tga, chord1, NULL, NULL);
button (76, 16, chord2on_tga, chord2off_tga, chord2over_tga, chord2, NULL, NULL);
button (120, 16, chord3on_tga, chord3off_tga, chord3over_tga, chord3, NULL, NULL);
button (166, 15, chord4on_tga, chord4off_tga, chord4over_tga, chord4, NULL, NULL);
button (210, 16, chord5on_tga, chord5off_tga, chord5over_tga, chord5, NULL, NULL);
button (254, 16, chord6on_tga, chord6off_tga, chord6over_tga, chord6, NULL, NULL);
hslider(316, 384, 298, slider_tga, 0, 9, slider_value);
digits(372, 168, 1, digits_font, 1, sound_delay);
flags = VISIBLE;
}
Once again, I am skipping all the variable definitions and the rest of the boring stuff. The main panel includes several button definitions. We have used a button in our previous example, but this time we are using several buttons (a button for each chord) fully: regular bitmaps, bitmaps that change when the mouse is placed over the button and bitmaps that change when the player clicks the button. As you can see, we've got regular (grey) chords, orange chords or red buttons (chords).

A new 2D element is the "hslider" definition, which creates the horizontal slider that can set the looping interval. GameStudio allow us to create horizontal sliders or vertical sliders. Finally, we have a "digits" definition that displays the number of seconds between two consecutive chord sounds. Let's see how the rest of the code looks like:
void main()
{
fps_max = 70;
video_mode = 6; // run in 640 x 480 pixels
video_depth = 32; // 32 bit mode
video_screen = 2; // start in window mode
// the following loop makes sure that the slider inputs an integer value
while (1)
{
sound_delay = integer(slider_value + 0.4); // sound_delay should be in the 0...9 range
wait (1);
}
}
Function main doesn't do anything special; please note that sound_delay, which is in the 0...9 range, is set to an integer value and makes it easier for the player to set the maximum value of 9 (if needed) without having to drag the slider all the way towards right.
function mouse_startup()
{
mouse_mode = 2;
mouse_map = pointer_tga;
while (1)
{
vec_set(mouse_pos, mouse_cursor);
wait(1);
}
}
Function mouse_startup( ) didn't change from the previous example, so we can safely ignore it. We've only got a last function to discuss; it's the function that runs when the player clicks the first chord. The functions that are associated with the rest of the chords are identical, so we won't discuss them.
function chord1()
{
var temp;
chord_changed = 1;
wait (3); // stop all the other loops that might be running
chord_changed = 0;
snd_stop(chord1_handle);
snd_stop(chord2_handle);
snd_stop(chord3_handle);
snd_stop(chord4_handle);
snd_stop(chord5_handle);
snd_stop(chord6_handle);
if (!sound_delay) // delay = 0?
{
chord1_handle = snd_play(one_wav, 100, 0); // then play the chord sound only once
}
else // the sound will be played in a loop here
{
while (1)
{
chord1_handle = snd_play(one_wav, 100, 0);
// stop playing the sound in a loop if the player sets the sound delay to zero
while (!sound_delay)
{
if (chord_changed) return; // get out of here if the player has clicked another chord
wait (1);
}
temp = 0;
while (temp < sound_delay)
{
if (chord_changed) return; // get out of here if the player has clicked another chord
temp += time_step / 16;
wait (1);
}
}
}
}
We are using a global variable named "chord_changed" to detect if the player has clicked another chord; if this is the case and the current chord sound runs in a loop, it has to be stopped. The first lines of code set "chord_changed" to 1 for 3 consecutive frames; this will be enough to stop our "while... wait (1)" loops.
Each chord sound has a different handle attached to it, so we make sure to stop all the sounds first. If the looping interval ("sound_delay") is set to zero, we play the chord only once. If the looping interval is set to a non-zero value (could be 1... 9 seconds), we use a "while (1)" loop that plays the sound over and over, waiting for as long as sound_delay is set to zero and getting out of the function if "chord_changed" is set to 1 (the player has clicked another chord button). I have used my good old trick, replacing the "wait (-x)" delay instruction with a loop that increases temp's value with 1 each second; this way, we can get out of the loop instantly when needed.
With all this fresh knowledge in our minds, we are now ready to dive into the fascinating world of 2D gaming. Don't ignore the potential of the 2D applications, though.
I'll see you all next month!