Car AI
This month we will learn to create several cars that are driven by the computer. These cars will use different paths and they will have different speeds every time, so every race will look different. Oh, and each car will use its horn if one of the other cars stands in its way. We will also see a nice "Finish" panel that displays the places occupied by the cars and their individual racing times.
Don't forget to read the article in Aum32 first! You did that already? Ok, let's start with a few definitions:
define race_over skill20;
define counting_laps skill21;
define laps skill22;
define max_speed skill23;
define min_speed skill24;
define distance skill25;
define scans skill26;
define car_speed skill27;
I have named the skills above in a more friendly way; let's see what they mean:
- my.race_over is a skill that will be set to 1 as soon as the car finishes the race;
- my.counting_laps will enable or disable the counter for the number of laps;
- my.laps will hold the number of laps for the car;
- my.max_speed holds the maximum speed for the car; its value changes every lap;
- my.min_speed holds the minimum speed for the car; its value changes every lap;
- my.distance holds the distance covered by the car;
- my.scans holds the number of scans for a specific car
- my.car_speed holds the current speed of the car.
Don't bother to learn what these skills do; we will get back to them later.
entity* car1; // needed only for the panels
entity* car2;
entity* car3;
I have defined three pointers named car1, car2 and car3; the driving code doesn't need pointers at all, but the texts that appear at the end of the race need them.
text car1_txt
{
font = system_font;
pos_x = 180;
pos_y = 0;
string = car1_str;
layer = 15;
}
text car2_txt
{
font = system_font;
pos_x = 180;
pos_y = 0;
string = car2_str;
layer = 15;
}
text car3_txt
{
font = system_font;
pos_x = 180;
pos_y = 0;
string = car3_str;
layer = 15;
}
panel finish_pan
{
bmap = finish_pcx;
pos_x = 100;
pos_y = 100;
alpha = 50;
layer = 10;
flags = overlay, refresh, transparent;
}
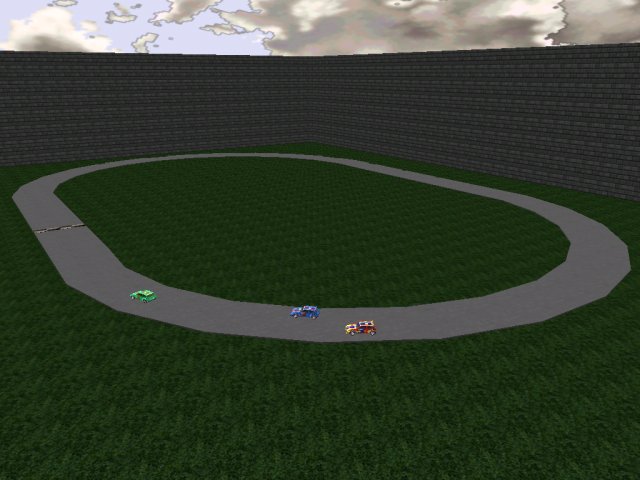
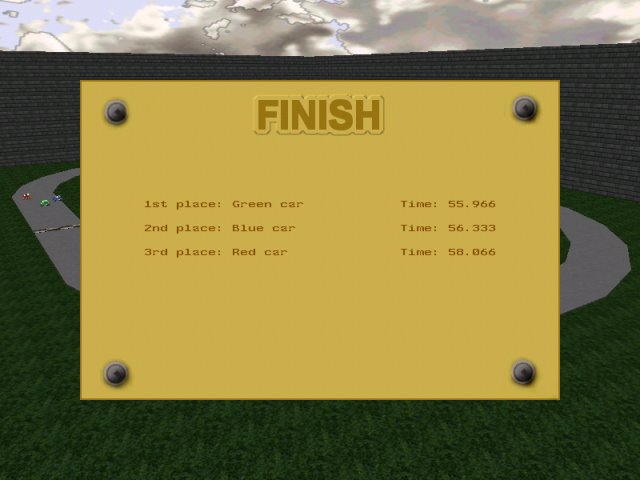
You can see that these text definitions and the panel are simple; take a look at the picture below to see them in action:
And now here's another picture that shows who is who:
The texts will appear in a random order over finish_pan, depending on the winner of the race.
This was the introduction. How would you create a racing game that includes several cars controlled by the computer? You could use something like this:
You could use those concentric paths indeed, but I wouldn't buy your game. I like to see the cars running into each other, using their horns, and so on; this will never happen with the path layout above. What do we do then? We duplicate a good path several times, we rotate it a little, we edit some of its points and we get something like this:
You can see that these paths overlap a few times; if your track is bigger than mine then you will have plenty of room for more natural (yet wicked) path twists. Ok, let's take a look at function main now:
function main()
{
randomize();
fps_max = 30;
level_load (carai2_wmb);
wait (3);
camera.x = -3400;
camera.y = 1325;
camera.z = 840;
camera.pan = 326;
camera.tilt = -17;
The first line of code generates a unique sequence of random number every time. We limit the frame rate to 30 fps, we load the level and then we set the correct position and angles for the camera.
while (1)
{
if (car1.race_over == 0)
{
car1_time = total_frames / 30;
}
if (car2.race_over == 0)
{
car2_time = total_frames / 30;
}
if (car3.race_over == 0)
{
car3_time = total_frames / 30;
}
wait (1);
}
}
The while loop above computes the racing time for every car for as long as the car continues to move (race_over isn't set to 1). The times are stored in car1_time, car2_time and car3_time. Read the article in Aum 32 to get more info about this simple timer system.
Here comes the big, scary action:
action car
{
var waypoint_number = 0;
var target_coords;
var engine_handle;
var angle_diff;
var engine_offset;
my.race_over = 0;
my.counting_laps = 1;
my.laps = -1;
my.max_speed = 50;
my.min_speed = 50;
my.enable_scan = on;
my.event = make_way;
engine_offset = random(3);
We define a few variables that will store the current waypoint number and the coordinates of the next target (waypoint) on the path. Engine_handle is the handle (the identifier) for the engine sound; angle_diff holds the difference between the current pan angle of the car and the angle of the next waypoint on the path. Engine_offset will create a unique engine sound for every car. The skill that was defined as race_over is set to zero (the race is starting, not ending) and the lap counter is enabled (counting_laps = 1). The number of laps is set to -1 (it will be set to zero as soon as the cars start the race). The initial max_speed and min_speed values are set to 50, but that will change in a moment, as soon as the cars cross the starting line (well, it's a block, not a line, but let's pretend that it is a line for now).
The car is sensitive to scanning; when it is scanned by another car, its make_way event is run. Finally, engine_offset is set to a random value from 0 to 3.
if (my.skill1 == 1) // don't forget to set skill1 = 1 for the first car, skill1 = 2 for the second car and so on
{
ent_path("car01"); // if skill1 = 1 the car will follow the path named "car01" without the quotes
car1 = me; // I'm car 1
}
if (my.skill1 == 2) // same thing for the rest of the cars
{
ent_path("car02");
car2 = me;
}
if (my.skill1 == 3)
{
ent_path("car03");
car3 = me;
}
engine_handle = ent_playloop (my, engine_wav, 50); // play the engine sound in a loop
ent_waypoint(target_coords, 1); // set the target coordinates to the first point on the path
The first car has its skill1 set to 1, so it will use the "car01" path. This car will be known as "car1" from now on, because we have assigned it the pointer with this name. The same things happen for the rest of the cars; don't forget to set their skill1 to different values!
The engine_wav sound will be played in a loop; the result of the operation is stored in engine_handle. The next line of code sets the target coordinates to the first point on the path.
while (my.race_over == 0) // this loop will run until my.race_over = 1
{
temp.x = 60; // horizontal scanning angle
temp.y = 60; // vertical scanning angle
temp.z = 150; // scanning range
scan_entity (my.x, temp);
temp.x = target_coords.x - my.x;
temp.y = target_coords.y - my.y;
temp.z = 0;
if (vec_to_angle (angle_diff.pan, temp) < 150)
{
waypoint_number = ent_nextpoint(target_coords);
}
angle_diff.pan = ang(angle_diff.pan - my.pan);
my.pan += my.car_speed * angle_diff.pan * 0.005;
The while loop above will run until my.race_over is set to 1, and this happens only at the end of the race. The car scans in front of it, detecting the other cars nearby (if any). Take a look at the picture below:
If one of the other cars invades the scanning cone, the event function associated to the car will run. We'll talk about the event soon; let's get back to our code.
We get the vector that points toward the target and we store it in temp. If the car comes closer than 150 quants to the target, we tell her to move towards the next point on the path (that's what ent_nexpoint does). We get the difference angle between the current pan angle of the car and the orientation of the next point on the path, and then we rotate the car slowly towards the destination.
if (((waypoint_number > 65) || (waypoint_number < 8)) || ((waypoint_number > 34) && (waypoint_number < 49))) // horizontal areas of the track?
{
if (my.car_speed < (my.max_speed * time)) // and the speed is below max_speed?
{
my.car_speed += 1 * time; // increase the speed of the car
}
}
else // curved areas of the track
{
if (my.car_speed > (my.min_speed * time)) // and the speed is above min_speed?
{
my.car_speed -= 0.5 * time; // decrease the speed of the car
}
}
my.skill28 = 0; // second skill used for car_speed, we are using skill27..skill29 (skill27 was defined as car_speed)
my.skill29 = 0; // third skill used for car_speed
move_mode = ignore_you + ignore_passable + glide;
my.skill2 = ent_move (my.car_speed, nullskill);
my.distance += my.skill2;
snd_tune (engine_handle, 50, (my.skill2 * 5 + engine_offset), 0);
vec_set (temp, my.x);
temp.z -= 1000;
trace_mode = ignore_me + ignore_passable + scan_texture;
trace (my.x, temp); // trace 1000 quants below the car
if (str_cmpi ("checker1", tex_name))
{
add_laps( );
}
If the car moves on a horizontal portion of the track and its speed is below max_speed, we increase the speed of the car; otherwise, if the car is moving on a curved area and its speed is above min_speed, we decrease the speed of the car. For those of you that are too lazy to read the article in Aum 32 again, I have attached the picture that shows where those numbers came from:
We set skill28 and 29 to zero (those would be the y and z components of the car_speed vector, aka skill27...29). The car will move ignoring passable entities and gliding along walls and entities; the distance covered by the car in a frame will be stored in skill2 and the total distance covered by the car will be stored in my.distance. The engine sound is tuned depending on the "real" speed of the car, based on the distance covered by it. Please note that I have also added the random engine_offset, in order to generate that unique engine sound I've told you about. Finally, we trace 1000 quants below the car and we get the name of the road texture. If the name is "checker1", the car has passed over the starting block and function add_laps() is called.
if (my.laps == 3) // end of race?
{
my.race_over = 1; // get out of the while loop after 3 laps
place += 1;
if (place == 1) // i'm the first car that finishes the race?
{
if (my.skill1 == 1)
{
str_cpy (car1_str, "1st place: Green car Time: ");
str_for_num (temp_str, car1_time);
str_cat (car1_str, temp_str);
car1_txt.pos_y = 250;
car1_txt.visible = on;
}
if (my.skill1 == 2)
{
str_cpy (car2_str, "1st place: Red car Time: ");
str_for_num (temp_str, car2_time);
str_cat (car2_str, temp_str);
car2_txt.pos_y = 250;
car2_txt.visible = on;
}
if (my.skill1 == 3)
{
str_cpy (car3_str, "1st place: Blue car Time: ");
str_for_num (temp_str, car3_time);
str_cat (car3_str, temp_str);
car3_txt.pos_y = 250;
car3_txt.visible = on;
}
}
If the number of laps is 3 the race has ended for this car; therefore, we set my.race_over to 1, we increment "place" (the place occupied by the car at the end of the race) and we check the value of "place". If place = 1, this car is the first that has finished the race. If its skill1 is set to 1, the first car is the green car (I know that because I've set skill1 to 1 for it in Wed). We write "1st place: Green car.... " in the string that will be used by car1_txt, we convert car1_time from number to string and then we add this string to our "1st place: Green car... " string. We set a good pos_y value for the text and then we make it visible. The result will look like this (just an example):
1st place: Green car Time: 50.342
If my.skill1 = 2, then the red car is the winner (once again, I know I've set skill1 = 2 for it in Wed). We must use a different string this time: "1st place: Red car....", we convert car2_time from number to string and then we add it to the "1st place: Red car..." string. We set a good pos_y value for the text and we display it. The result is shown below:
1st place: Red car Time: 51.324
If my.skill1 = 3, the blue car is the winner and the things work the same way for it.
if (place == 2) // i'm the second car that finishes the race?
{
if (my.skill1 == 1)
{
str_cpy (car1_str, "2nd place: Green car Time: ");
str_for_num (temp_str, car1_time);
str_cat (car1_str, temp_str);
car1_txt.pos_y = 280;
car1_txt.visible = on;
}
if (my.skill1 == 2)
{
str_cpy (car2_str, "2nd place: Red car Time: ");
str_for_num (temp_str, car2_time);
str_cat (car2_str, temp_str);
car2_txt.pos_y = 280;
car2_txt.visible = on;
}
if (my.skill1 == 3)
{
str_cpy (car3_str, "2nd place: Blue car Time: ");
str_for_num (temp_str, car3_time);
str_cat (car3_str, temp_str);
car3_txt.pos_y = 280;
car3_txt.visible = on;
}
}
The things repeat exactly for the second car that finishes the race; the only difference here is the value used for pos_y of the text, which is bigger with 30 pixels, so the second text will be displayed below the first text.
if (place == 3) // i'm the third car that finishes the race?
{
if (my.skill1 == 1)
{
str_cpy (car1_str, "3rd place: Green car Time: ");
str_for_num (temp_str, car1_time);
str_cat (car1_str, temp_str);
car1_txt.pos_y = 310;
car1_txt.visible = on;
}
if (my.skill1 == 2)
{
str_cpy (car2_str, "3rd place: Red car Time: ");
str_for_num (temp_str, car2_time);
str_cat (car2_str, temp_str);
car2_txt.pos_y = 310;
car2_txt.visible = on;
}
if (my.skill1 == 3)
{
str_cpy (car3_str, "3rd place: Blue car Time: ");
str_for_num (temp_str, car3_time);
str_cat (car3_str, temp_str);
car3_txt.pos_y = 310;
car3_txt.visible = on;
}
}
finish_pan.visible = on;
}
wait(1);
}
The same things happen with the third car; the only notable change is a new pos_y value, which makes the text appear even closer to the bottom of the screen, after the first two texts.
while (my.car_speed > 1) // decrease the speed from its current speed to 1
{
my.car_speed -= 1 * time;
snd_tune (engine_handle, 50, my.car_speed * 5, 0); // and tune the sound accordingly
my.skill28 = 0;
my.skill29 = 0;
move_mode = ignore_you + ignore_passable + glide;
ent_move (my.car_speed, nullskill);
wait (1);
}
snd_stop (engine_handle); // stop the engine sound
if (place == 3) // race finished for all the cars?
{
while (finish_pan.alpha < 95)
{
finish_pan.alpha += 2 * time; // increase alpha
wait (1);
}
finish_pan.transparent = off; // the panel is opaque now
}
}
The race is over here, so we decrease the speed from its current value to 1, tuning the sound accordingly. As soon as the speed goes below 1, we stop the engine sound (the car isn't moving here anyway). If place = 3 (all the cars have finished the race) we increase the alpha for finish_pan in a while loop and then we make it opaque, because all the cars are stopped now, so there isn't anything interesting to see on the screen.
Time to look at two tiny functions:
function add_laps()
{
if (my.counting_laps == 0) {return;}
my.max_speed = 50 + random(10);
my.min_speed = 30 + random(10);
my.laps += 1;
snd_play (lap_wav, 100, 0);
my.counting_laps = 0;
sleep (10);
my.counting_laps = 1;
}

You know that we are using a trace instruction to keep track of the number of laps, right? When one of the cars passes over the starting line (a block that was textured with the "checker1" texture) function add_laps is called. There is a small problem though: a car could trigger more than a single add_laps call if its speed is too small. If the car will hover over that block for 4 frames, function add_laps would be called four times, get it?
That's why I'm using my.counting_laps; if the car passes over the "checker1" block, the number of laps is incremented, but this function won't accept other calls for 10 seconds (only the first line of code inside it will run). We set random max_speed and min_speed values for each car every lap, so the results of the race will be unpredictable, at least for me :) We play a sound and like I said, we stop adding laps for 10 seconds. You can use any value here, as long as it is smaller than the time that is needed to complete a lap.
The final function runs when a car is scanned by the car behind it:
function make_way()
{
my.scans += 1; // increase the number of scan
if (you.car_speed >= 5) // the speed of the car is above 5?
{
you.car_speed -= 0.5 * time; // decrease the speed of the car that has scanned me. Play with 0.5
}
if (my.scans > 5) // too many scans? play with "5"
{
ent_playsound (my, horn_wav, 2000); // I'll use my horn then
my.enable_scan = off; // stop reacting to scans
sleep (1); // for one second
my.enable_scan = on; // enable scans again
my.scans = 0; // reset the number of scans (prepare for a new horn)
}
}
We increase the number stored in my.scans and if the speed of the car that has scanned this scar is above 5, we decrease it slowly. This way the car behind will avoid most of the collisions with the car in front of it. If my.scans is over 5, we play a horn_wav sound, we stop reacting to scans for one second and then we reset my.scans, preparing it for another horn_wav. That's all!
Well, almost. This code runs ok with A5 and A6, but I encourage you to buy A6 because it uses polygon based collisions for models, which means that the cars won't penetrate each other if you replace ent_move with the new A6 movement instruction c_move. Next month we will learn to create the code used for player's car.
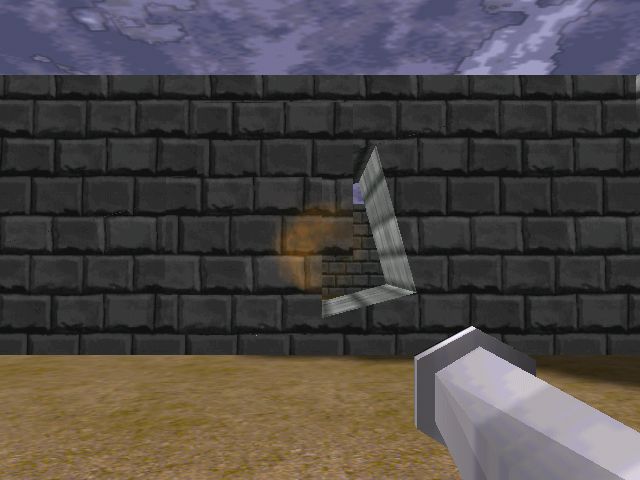
Breakable walls
Did you know that you can use wmb entities for many purposes, including destroyable level geometry? This article shows you how to make a hole in the wall using your rocket launcher.
I have used the rocket launcher I've built in Aum24 ("Rocket camera") as the weapon, but you can use any other weapon that fires entities, including the template rocket launcher (if you make a few minor changes to its code). Read the article in Aum24 to get more info about my rocket launcher; I have made a few minor changes to its code, but the first line in the function below is the only one that really matters:
function move_rocket()
{
my.skill1 = 1357;
wait (1);
my.enable_entity = on;
my.enable_block = on;
my.passable = on;
my.event = remove_rocket;
my.pan = camera.pan;
my.tilt = camera.tilt;
rocket_speed.y = 0;
rocket_speed.z = 0;
while (my != null)
{
rocket_speed.x = 100;
rocket_speed *= time;
ent_move (rocket_speed, nullvector);
if (vec_dist (camera.x, my.x) > 30)
{
my.passable = off;
}
wait (1);
}
}
Every entity (rocket) fired by the rocket launcher will have its skill1 set to 1357 (of course that you can use any other value here). The reason for this is simple: the wmb entity that acts as a piece of wall will check if it was hit by a rocket or not by checking the value stored in skill1. You shouldn't be able to destroy a thick wall by running into it (collision with the player model) or by shooting it with a tiny bullet, or maybe by hitting the wall with your sword; only the rocket entity should be able to do that.
Let's see how these destroyable walls work. First of all, you create a wall with a big hole in it. I have created a simple hole by subtracting a slightly rotated cube from the wall, but I encourage you to create a more complex, irregular shaped hole.
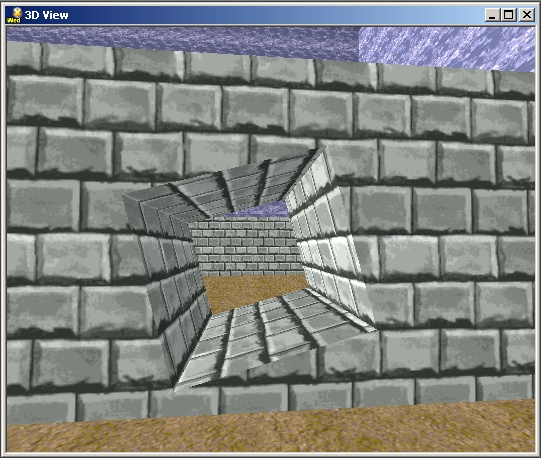
Now go and create several wmb entities that will be used as breakable wall pieces; I have used a single "brick" and I have repeated it 3 times, but more different entities will look much better!

Fill the hole in the wall with several entities; align them carefully (their textures should tile seamlessly) but give the player a small hint: show some cracks, maybe a tiny hole, etc.
Attach action wall_bricks to every entity that fills the hole:
action wall_bricks
{
my.enable_impact = on;
my.enable_entity = on;
my.event = destroy_me;
}
You can see that the entity is sensitive to impact with other entities; as soon as something hits it, its destroy_me event will run:
function destroy_me()
{
if (you != null) // hit by an entity?
{
if (you.skill1 == 1357) // hit by a rocket?
{
ent_playsound (my, bricks_wav, 500); // play a sound
sleep (0.5);
ent_remove (me);
}
}
}
If the brick is hit by another entity (you != null) and the entity is a rocket (its skill1 = 1357) we play a sound at the impact point, we wait for half a second and then we remove the entity. Shoot that area of the wall several times and you will create a hole that will be big enough for the player (if you've planned it this way).
Like I said, you can use any other weapons if they fire entities and if you set one of the skills for their bullets to a specific value. The value of the skill must be checked by the event function of the brick entity.